About Nick Ladd

On Memorial Day 2009 I brewed my first batch of beer. Brewing quickly became an obsession, completing nearly 100 batches in less than 3 years, entering numerous brewing competitions, participating in collaborative projects with professional breweries, and winning some of the biggest awards an amateur brewer can.

2014 Sour Beer Solera Brewday


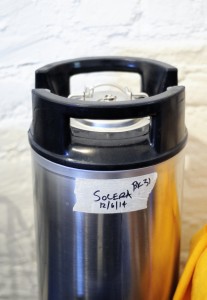
5-gallon corny kegs make excellent Solera vessels.

5-gallon corny kegs make excellent Solera vessels.

Solera is a traditional production method commonly utilized by wine (Sherry, Maderia, Port) and vinegar (Balsamic, Sherry) producers to craft long-aged products. In a nutshell, Soleras work by never completely emptying the vessels in which the liquids are aged. When a product is packaged, a percentage of the liquid is left in the storage vessel and topped up with fresh un-aged liquid. The idea is that a percentage of aged liquid is always left in the aging vessel, effectively allowing all packaged versions to end up with a final product containing a variety of vintages, some of which can be extremely old depending on the age and number of cycles a Solera has been through. This can help to unify any seasonal variation between batches, but also allows products containing substantial amounts of young liquid to taste much more aged than it would taste on its own.

Reading Michael Tonsmeire’s American Sour Beers convinced me that building a sour beer Solera was a wonderful idea. Solera production lends itself perfectly to sour beer production due to the inherent aged nature of these beers, and the similarities between Solera and traditional Gueuze production.

To start, I’ve dedicated 5-gallon Corny keg to Solera sour beer production. Initially I filled the keg with 5-gallons of beer that was fermented out in a primary vessel using Wyeast’s Roeselare blend of microbes. The base beer I am shooting for will be a fairly neutral golden sour that can act as a somewhat generic background for future Solera batches. My plan in a year is to pull half of the contents of the Solera and package it as-is. From there I will top it up with another fresh batch of beer and begin the process again. In theory, this will create an annual pipeline of sour beer which I can package as-is, or use for other projects (other blends, fruiting, dry-hopping, etc.). Additionally, the new beers added annually to the Solera can be used to steer the flavor profile of the beer in the Solera, through both recipe formulation and microbe content, in different and hopefully interesting directions.

2014 Sour Solera Recipe
(Golden Sour w/ Underlying Crackey / Grainy Notes)

Recipe Specifications:
Size: 5.06 gal
Efficiency: 72%
Attenuation: 90% (anticipated)

Original Gravity: 1.049 SG
Terminal Gravity: 1.005 SG (anticipated)
Color: 7.95 SRM
Alcohol: 5.83% ABV
Bitterness: 0.0 IBU

Grain Bill:
6.5 lb (65.0%) Belgian Pils (Dingemans)
1.5 lb (15.0%) White Wheat Malt (Briess)
1 lb (10.0%) Munich 10L Malt (Briess)
0.5 lb (5.0%) Victory® Malt (Briess)
0.5 lb (5.0%) 2-Row Carapils® Malt (Briess)

Mash Regiment:
The mash was taken through the steps below. I use a direct fire recirculating mash to transverse the steps.

113 °F – Ferulic Acid Rest – 10min
144 °F – Beta Rest – 20min
154 °F – Alpha Rest – 30min
168 °F – Mashout Rest – 5min

Water Treatment:
Extremely Soft NYC Water
2g Gypsum (to mash)
6g Calcium Chloride (to mash)

Hopping:
2 oz AGED Cascade (0% AA) – 90 m

Kettle Additions:
0.5 ea Whirlfloc Tablets (Irish moss) – added during boil, boiled 15 m
0.5 tsp Wyeast Nutrient – added during boil, boiled 10 m

Yeast:
WYeast 3763 Roeselare Ale Blend – No Starter
Ferment at room temp until activity ceases. Rack into 5-gallon corny keg. Monitor pressure on corny keg and occasionally pull pressure relief valve to prevent the keg from becoming overly pressurized.

Brew Your Own Malt Vinegar

Vinegar is often a hushed subject amongst brewers. A veritable boogeyman, the bacteria (acetobacter) responsible for one of my favorite condiments and cooking ingredients can easily spoil a batch of beer. The thought of our carefully crafted libations (and their inherent ethanol content) being transformed into acetic acid sends shivers up many a brewer’s spine. Acetobacter must be respected, and never invited into our breweries…

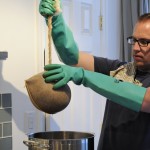
Homebrewing your malt vinegar is a delicious off-shoot of homebrewing beer.

Homebrewing your own malt vinegar is a delicious off-shoot of homebrewing beer.

…or so we have been told. The truth of the matter is that acetobacter exists in every brewery. Its omnipresent existence is evidenced by the fact that nearly any liquid containing ethanol will spontaneously transform into vinegar provided it is left exposed to oxygen. Basic good sanitation practices and keeping your ‘funky’ equipment separate from your ‘clean’ brewing equipment will allow you the creative freedom to ferment outside the bounds of typical brewing.

Once I decided to begin producing my own malt vinegar, I was somewhat surprised to find the Internet nearly devoid of good information as it relates to producing malt vinegar. This is not to say that there isn’t a lot of information out there, but most of it is very basic in terms of real detail. By-and-large, the articles out there focus on the economy of producing vinegar. Their focus is on vinegar production as a means of transforming an unwanted alcoholic beverage into something of value – a happy byproduct for unwanted hooch. What is one to do with a half-consumed bottle of wine, decanted yeast starter wort, or a bad batch of beer? Turn it to vinegar (or so says the Internet). The problem with this approach is that it over-simplifies vinegar production. Will a haphazard approach to vinegar production produce a passable product? Probably so. My interests however are in producing a truly artisanal product with as much complexity and diversity as the alcoholic beverages that serve as their base.

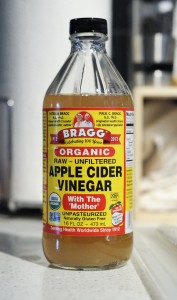
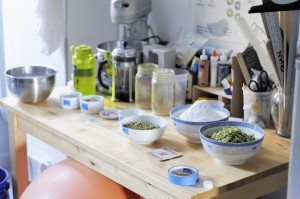
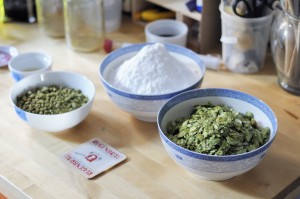
Bragg unpasturized, unfiltered vinegar acts as a starter culture.

Bragg unpasteurized, unfiltered vinegar acts as a starter culture.

The pathway to vinegar production is very basic. All that is needed is an alcoholic liquid, a culture of acetobacter, and oxygen. Acetobacter will oxidize ethanol into acetic acid, transforming your alcoholic base into a non-alcoholic vinegar. Making vinegar is as simple as fermenting out a beer (or really any alcoholic beverage), pitching a acetobacter culture (this will occur spontaneously with enough time), and leaving the liquid open to oxygen. Eventually the ethanol in the liquid will be converted to acetic acid, and you’ll be left with vinegar.

Like beer production, your recipe formulation will have a profound effect on the final vinegar. Finding good information about how recipes for vinegar should be formulated was a challenge. My base assumption is that I can take much of what I understand about beer formulation and expect those same types of flavors to be carried through to the final vinegar. The biggest variable to account for is starting gravity. This variable impacts both the residual sweetness in the vinegar, as well as the final level of acidity in the vinegar. These two components affect the sweet/sour balance of the final vinegar. At the very least, it seems prudent to produce roughly an 8% ABV beer in order to achieve a final vinegar with approximately 8% acidity.

As brewer’s, we know that there is a tremendous diversity within the broad category of ‘beer’. A standard industrial lager and barrel-aged Russian Imperial Stout are both ‘beer’ but are world’s apart in terms of the impression they leave us with. This diversity can easily be applied to malt vinegar. Malt vinegar does not have to be a generic product. It can be equally as diverse and complex as the beer we produce. For my initial attempt at vinegar I wanted to try and produce something a bit richer than the industrial malt vinegars most of us are familiar with. With hints of dried fruit, a subtle sweetness, toasty malt character, and sharp acidity, my hope is to produce something closer to the fine aged balsamic vinegars of Modena.

Dark Malt Vinegar Recipe

Specifications:
Size: 1.25 gal
Efficiency: 80%
Attenuation: 63%

Original Gravity: 1.108
Terminal Gravity: 1.040
Color: 25.23 SRM
Alcohol: 9.08& ABV (before transformation into vinegar)
Bitterness: 0.0 IBU

Malt Bill:
3.75 lb (78.9%) Maris Otter (Muntons)
0.5 lb (10.5%) Special B Malt (Dingemans)
0.5 lb (10.5%) 2-Row Caramel Malt 60L (Briess)

Mash Regiment:
149 °F, 60 min

Kettle Additions:
0.25 Tablet Whirlfloc (Irish moss) – 15 m
0.25 tsp Wyeast Nutrient – 10 m

Yeast:
1/2 pack Safale S-04

The Process

  1. Approximately one-gallon of wort was produced using a brew-in-a-bag no sparge method.
  2. The initial beer was fermented out cleanly using Safale US-04 yeast for approximately 1.5 weeks at ambient room temperatures. Once fermentation was completed, the fermenter was chilled to compact the trub and yeast cake.
  3. The beer was carefully decanted off the initial yeast cake into a clean 1-gallon glass fermenter. The beer was purposefully allowed to splash into the secondary fermenter to allow for some oxygen pickup. 1/4 c. of Bragg unpasturized vinegar was added as a starter culture. 1/8 oz. heavy toast American Oak cubes were added to the liquid. A mesh bag was rubber-banded over the top of the secondary fermenter to allow for oxygen exchange.
  4. Vinegar was allowed to age and acidify for approximately 4-months at ambient temperatures. pH readings and tastings were taken at regular intervals:
  • After 2-weeks: pH 3.58
  • After 4-weeks: pH 3.14
  • After 8-weeks: pH 2.99
  • After 14-weeks: pH 2.81 – Bottled despite somewhat high pH. Taste is quite sour. Next time I will shoot for a pH of 2.4-2.7.

Tasting

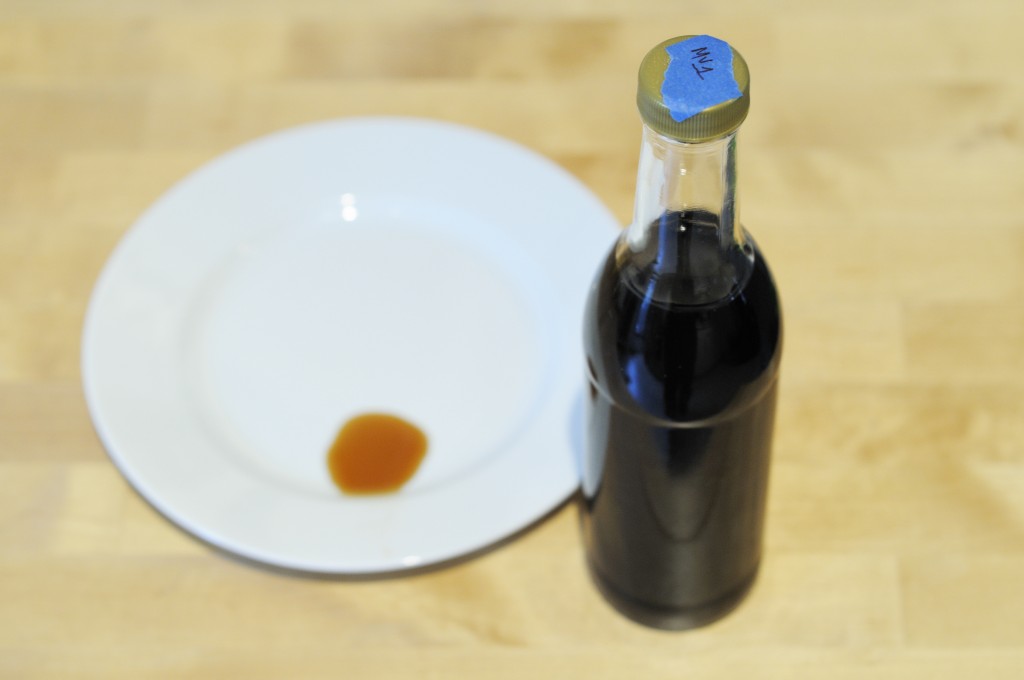
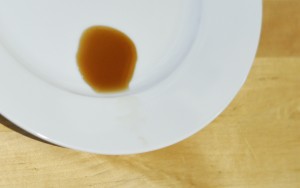
_DSC2096The vinegar is quite fruity on the nose, almost grape-like. There is a residual grainy character and a relatively sharp acetic acid note, although not quite as piquant as commercial vinegars. The flavor however is sharpely acidic. Once the initial burst of acidity subsides, there is a nice crackery malt finish with a faint hint of caramel and dark fruit. There is a low to moderate amount of residual body and sweetness that helps soften the sharp acidity, although this lacks the concentration and depth of flavor found in a good balsamic vinegar.

Triple IPA Brewday & Review

_DSC1886Take a ridiculously hoppy double IPA, increase the hopping and alcohol to ludicrous levels, and you have a decent outline for crafting a triple IPA. These are fun beers to brew, and a great way to use up any extraneously hops that may be buried in your freezer. This beer is very much in the same spirit as coveted beers like Pliny the Younger (you can read more about my club’s attempt at cloning the Younger, here).

This is a tough beer to brew as it can easily fall victim to common faults. The most frequent and egregious fault with American-style IPAs is not achieving adequate levels of attenuation. Nothing ruins a big hoppy beer’s drinkability quicker than excessive residual gravity or caramel flavors. This is even more apparent when you’re pushing the beer to triple IPA levels. Controlling fermentability with the addition of simple sugars and low mash temps will take you most of the way. From there, it is key to pitch a big healthy population of yeast, adequately oxygenate the wort, and carefully control fermentation to keep higher alcohols in check.

_DSC1888The second most common fault would likely be harsh or grassy hop flavors. This most commonly occurs when brewers leave dryhops in contact with the beer for excessive periods. Many sources cite the fact that the majority of hop oils are extracted within the first 24-48 hours of contact with our beer. Anecdotally, I’ve definitely experienced this and typically now only leave dry hops in contact with my beers for 2-3 days, maximum.

Lastly, it is extremely important to limit oxygen pickup post fermentation with your hoppy beers. Hop compounds are extremely susceptible to oxidation. Very few factors will contribute to the destruction of a hoppy beer quicker than oxygen. Purging vessels, pushing beer with C02 in closed loops, and cold storage can greatly increase the shelf-life of your hoppy beers.

Triple Tap Triple IPA Recipe

Specifications:
Size: 4.5 gal
Efficiency: 67%
Attenuation: 92%

Original Gravity: 1.088 SG
Terminal Gravity: 1.007 SG
Color: 8.3 SRM
Alcohol: 10.65% ABV
Bitterness: 55.7 IBUs (Doesn’t account for substantial bitterness achieved with whirlpool additions)

Malt Bill:
12 lb (76.2%) Pilsner Malt (Weyermann)
1 lb (6.3%) Munich TYPE II (Weyermann)
.25 lb (1.6%) Caramalt 15 (Bairds)

Mash Profile:
147 °F – 60m
154 °F – 10m
168 °F – 5m

Water Treatment:
Extremely Soft NYC Water
6g Gypsum (to mash)
3g Calcium Chloride (to mash)

Hopping:
0.25 oz Centennial (10.5%) – 60 m
1 oz Centennial (10.5%) – 20 m
1 oz Amarillo® (8.7%) – 20 m

2 oz Citra™ (13.7%) – Whirlpool 20m
1 oz Amarillo® (8.7%) – Whirlpool 20m
2.5 oz Mandarina Bavaria (7.2%) – Whirlpool 20m

2.5 oz (17.5%) Amarillo® – Hop Back (Blichmann Hop Rocket)

2 oz Galaxy (14.0%) – Dry Hop @ Room Temp 3 Days
2 oz Citra™ (12.0%) – Dry Hop @ Room Temp 3 Days

Kettle Additions:
2.5 lb (15.9%) Corn Sugar – 15m
0.5 ea Whirlfloc Tablets (Irish moss) –  15m
0.5 tsp Wyeast Nutrient – 10 m

Yeast:
WYeast 1056 American Ale™ – Large starter on stirplate to achieve 1 million cells per milliliter of wort per degree Plato. Use Mr. Malty to determine proper starter sized based on age of yeast package. Pitch into 60°F wort and allow to free rise to 64°F. As fermentation begins to slow, raise temperature to 70°F.

Tasting Notes:

Judged as a BJCP Category 23 Specialty Beer

_DSC1976Aroma (10/12):
Huge, punchy hop-nose. The hops are extremely juicy and tropical — reminiscent of mango, orange, and pineapple. In many ways, this beer reminds me P.O.G. (passion fruit, orange, guave) juice. There is a moderate amount of grassy, plant-like aromas. By and large the hops are almost uniformly fruity with very little pine or resinous aromas. Malt character is slightly bready. No alcohol, DMS, or diacetyl are perceptible.

Appearance (1/3):
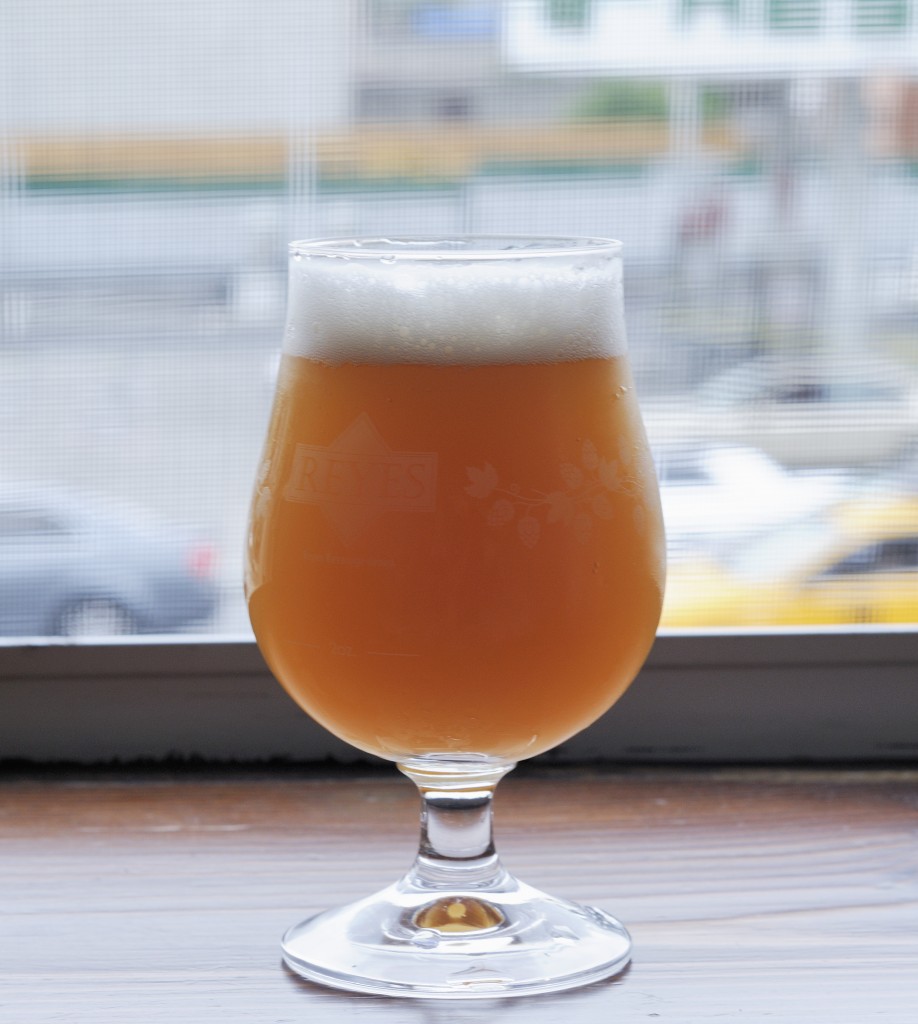
Beer pours a muddy copper color. Extremely hazy with hop compounds. Beer is capped with a bright white, thick, persistent head.

Flavor (10/20):
Taking a swig from the tasting glass fills your mouth with huge, round, hop flavors. The flavors are very fruity and tropical, although there is a slightly biting, resinous, bitterness on the finish. There is a bit of residual sweetness that keeps the beer feeling slightly full and heavier than I would like. As the beer warms, some warming alcohol dances across the palate.

Mouthfeel (3/5):
Medium body and carbonation. Some light hop astringency is present on the finish and detracts from the overall drinking experience. The hops seem to lend a creamy texture to the mouthfeel.

Overall Impression (6/10):
This beer pushes the level of hoppiness that I am able to enjoy almost to the breaking point. The beer is young and brash with bold assertive flavors that come off a touch green. It is very much in the same vein as beers like Pliny the Younger, which are best enjoyed in small glasses and shared with friends.

Very Good (31/50)


Hoppy Rye Saison with Brett Trois – Recipe and Review

More and more I’m beginning to think that there is real potential to create delicious beers by exploiting the synergies that can take place between fruity American hops, and fruity yeast strains. To achieve this end, it is important to select the appropriate hop varieties that lean more towards the fruity/tropical rather than pine/resin end of the flavor spectrum. To further investigate these possibilities, I decided to brew up a super hoppy saison that would be complemented by the pleasant fruitiness provided by the Dupont saison yeast and intense tropical esters provided by Brettanomyces Trois (which may or may not actually be a Brettanomyces strain). Additionally, my goal in pitching a Brett strain along with the traditional Dupont strain would be to allow the Brett to finish up the ferment where the Dupont yeast typically stalls out.

Rye Saison

Hoppy Rye Saison with Brett Trois

Recipe Specs:
Size: 3.31 gal
Efficiency: 70%
Attenuation: 84%

Original Gravity: 1.050
Terminal Gravity: 1.008
Color: 3.87 SRM
Alcohol: 5.5% ABV
Bitterness: 30.6 IBU
Mash Temp: 144°F 90 min., 154°F 10 min.

Grain Bill:
5.75 lb (79.3%) Weyermann Pilsner Malt
.75 lb (10.3%) Weyermann Rye Malt
.75 lb (10.3%) Briess Flaked Rye

Hopping:
0.75 oz Mandarina Bavaria (7.2% AA) – 90 m

1 oz Citra™ (13.7% AA) – 180 degree hop stand – 20 m
2 oz Mandarina Bavaria (7.2% AA) – 180 degree hop stand – 20 m
1 oz Centennial (10.5% AA) – 180 degree hop stand – 20 m

2 oz Amarillo® (8.5% AA) – Hop Back

1 oz Mandarina Bavaria (7.2% AA) – Dry Hop 3 Days
1 oz Citra™ (13.7% AA) – Dry Hop 3 Days

Kettle Additions:
0.5 ea Whirlfloc Tablets (Irish moss) – 15 m
0.5 tsp Wyeast Nutrient – 10 m

Yeast:
WYeast 3724 Belgian Saison™ – Added to 2 gallons of wort
White Labs WLP644 Brettanomyces Trois – Added to 1 gallon of wort

The Saison strain and Brett strain were pitched on brew day into two separate fermentation vessels. Once the Saison yeast stalled (typical of this strain), the two fermenters were combined and allowed to co-ferment.

Water Treatment:
Soft NYC municipal water with 3g Gypsum and 2g Calcium Chloride added to the mash.

Tasting Notes:

Judged as a BJCP Category 16E Belgian Specialty Ale

Aroma (11/12):
Initially there is a big hit of meyer lemon-like fruit up front, followed by a massive amount of tropical fruit. The beer is almost reminiscent of POG (Passion Orange Guava) juice. Very bright and refreshing aroma. The impression of fruitiness is huge, but it is unclear where the hops and yeast character begin and end. A great melding of aroma compounds. Malt is soft and bready. No grassiness, alcohol heat, or other off-aromas. Just a hint of pepper — not as much as you’d find in a typical saison.

Appearance (1/3):
Murky gold. The hop haze and high-protein rye have produced a very muddy beer. Glass is capped with a nice persistent white foam.

Flavor (16/20):
Huge tropical notes fill the pallet. Very delicious and refreshing. Low amounts of pepper-like phenols are present and add to the beer’s dry impression. The base malt is in the background and nondescript. The rye is evident and provides a spicy kick. The overall impression of dryness is very high and gives a great refreshing impression. The is a firm hop bitterness that is high for style, but works well in this beer.

Mouthfeel (5/5):
This is where the rye really shines. The beer has an immensely pleasurable silky mouthfeel that prevents a dry beer like this from feeling too austere. The silky body balances well against a prickly level of carbonation.

Overall Impression (9/10):
This is a fantastic, refreshing, and complex beer. In many ways, it feel more like a Belgian IPA than saison due to the immense hop aroma and flavor. The synergies that are happening between the potent hopping and yeast derived compounds work well. It will be interesting to see where this beer goes as the hops begin to fade and the yeast derived flavors come more to the foreground.

Excellent (42/50)

Treating Brooklyn Water for Brewing Purposes

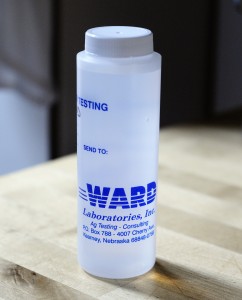
Shipping a sample of your brewing water to an analysis (such as Ward Labs), is easy and cost effective.

Shipping a sample of your brewing water to an analysis lab, such as Ward Labs, is easy and cost effective.

Water chemistry can be a complicated and intimidating topic. Discussions often quickly turn very technical and jump into the deep end of chemistry. This tends to cause non-scientific brewers to either ignore it completely or apply a blanket approach to water treatment in their brewery.

Part of the difficulty with blanket approaches is that no two locations’ brewing waters are identical. The journey water takes from cloud, to watershed, and ultimately your faucet has an immense impact on the qualities inherent to the water. A personal pet peeve of mine is reading brewing recipes that dictate a blanket approach to water treatment. Instructions–such as adding a fixed amount of gypsum or the ubiquitous ‘Burton Salts’ to your boil or mash–are reckless and naive. These types of instruction must be taken in the context of the specific brewing water that the recipe was formulated with. The results with that specific water may produce a delicious beer, whereas a different brewing water would provide drastically different and often terrible results. These types of blanket approaches automatically raise flags as to the reputable nature of any published recipe.

Blanket approaches should be avoided; a little basic knowledge can go a long way towards improving your beers. The key for homebrewers is distilling the science into practical knowledge that can be applied in the brewery and used to achieve positive impacts on your final beer. With this article, my goal is to establish a pragmatic approach to water treatment, specifically as it relates to brewing with the water flowing through the taps of my Brooklyn apartment.

Water in Brooklyn – Not Just Great for Bagels

The water flowing to my Park Slope / Gowanus apartment originates in the Catskill/Delaware Water System found in Delaware, Greene, Schoharie, Sullivan, and Ulster Counties. The water is surface derived from a relatively pure watershed, so much so that New York City is one of only five large cities in the country with a surface drinking water supply not requiring filtration as a form of treatment. That said, the Department of Environmental Protection does treat our drinking water to prevent any microbial risk. This is typically done with a combination of chlorine and UV light treatment. I have noticed that in warmer months, the chlorine concentration in the tap water seems higher–making it a greater concern for brewers. All of my brewing water goes through a very basic activated charcoal water filter to remove chlorine. I have not seen or heard any evidence that our municipal water is treated with harder to remove chlorimines, which pose the risk of inflicting beer with chlorophenolic off-flavors (band-aid, medicinal).

Purity aside, NYC water is wonderful due to the inherent characteristic of being nearly devoid of the minerals that impact brewing. Our brewing water picks up very little mineral content along its journey from watershed to tap and is about as close to distilled as you can find from a municipal source. This is very beneficial for brewers as it allows you to easily build up your water using various brewing salts and match the ion and mineral concentrations found in nearly any brewing water across the world.

I know a number of brewers in NYC that brew great beer without doing anything to treat their water. This anecdotal evidence supports the fact that very good beer can be brewed with NYC water without any sort of treatment and implies that without having a clear understanding of what you’re adding, it’s probably best to not add anything. That said, there are a number of reasons that I always provide a minimal amount of treatment for my brewing water.

1) Mash pH

The extremely low calcium ion content in NYC water will typically cause the mash pH for lightly colored beers to fall well above the optimal pH range in which amylase enzymes convert starches into fermentable sugar. Almost all beers from straw to brown in color can benefit from some acidification that mineral additions can provide within the mash. For very dark beers (stouts, porter, etc) the mash will typically fall into appropriate mash pH ranges due to the acidic nature of darkly kilned grains. Calcium sulfate (gypsum) and calcium chloride are typically added to my mashes in order to help lower the mash pH into the 5.2-5.4 range.

2) Yeast Health / Flocculation

Various brewing publications cite calcium as an important nutrient for yeast health. Calcium is frequently credited with improving protein coagulation in the kettle and yeast flocculation once fermentation is complete.

3) Flavor

The so-called ‘flavor ions’ sulfate and chloride are a primary concern for brewers. The balance of sulfate to chloride is often cited as a tool for accentuating either hops or malt in a beer. Balancing towards sulfate tends to crisp up a beer and accentuate hops, whereas leaning heavier on chloride tends to round out a beer and accentuate the malt. I typically add calcium sulfate (gypsum) to increase sulfate levels in my water and calcium chloride to increase chloride levels.

Water Analysis

Before attempting to adjust your water, it is imperative to understand what the mineral content of your water is. Luckily, NYC’s Department of Environmental Protection provides an annual report which includes a very useful water analysis:

NYC Dept of Environmental Protection Water Report

Additionally, Ward Labs, can provide brewers with a low-cost water analysis report that includes all of the metrics brewers are interested in.

I’ve always been somewhat suspicious of municipal water reports so I went ahead and sent a sample of my tap water to Ward Labs for analysis. As you can see below, the two reports were nearly identical. For reference, I’ve uploaded the test results from Ward Labs here.

Comparing the nearly identical numbers from the NYC Water Report, and the test analysis completed be Ward Labs.

The nearly identical numbers from the NYC Water Report and the test analysis completed by Ward Labs.

Calculating Ion Concentration in Your Wort

It is important to understand and quantify the impact that adding a specific quantity of mineral salt has on your water. Luckily, there are many calculators out there that will provide you with ppm concentrations based on your beer ingredients, base water, and mineral additions. I, personally, use and recommend the free EZWaterCalculator spreadsheet. It is easy-to-use and reliably accurate. Additionally, most brewing software provides tools for managing water additions.

Basic Strategies

While not all strategies work for all beers in all locations, below is the basic process I use to brew beer with NYC tap water.

1. Establish a baseline for ion concentrations. For calcium, I typically shoot for 75-100 ppm. For chloride and sulfate, I tend to shoot for 75-100 ppm, balancing towards sulfate if I want to accentuate hops, and chloride if I’m looking to make a malty beer. For very hoppy beers, I’ll push the sulfate levels to 150-200 ppm.

2. In light beers, use a blend of gypsum and calcium chloride to achieve baseline mineral concentrations. The blend will depend on whether I’m looking to accentuate hops or malt. To accentuate hops, I lean more heavily towards sulfate; for malt, chloride. If further pH adjustment is needed to hit desired mash pHs after the mineral concentrations have been achieved, I’ll adjust the mash with lactic acid to hit the desired pH range (5.2-5.4 at room temp). Most light beers that I brew require small additions of lactic acid in addition to mineral salt additions in order to achieve desired pH levels.

3. Most dark beers that I brew tend to land close to the correct pH range without any salt additions. Because of this, I’ll typically create a pH neutral blend of chalk (calcium carbonate), gypsum (calcium sulfate), and calcium chloride to hit 75-100 ppm of calcium and then varying levels of sulfate and chloride depending on whether I’m trying to balance the beer more towards hops or malt. This allows me to hit the ion concentrations I am looking to achieve without pushing the mash outside of the desired pH range.

I’ve been lucky to brew in two locations that have great neutral brewing water (NYC and Seattle). This is certainly not the case in most areas. The overall key for any location is taking a critical look at the water you’re starting with, analyzing the types of beers you want to make, and then making adjustments to your brewing water so that you can achieve optimal brewing results.