Brambic – Spontaneously Fermented Wild Homebrew

Against what may or may not be good logic, I’ve begun a new sour beer project. My goal is to successfully create a delicious sour beer fermented only from airborne yeast and bacteria. There is something beautiful about the idea of successfully producing a delicious sour beer that reflects the micro-flora present where I live. I love the tangible connection that can be made with world-renowned Lambic brewers who continue to brew traditional spontaneously fermented beers (as well as American craft brewers like Allagash, Jester King, and Russian River). I am keeping this project as wild as possible; I will not be culturing yeast from fruit, grains, bottle dregs, or any other source, rather only what I can capture across the cool evening breeze.

Brooklyn wild cultures.

Brooklyn wild. What fermentive creatures lurk in our Gowanus air?

The Internet is full of stories both of success and failure when it comes to truly spontaneous beer. Whenever I attempt a technique that includes a high probability for failure, I try to set as many variables in my favor as possible to get a successful end result. There are no guarantees for success in a project like this, but taking a few simple measures can greatly increase your odds. Using this logic, I decided that running multiple samples and testing their qualities before pitching into a full 2.75 gallon batch of beer was the way to go. This was especially important given the fact that I live an dense urban environment with little vegetation and no fruit bearing trees that could be attractive homes for wild yeast.

My Process
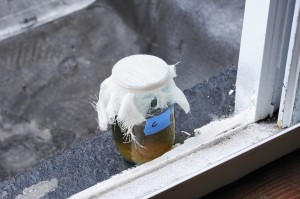
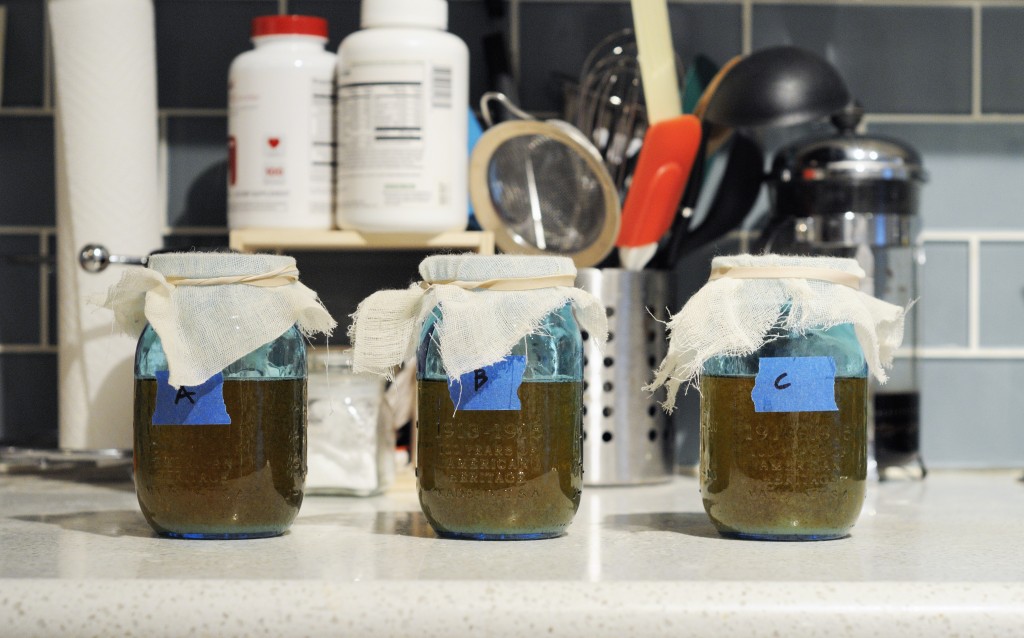
_DSC1962Initially I prepared (3) 8 oz. samples of sanitary 1.030 OG wort and placed them boiling hot into pint sized mason jars. I added 0.3 ml of 88% lactic acid to each sample in order to acidify each below pH 4.5. My goal is to inhibit pathogens from growing in the wort as well as non-pathogenic bacteria that can produce objectionable flavors. Since I would be tasting the wort, I wanted to minimize terrible tasting samples as well as ones that could potentially make me sick.

Each of the three samples were placed around my apartment. One was located on the roof of my building, one in front of an open window at the rear of my apartment, and one in front of an open window at the front of my apartment. Each were covered with a couple layers of cheese cloth to prevent any insects from entering the sample and then left to cool for approximately 24-hours. After 24-hours I fitted each jar with a lid and airlock to create an anaerobic environment, providing control of another variable and putting selective pressure on the organisms growing in the wort.

I completed this experiment in the late fall, which according to American Sour Beers offers the best probability for culturing yeast and bacteria that will have a positive fermentation character.

After approximately one-month, I completed a sensory analysis of each sample (smell and taste). In hindsight, I should have also taken pH and gravity measurements.
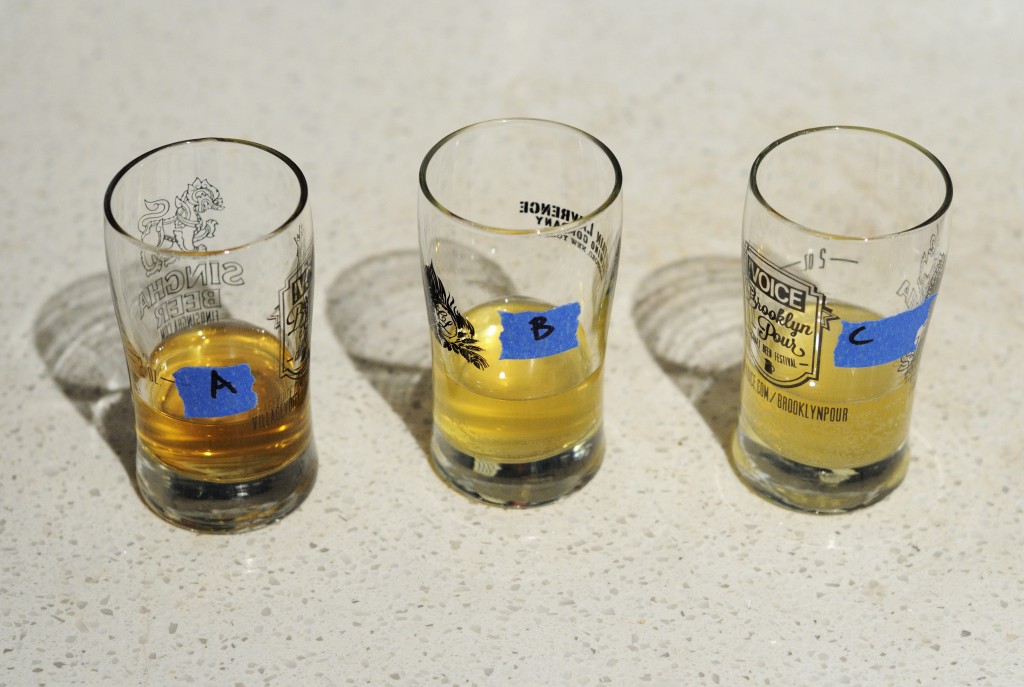
_DSC2024Sample A – In Front of Window – Small filmy pellicle. Cabbage, some baby diaper. No apparent alcohol flavor.

Sample B – Outside on Roof – Small filmy pellicle. A couple spots of white fluffy mold. Some alcohol on nose. Light rubbery phenol.

Sample C – In Front of Window – Small filmy pellicle. Cabbage. Some oniony aromas. Pretty sweet, low alcohol.

Encouraged by the initial results, I stepped each into a three new 300-ml sanitary starters. Each were allowed to ferment for another month under airlock.

Sample A – Very sweet. Didn’t appear to ferment much. Clean.

Sample B – Quite sour. Some definite plastic-like phenolics and slight alcohol. Some pleasing barnyard notes.

Sample C – Reminiscent of pickle juice. The most sour. Definite alcohol on nose. Not very pleasant.

After the second round of fermentation, I decided that Sample B (the sample pulled from my roof) was the most pleasing (or least offensive). I pitched it into a fresh 1200 ml starter (also under airlock) and made preparation to brew a full 2.75 gallon batch. For my recipe, I decided on a simple golden grain bill to act as a clean slate for the culture to express itself.

2014 Brambic Recipe
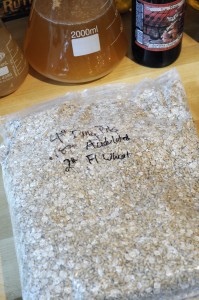
_DSC2036Size: 3.25 gal
Efficiency: 75%
Attenuation: 90% (estimated)

Original Gravity: 1.049 SG
Terminal Gravity: 1.005 SG (estimated)
Color: 3.33 SRM
Alcohol: 5.71% ABV (estimated)
Bitterness: 0.0 IBU

Grist:
4.0 lb (64.6%) Dingemans Belgian Pils
2 lb (32.3%) Briess Flaked Wheat
3 oz (3.0%) Weyermann Acidulated Malt

Mash Regiment:
A turbid mash regiment (basically a thin decoction) was completed through the steps below. A Ferulic acid rest was completed to encourage the formation of 4-vinyl guaicol which Brettanomyces can theoretically convert into 4 ethyl-guiacol which produces some of the ‘funky’ aromas and flavors that Brettanomyces is known for. A short Beta rest was followed by a very high Alpha rest to encourage a dextrinous wort and protracted secondary Brettanomyces fermentation.

113 °F – Ferulic Acid Rest – 10min
136 °F – Protein Rest – 5min
150 °F – Beta Rest – 20min
162 °F – Alpha Rest – 30min
168 °F – Mashout Rest – 5min

Water Treatment:
Extremely Soft NYC Water
4g Gypsum (to mash)
4g Calcium Chloride (to mash)

Hopping:
1.25 oz AGED Cascade (0% AA) – 90 m

Kettle Additions:
0.5 ea Whirlfloc Tablets (Irish moss) –  15 m
0.5 tsp Wyeast Nutrient – 10 m

Yeast:
1200ml Brambic Spontaneous Culture
Fermented at ambient temperatures (70°F or so)

The beer will be allowed to ferment for at least a year until packaging.

2014 Gueuze Brewday

Gueuze is a wonderfully complex sour beer that is typically a blend of 1, 2, and 3 year old spontaneously fermented Lambic batches. While, technically not a Lambic (Lambic is a protected term for a specific type of beer brewed within a specific geographic region of Belgium), this beer is made in the spirit of Lambic. It eschews the typical spontaneous cultures used in traditional Lambic fermentation for a commercial microbe blend (Wyeast Roeselare) combined with grown up bottle cultures.This batch of homebrew marks the my second annual batch of Lambic-style beer that will ultimately become part of a 3-component Gueuze blend that includes 3-year, 2-year, and 1-year old Lambic-style brews.

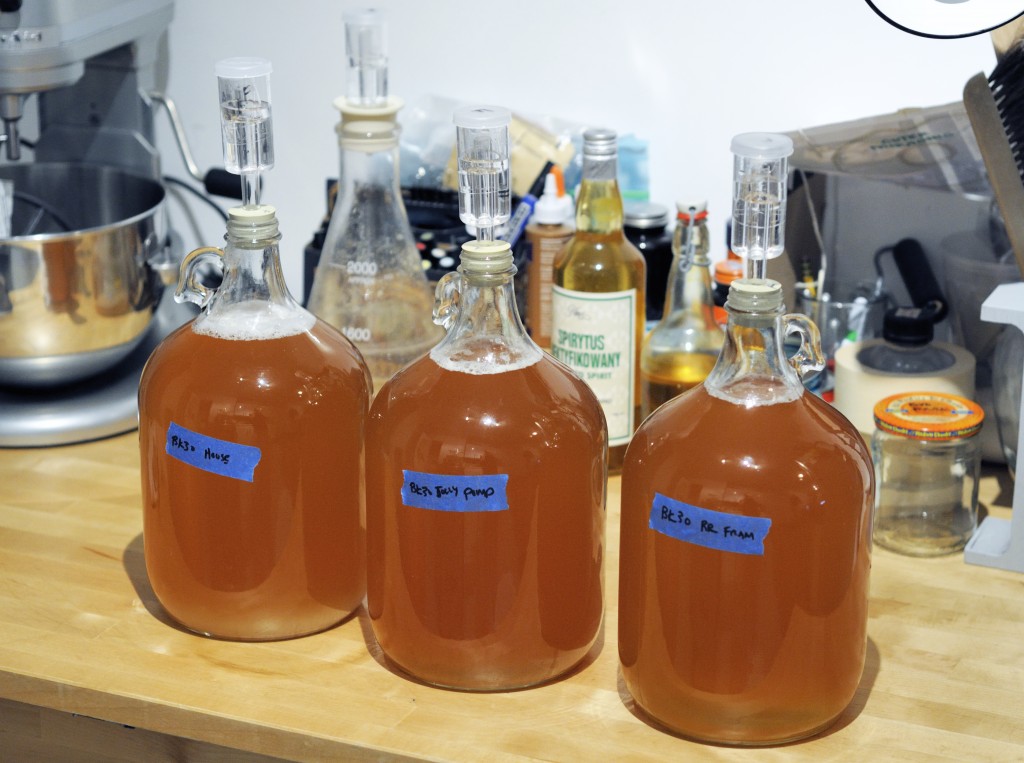
 To further provide variation (and flexibility) in what will ultimately build the blend, I brewed a 3-gallon batch the was split three-ways and inoculated with distinct culture grown up from various bottle dregs: Jolly Pumpkin La Roja, Russian River Framboise for a Cure, and my house bug culture.


To further provide variation (and flexibility) in what will ultimately build the blend, I brewed a 3-gallon batch that was split 3-ways and inoculated with distinct cultures grown up from various bottle dregs: Jolly Pumpkin La Roja, Russian River Framboise for a Cure, and my house bug culture.

2014 Lambic-Style Homebrew Recipe

Specifications:
Size: 4.25 gal
Efficiency: 75%
Attenuation: 90% (anticipated)

Original Gravity: 1.045 SG
Terminal Gravity: 1.005 SG (anticipated)
Color: 3.1 SRM
Alcohol: 5.3% ABV
Bitterness: 0.0 IBU

Malt Bill:
5 lb (66.7%) Belgian Pils (Dingemans)
2.25 lb (30.0%) Flaked Wheat (Briess)
4 oz (3.3%) Acidulated Malt (Weyermann)

Mash Regiment:
A turbid mash regiment (basically a thin decoction) was completed through the steps below. A Ferulic acid rest was completed to encourage the formation of 4-vinyl guaicol which Brettanomyces can theoretically convert into 4 ethyl-guiacol which produces some of the ‘funky’ aromas and flavors that Brettanomyces is known for. A short Beta rest was followed by a very high Alpha rest to encourage a dextrinous wort and protracted secondary Brettanomyces fermentation.

113 °F – Ferulic Acid Rest – 10min
136 °F – Protein Rest – 5min
150 °F – Beta Rest – 20min
162 °F – Alpha Rest – 30min
168 °F – Mashout Rest – 5min

Water Treatment:
Extremely Soft NYC Water
4g Gypsum (to mash)
4g Calcium Chloride (to mash)

Hopping:
1.75 oz AGED Cascade (0% AA) – 90 m

Kettle Additions:
0.5 ea Whirlfloc Tablets (Irish moss) –  15 m
0.5 tsp Wyeast Nutrient – 10 m

Yeast:
WYeast 3763 Roeselare Ale Blend – No Starter
Ferment at room temp until activity ceases. Rack into individual 1-gallon fermentation vessels. Inoculate each with separate secondary cultures.

Honey | Orange Pale Ale – Recipe and Review

_DSC1871Synergy between ingredients is something that I often seek out when writing a new beer recipe. In this particular case, I started with the premise of wanting to use orange blossom honey in a beer. Orange blossom honey has a delicate orange flavor as well a soft floral honey bouquet. Building a beer recipe around these attributes, I started with a Belgian Pilsner malt base which I’ve found to produce a honey like sweetness in my beers. From there, the base malt was accented with a small amount of Gambrinus honey malt to emphasize the honey character. Additionally, I delicately hopped the beer with Mandarian Bavaria hops which I’ve found to have a pronounced sweet orange (not pith) character that would be delicate enough not to overpower the honey.

Honey | Orange Pale Ale Recipe

Specifications:
Size: 3.75 gal
Efficiency: 68%
Attenuation: 80%

Original Gravity: 1.050 SG
Terminal Gravity: 1.010 SG
Color: 6.07 SRM
Alcohol: 5.28% ABV
Bitterness: 20.3 IBU

Malt Bill:
5.5 lb (72.1%) Pilsner Malt (Dingemans)
0.75 lb (9.8%) Munich TYPE I – (Weyermann)
6 oz (4.9%) Honey Malt – (Gambinus)

Mash Profile:
146 °F – 60m
168 °F – 5m

Water Treatment:
Extremely Soft NYC Water
2g Gypsum (to mash)
4g Calcium Chloride (to mash)

Hopping:
16 g Mandarina Bavaria (7.2%) – 90 m

Note: After boil was complete, the kettle was topped up with cold water to lower temperature to 180°F.

2 oz (43.8%) Mandarina Bavaria – 180°F Steep – 15 m
1 lb (13.1%) Orange Blossum Honey – 180°F Steep – 15 m

2 oz (43.8%) Amarillo® – Hop Back (Blichmann Hop Rocket)

Kettle Additions:
0.5 ea Whirlfloc Tablets (Irish moss) –  15m
0.5 tsp Wyeast Nutrient – 10 m

Yeast:
WYeast 1056 American Ale™- Starter on stirplate to achieve 1 million cells per milliliter of wort per degree Plato. Use Mr. Malty to determine proper starter sized based on age of yeast package. Pitch into 60°F wort and allow to free rise to 64°F. As fermentation begins to slow, raise temperature to 70°F.

Tasting Notes:

Judged as a BJCP Category 23 Specialty Beer

_DSC1966Aroma (10/12):
Low to moderate floral honey notes. There is a medium to medium-high sweet citrus / orange / tangerine hop aroma. Some soft candy-like malt sweetness is in the background. No alcohol, DMS, or diacetyl. The is a touch of grassy hops in the background.

Appearance (2/3):
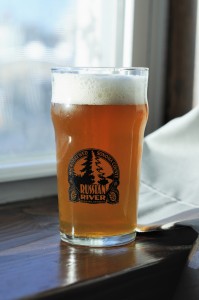
Color falls somewhere between a light copper and a deep blond. There is a slight haze to the beer. Fluffy white persistent head.

Flavor (17/20):
Moderately high hop flavor that is like sweet or candied orange. None of the pithy bitter citrus flavors that are often associated with traditional types of citrus hops. Honey is strongly present and quite floral. Malt is soft and bready with a light crackery character. The hop bitterness is medium-low and leaves behind just a hint of malt sweetness. There is a wonderful honey flavor that persists through the finish.

Mouthfeel (3/5):
Crisp with a medium to medium-low body. Quite balanced. No astringency. Beer has a medium-high carbonation which is slightly biting.

Overall Impression (8/10):
This is a very nice balanced pale ale that showcases the honey content. The beer is exceptionally balanced with layer of flavors; none of which stick out or feel out of place. Very well crafted beer.

Excellent (40/50)


2014 Sour Beer Solera Brewday


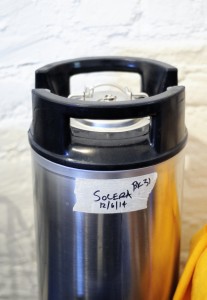
5-gallon corny kegs make excellent Solera vessels.

5-gallon corny kegs make excellent Solera vessels.

Solera is a traditional production method commonly utilized by wine (Sherry, Maderia, Port) and vinegar (Balsamic, Sherry) producers to craft long-aged products. In a nutshell, Soleras work by never completely emptying the vessels in which the liquids are aged. When a product is packaged, a percentage of the liquid is left in the storage vessel and topped up with fresh un-aged liquid. The idea is that a percentage of aged liquid is always left in the aging vessel, effectively allowing all packaged versions to end up with a final product containing a variety of vintages, some of which can be extremely old depending on the age and number of cycles a Solera has been through. This can help to unify any seasonal variation between batches, but also allows products containing substantial amounts of young liquid to taste much more aged than it would taste on its own.

Reading Michael Tonsmeire’s American Sour Beers convinced me that building a sour beer Solera was a wonderful idea. Solera production lends itself perfectly to sour beer production due to the inherent aged nature of these beers, and the similarities between Solera and traditional Gueuze production.

To start, I’ve dedicated 5-gallon Corny keg to Solera sour beer production. Initially I filled the keg with 5-gallons of beer that was fermented out in a primary vessel using Wyeast’s Roeselare blend of microbes. The base beer I am shooting for will be a fairly neutral golden sour that can act as a somewhat generic background for future Solera batches. My plan in a year is to pull half of the contents of the Solera and package it as-is. From there I will top it up with another fresh batch of beer and begin the process again. In theory, this will create an annual pipeline of sour beer which I can package as-is, or use for other projects (other blends, fruiting, dry-hopping, etc.). Additionally, the new beers added annually to the Solera can be used to steer the flavor profile of the beer in the Solera, through both recipe formulation and microbe content, in different and hopefully interesting directions.

2014 Sour Solera Recipe
(Golden Sour w/ Underlying Crackey / Grainy Notes)

Recipe Specifications:
Size: 5.06 gal
Efficiency: 72%
Attenuation: 90% (anticipated)

Original Gravity: 1.049 SG
Terminal Gravity: 1.005 SG (anticipated)
Color: 7.95 SRM
Alcohol: 5.83% ABV
Bitterness: 0.0 IBU

Grain Bill:
6.5 lb (65.0%) Belgian Pils (Dingemans)
1.5 lb (15.0%) White Wheat Malt (Briess)
1 lb (10.0%) Munich 10L Malt (Briess)
0.5 lb (5.0%) Victory® Malt (Briess)
0.5 lb (5.0%) 2-Row Carapils® Malt (Briess)

Mash Regiment:
The mash was taken through the steps below. I use a direct fire recirculating mash to transverse the steps.

113 °F – Ferulic Acid Rest – 10min
144 °F – Beta Rest – 20min
154 °F – Alpha Rest – 30min
168 °F – Mashout Rest – 5min

Water Treatment:
Extremely Soft NYC Water
2g Gypsum (to mash)
6g Calcium Chloride (to mash)

Hopping:
2 oz AGED Cascade (0% AA) – 90 m

Kettle Additions:
0.5 ea Whirlfloc Tablets (Irish moss) – added during boil, boiled 15 m
0.5 tsp Wyeast Nutrient – added during boil, boiled 10 m

Yeast:
WYeast 3763 Roeselare Ale Blend – No Starter
Ferment at room temp until activity ceases. Rack into 5-gallon corny keg. Monitor pressure on corny keg and occasionally pull pressure relief valve to prevent the keg from becoming overly pressurized.

Brew Your Own Malt Vinegar

Vinegar is often a hushed subject amongst brewers. A veritable boogeyman, the bacteria (acetobacter) responsible for one of my favorite condiments and cooking ingredients can easily spoil a batch of beer. The thought of our carefully crafted libations (and their inherent ethanol content) being transformed into acetic acid sends shivers up many a brewer’s spine. Acetobacter must be respected, and never invited into our breweries…

Homebrewing your malt vinegar is a delicious off-shoot of homebrewing beer.

Homebrewing your own malt vinegar is a delicious off-shoot of homebrewing beer.

…or so we have been told. The truth of the matter is that acetobacter exists in every brewery. Its omnipresent existence is evidenced by the fact that nearly any liquid containing ethanol will spontaneously transform into vinegar provided it is left exposed to oxygen. Basic good sanitation practices and keeping your ‘funky’ equipment separate from your ‘clean’ brewing equipment will allow you the creative freedom to ferment outside the bounds of typical brewing.

Once I decided to begin producing my own malt vinegar, I was somewhat surprised to find the Internet nearly devoid of good information as it relates to producing malt vinegar. This is not to say that there isn’t a lot of information out there, but most of it is very basic in terms of real detail. By-and-large, the articles out there focus on the economy of producing vinegar. Their focus is on vinegar production as a means of transforming an unwanted alcoholic beverage into something of value – a happy byproduct for unwanted hooch. What is one to do with a half-consumed bottle of wine, decanted yeast starter wort, or a bad batch of beer? Turn it to vinegar (or so says the Internet). The problem with this approach is that it over-simplifies vinegar production. Will a haphazard approach to vinegar production produce a passable product? Probably so. My interests however are in producing a truly artisanal product with as much complexity and diversity as the alcoholic beverages that serve as their base.

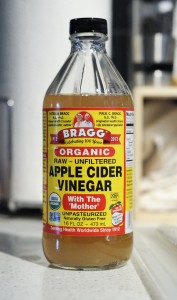
Bragg unpasturized, unfiltered vinegar acts as a starter culture.

Bragg unpasteurized, unfiltered vinegar acts as a starter culture.

The pathway to vinegar production is very basic. All that is needed is an alcoholic liquid, a culture of acetobacter, and oxygen. Acetobacter will oxidize ethanol into acetic acid, transforming your alcoholic base into a non-alcoholic vinegar. Making vinegar is as simple as fermenting out a beer (or really any alcoholic beverage), pitching a acetobacter culture (this will occur spontaneously with enough time), and leaving the liquid open to oxygen. Eventually the ethanol in the liquid will be converted to acetic acid, and you’ll be left with vinegar.

Like beer production, your recipe formulation will have a profound effect on the final vinegar. Finding good information about how recipes for vinegar should be formulated was a challenge. My base assumption is that I can take much of what I understand about beer formulation and expect those same types of flavors to be carried through to the final vinegar. The biggest variable to account for is starting gravity. This variable impacts both the residual sweetness in the vinegar, as well as the final level of acidity in the vinegar. These two components affect the sweet/sour balance of the final vinegar. At the very least, it seems prudent to produce roughly an 8% ABV beer in order to achieve a final vinegar with approximately 8% acidity.

As brewer’s, we know that there is a tremendous diversity within the broad category of ‘beer’. A standard industrial lager and barrel-aged Russian Imperial Stout are both ‘beer’ but are world’s apart in terms of the impression they leave us with. This diversity can easily be applied to malt vinegar. Malt vinegar does not have to be a generic product. It can be equally as diverse and complex as the beer we produce. For my initial attempt at vinegar I wanted to try and produce something a bit richer than the industrial malt vinegars most of us are familiar with. With hints of dried fruit, a subtle sweetness, toasty malt character, and sharp acidity, my hope is to produce something closer to the fine aged balsamic vinegars of Modena.

Dark Malt Vinegar Recipe

Specifications:
Size: 1.25 gal
Efficiency: 80%
Attenuation: 63%

Original Gravity: 1.108
Terminal Gravity: 1.040
Color: 25.23 SRM
Alcohol: 9.08& ABV (before transformation into vinegar)
Bitterness: 0.0 IBU

Malt Bill:
3.75 lb (78.9%) Maris Otter (Muntons)
0.5 lb (10.5%) Special B Malt (Dingemans)
0.5 lb (10.5%) 2-Row Caramel Malt 60L (Briess)

Mash Regiment:
149 °F, 60 min

Kettle Additions:
0.25 Tablet Whirlfloc (Irish moss) – 15 m
0.25 tsp Wyeast Nutrient – 10 m

Yeast:
1/2 pack Safale S-04

The Process

  1. Approximately one-gallon of wort was produced using a brew-in-a-bag no sparge method.
  2. The initial beer was fermented out cleanly using Safale US-04 yeast for approximately 1.5 weeks at ambient room temperatures. Once fermentation was completed, the fermenter was chilled to compact the trub and yeast cake.
  3. The beer was carefully decanted off the initial yeast cake into a clean 1-gallon glass fermenter. The beer was purposefully allowed to splash into the secondary fermenter to allow for some oxygen pickup. 1/4 c. of Bragg unpasturized vinegar was added as a starter culture. 1/8 oz. heavy toast American Oak cubes were added to the liquid. A mesh bag was rubber-banded over the top of the secondary fermenter to allow for oxygen exchange.
  4. Vinegar was allowed to age and acidify for approximately 4-months at ambient temperatures. pH readings and tastings were taken at regular intervals:
  • After 2-weeks: pH 3.58
  • After 4-weeks: pH 3.14
  • After 8-weeks: pH 2.99
  • After 14-weeks: pH 2.81 – Bottled despite somewhat high pH. Taste is quite sour. Next time I will shoot for a pH of 2.4-2.7.

Tasting

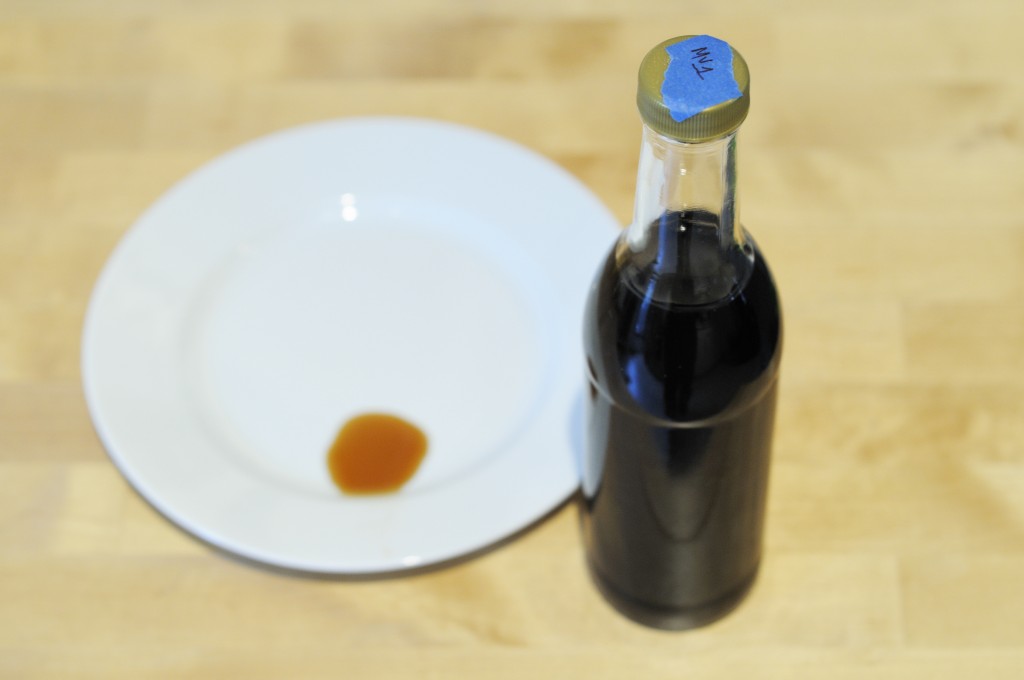
_DSC2096The vinegar is quite fruity on the nose, almost grape-like. There is a residual grainy character and a relatively sharp acetic acid note, although not quite as piquant as commercial vinegars. The flavor however is sharpely acidic. Once the initial burst of acidity subsides, there is a nice crackery malt finish with a faint hint of caramel and dark fruit. There is a low to moderate amount of residual body and sweetness that helps soften the sharp acidity, although this lacks the concentration and depth of flavor found in a good balsamic vinegar.