Pumpkin Homebrew Tasting

Homebrewed Pumpkin BeerSix weeks have passed since I brewed my high gravity pumpkin ale. The base recipe for the beer was an English Barley Wine on the low end of the style category. The original gravity started at 1.077 and finished at 1.017, giving me an approximately 8% ABV beer.

My goal with this beer was to take take the pie crust malt character found in many commercial pumpkin beers and amplify it, while decreasing the spice intensity. Additionally, I really wanted to make a beer where you could actually taste the caramelized pumpkin that was added to the mash.

Beer Tasting

Judged as a BJCP Category 21A Spice / Herb / Vegetable Beer.

Aroma (10/12)
Big round malt on the nose that is quite full with lots of deep caramel, toffee, and a hint of honey. There is a definite vanilla aroma as well as some oakey bourbon. The spicing is quite low with cinnamon being the most readily apparent, along with some nutmeg that instantly combines with some of the whiskey aromas to become reminiscent of eggnog. There are some pumpkin aromas that come off as cooked squash. As the beer warms, there is a hint of alcohol heat and acetone.

Appearance (3/3)
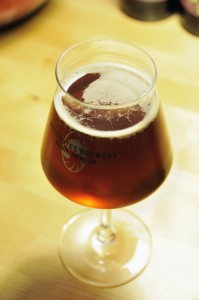
The beer is a beautiful deep amber or garnet with reddish highlights. The beer is clear, but not brilliantly so. The head is off-white and persistent.

Flavor (10/20)
There are some intense crackery and biscuit malt flavors upfront that are a little more substantial than I would have liked. There is no hop flavor although the beer has a nice firm balancing bitterness. Caramel hits mid palate and gives an impression of sweetness. It feels like the melanoidin rich malt is combining with the spice and alcohol to give a somewhat harsh flavor on the finish. There is a earthy gourd-like flavor that reminds you that you’re drinking a beer brewed with a substantial amount of pumpkin.

Mouthfeel (3/5)
The beer is quite full, perhaps a bit too much. The carbonation is low, further enhancing the beer’s fullness and leaving the mouthfeel a touch flabby.

Overall Impression (5/10)
This is not a bad beer, but I wouldn’t say it is world-class either. The slight harshness from the very intense toasty flavors are a bit much and could be dialed down a bit. Additionally, the whiskey and vanilla notes, while interesting, could benefit from some restraint. The presence of actual pumpkin in the beer is very apparent and quite welcome. It is quite likely that the beer will mellow out and become much more enjoyable with some age.

Total: 31/50 (Very Good)

BJCP Exam Results Are In!

I find great value in the BJCP (Beer Judge Certification Program). Their mission of providing both a standard to judge beers against and qualified judges to evaluate those beers is a worthwhile endeavor. While many home brewers quip at the thought of ‘brewing to style’ the truth is that the BJCP’s standards bring objectivity and order to the fundamentally subjective task of judging a beer. Love it or hate, I firmly believe it is a necessity if we want to try and objectively evaluate beers in a competition format. While I believe that some of the guidelines are perhaps outdated and not comprehensive enough to represent the contemporary brewing landscape, I certainly appreciate the order and subjectivity the guidelines provide.

The BJCP utilizes a three tiered exam approach. The Entrance Exam is a fairly difficult multiple-choice online exam. The questions are drawn from a broad knowledge base covering brewing processes, science, and individual beer styles. Upon successful competition of the Entrance Exam you become a provisional BJCP judge which qualifies you to take the Judging Exam.

This past July I sat for the BJCP Judging Exam. Successfully passing this test qualifies you as a ‘Recognized’ or ‘Certified’ BJCP judge, depending on your score and number of experience points you’ve accrued judging beer competitions. The judging exam consists of blindly tasting and scoring six different beers. You are given the base style of the beer in front of you and then left to analyze the beer and describe what you are perceiving in the beer and how well it matches the style guideline. This can be an intimidating task given how little information you’re given about the beer and the limited time in which you must evaluate the beer. That being said, being confident in what you are perceiving and accurately describing it on the scoresheet gives you a solid chance of successfully passing the test. Your scoresheets are judged against the scoresheets from the proctors (Nationally-ranked judges) who take the same test along side you.

The results from my judging exam are in; I’m happy to say that I scored an 80 on my exam and am now a ‘Recognized’ BJCP judge. Once I accrue a few more judging experience points, I’ll be a ‘Certified’ judge.

All in all, I am very satisfied with my score, and the entire testing process. An 80 is a high score meaning that my tasting capabilities are at a ‘National’ judge level. Once I’ve accumulated more judging experience points, I’ll be qualified to take the BJCP Written Proficiency Exam and hopefully bump my overall rank up to the ‘National’ level.

I’ve judged many competitions in the past as a non-BJCP judge and I feel like passing the test in some ways validates my tasting and judging capabilities. Additionally, I was quite blown away by the amount of feedback I received from those that scored my exam. For those curious, I’ve scanned and uploaded the feedback sheets I received from the exam. You can download them here (if you’re curious about that sort of thing).


Firestone Walker Parabola Clone Attempt

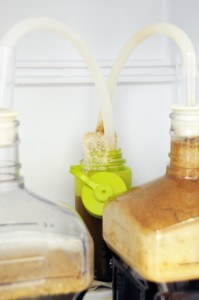
My Parabola clone fermenting side-by-side my King Henry clone.

My Parabola clone explosively fermenting away.

One of the greatest things about homebrewing is that it enables you to dissect commercial beers and make your own attempts at brewing beers of a similar nature. Precise replication is rare, even when you’re working from a proven recipe, but the exercise in itself is enjoyable, and the beers typically turn out quite tasty.

Back in 2011, I was inspired to take a shot at cloning Firestone Walker’s Parabola, and posted a quickly cobbled together recipe on HomebrewTalk. Now, a couple years later I’ve finally gotten around to taking a shot at it.

The recipe below was put together while carefully tasting the commercial beer and reading through the information published on both bottles of Parabola and on Firestone Walker’s website. The information that is out there indicates a very complex malt bill; something that makes determining the precise percentages of each malt somewhat of a shot in the dark. That being said, I’ve based the recipe on typical uses of those grains and what I’ve been able to taste in the commercial beer. The actual brewday was quite uneventful, and the beer is happily fermenting away. My plan is to transfer it onto oak in secondary and to let it rest until next April, which happens to coincide with the annual commercial release of Parabola. Stay tuned for future posts reviewing the beer and indicating how close this recipe replicates the commercial beer.

Recipe:

Size: 2.74 gal
Efficiency: 60%
Attenuation: 73.0%

Original Gravity: 1.127 SG
Terminal Gravity: 1.034 SG (projected)
Color: 53.12 SRM
Alcohol: 12.42% ABV
Bitterness: 79.6 IBUs

Ingredients:
10.5 lb (64.1%) Maris Otter (Crisp)
1.75 lb (10.7%) Munich TYPE II (Weyermann)
14 oz (5.3%) Chocolate (Crisp)
8 oz (3.1%) Roast Barley (Crisp)
8 oz (3.1%) Carafa Special® TYPE III (Weyermann)
12 oz (4.6%) Flaked Oats (Briess)
8 oz (3.1%) Carahell® (Weyermann)
8 oz (3.1%) Crystal 120 (Crisp)
8 oz (3.1%) Crystal 45 (Crisp)

22 g Columbus (15.0% AA) – boiled 60 m
1/2 tablet Whirlfloc – boiled 15 m
0.5 tsp Wyeast Nutrient – boiled 10 m
1 oz Hallertauer Hersbrucker (4.5% AA) – Whirlpool Rest 15m

Fermentis Safale US-05

Mash:
148 °F – 60m
170.0 °F – 10m

Fermentation:
1. Chill to 62°F and keep at 64°F until activity slows
2. Raise temp to 72°F 3 days
3. Crash to 32°F 3 days

Secondary:
Split into 1-gallon vessels with oak soaked in bourbon.

Vessel 1: 0.25 oz. American Heavy Toast + 2oz. Larceny Wheated Bourbon
Vessel 2: 0.25 oz. American Heavy Toast + 2oz. Rittenhouse Rye 101

Update:

The beer has unfortunately stopped fermenting at 1.044. The taste is quite nice and is by no means cloying. The high gravity however makes me slightly nervous as my eventual plan is to bottle condition the beer. I pulled a sample and preformed a force ferment test on it. The force ferment test confirms that there is no residual fermentable sugars left in the beer. Next round, I will likely lower the mash temperature and decrease the crystal malts to achieve a more fermentable wort. In the mean time, this beer tastes quite good and is aging on bourbon soaked oak cubes.

Goose Island King Henry Clone Attempt

For those of you not immersed in the world of commercial beer geekery, let me tell you a story. This is the tale of a noble and regal beer. King Henry as he was called began his life as a massive English Barley Wine from the Goose Island brewery. Once fermented, he was left to rest inside oak casks which began their life holding Pappy Van Winkle bourbon and later the Rare variant of Goose Island’s Bourbon County Brand Stout. After an extended slumber, the sweet nectar was packaged and released to the masses for enthusiastic consumption and hoarding within dark cellars. King Henry became well-known throughout the land and developed a reputation of mythical stature.

Goose Island last released King Henry in 2011. Now that Goose Island is an AB-InBev owned and produced brand, it is pretty unlikely that it will ever be brewed again.

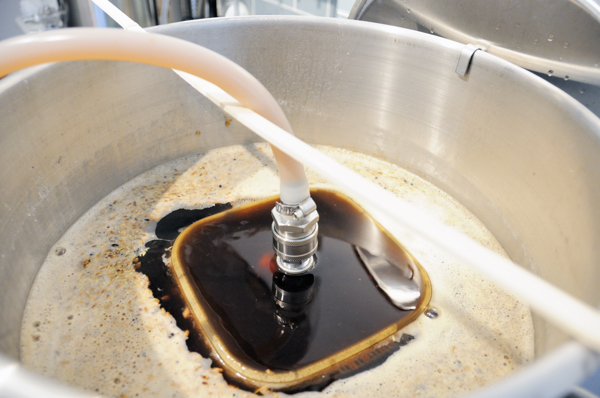
Beautiful viscous wort recirculating during my mash-out step. My new cobbled together  recirculation diffuser worked well.

Beautiful viscous wort recirculating during my mash-out step. My new cobbled together recirculation diffuser worked well.

Now some bad news — I’m not going to publish the recipe for this clone.

A homebrewing friend of mine was able to obtain the precise recipe from which the commercial beer was produced. With this information in hand, I was able to accurately formulate a scaled down homebrew recipe. This information was given to me with the caveat of not sharing it with the world.

As much as I wish that I could publish the recipe, Goose Island’s website actually gives some good information which can be used to formulate a recipe. Key metrics such as ABV and IBUs are listed, as are the malts and hops used. I can verify that my recipe is very much in line with the ingredients listed on the Goose Island website. The signature malt in this beer is a seasonal product called Caracrystal from by Briess Malting — something that the recipe formulation should account for.

I built up a massive pitch of yeast with the hope of fermenting out this extremely high gravity beer. Violent fermentation ensued, which is only now tapering down a week later. Once terminal gravity is hit, I intend to rack the beer into split secondaries containing oak cubes treated with varying spirits. With some luck, this beer will be finished and packaged sometime in February or March 2014. Stay tuned for a full review then!

Hitting Your Target Gravity – My Brewsheet

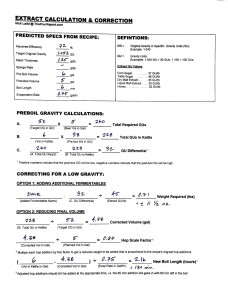
My brewday calculation sheet that allows be to easily adjust my gravities.

My brewsheet allows for easy adjustment of gravities. It is a simple matter of taking inventory of how much sugar is in the kettle pre-boil, and then adjusting your process or recipe on the fly, to hit your targets.

One of the most basic and important measures we take when brewing beer is specific gravity — the concentration of sugar within a wort. Original gravity is taken before fermentation begins, and when combined with additional readings during and after fermentation tells us volumes about what is occurring with your beer.

  • The alcohol content of your beer. This can be calculated by formula if we know what the starting and finishing gravities are.
  • The balance of your beer. Looking at the ratio of gravity to bitterness can tell a brewer a lot about how balanced a beer will be.
  • The fermentation status of your beer. By analyzing a recipe and process, you can estimate what your expected attenuation level is. If you know what gravity you started at, you can predict approximately where the beer will finish.

With this said, being able to predict your starting gravity and making adjustments on the fly that allow you to hit it, is key to accurately producing a recipe as well as reproducing beers you’ve made in the past.

The good news is that hitting your target gravity is easy. When brewing beer, the amount of sugar in the kettle is constant. As you boil, water evaporates and the concentration of sugar in the wort goes up. There is absolutely no difference in the amount of sugar in the kettle from the beginning of the boil until the end. Since we’re only changing one variable over the course of a boil (the amount of water), some very simple algebra (don’t worry, it is really simple) can be used to help us predict our final post-boil gravity, and make adjustments on the fly in order to hit our target gravity.

The first step in hitting your target gravity is to quantify the amount of sugar in your kettle pre-boil and check it against the amount of sugar that should be in the kettle in order to hit your target gravity. This quick check allows you to know exactly where you stand and whether to expect your starting gravity to be low or high. If you expect your gravity to be low you can add more sugar or boil longer to reduce your final volume. If you expect your gravity to be high, you can remove a portion of wort from the kettle and replace it with water or simply increase your final volume.

These are all fairly rudimentary algebra exercises. In order to simply it for my brewdays, I’ve created a fill-in-the-blank brewsheet that makes the math a very simple exercise. Additionally, the brew sheet helps me keep track of all my brewday statistics and calculate extract efficiency.

You can download your own copy, here. Let me know what you think!