This topic has been on my mind for a long time. It is especially important now as I begin evaluating my old brewing process in the hopes of building a better brewery, customized to fit my new Brooklyn home. This post is meant to be an overview of my previous brewing process, which demonstrates that you can brew award-winning beer in the kitchen on your stovetop. This article is intended for brewers with a basic understanding of the brewing process and the terms associated with it. If you’re completely new to brewing, I highly recommend John Palmer’s book How to Brew to get you started.
The Kitchen Brewery

The kitchen brewery
Kitchen brewers are often written off by long-time brewers (with more advanced systems) on the premise that those still working in the kitchen are neophytes producing inferior beer with extract and steeped grains. I agree to a certain extent. If you want to be producing the best beer possible, pre-formulated extracts whose sugar composition and quality is unknown adds an unneeded obstacle to producing great beer. Like cooking, starting with the best quality product in its least adulterated form typically leads to superior results. This is a brief overview of my kitchen brewery and how it worked for me. If you have questions, I’d be happy to elaborate on any part of this in the comments section below. This article is written in the past tense because I haven’t actually brewed this way since June 2012 and my new brewing process, while possessing many of the same procedures and equipment, will be adapted to my new location (as should anyone’s process).
Yeast
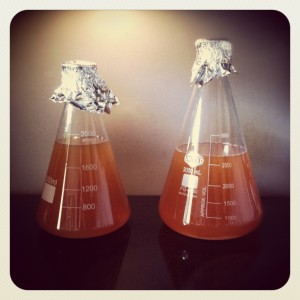
Erlenmeyer flask starters
My brewdays were never a brew day (singular). Each batch always began several days in advance with yeast propagation. The first step was acquiring the freshest yeast I could get, either online or through my local homebrew shop. (Always check the dates on the packages.) In many cases, especially with less-popular strains, the yeast your shop is selling will be well past its prime. Yeast viability drops at alarming rates. Use the freshest yeast you can find, even if that means not supporting your local shop and going online. Once I had acquired fresh yeast, I would then build an appropriate starter–based on the gravity of the beer, its volume, and the freshness of the yeast sample. For ales, 1 million cells per milliliter wort per degree plato is the commercial standard. I could often get by with less than this, but the commercial standard is something to strive for. Erlenmeyer flasks are great for creating sanitary starters because the wort can be mixed and boiled in the heat-resistant flask, cooled, and then pitched with yeast all in the same vessel. I did all of my propagation on a stir plate, which increases the yeast growth curve and limits the volume of wort you need to create to hit your target pitching rate. I always timed my brewdays so I could chill the starter and decant the spent beer off the yeast culture before pitching. MrMalty.com has a great pitching rate calculator to help you size your starters.
Mash
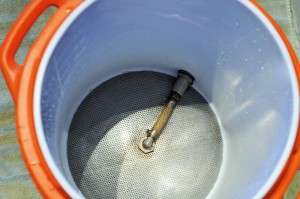
10-gallon mash tun with false bottom
Typically a brewday began by filling my 8-gallon stainless steel kettle outfitted with a ball valve and dial thermometer with the mash strike water. Water was dispensed from my kitchen faucet, which had an inline carbon filter installed. The filter removed the chlorine and chloramines found in most municipal water sources and prevented the need for campden tablets or bottled water. The strike water was then heated on a flat ceramic stove top. The flat top stove was nice because I could straddle two burners with my kettle and come up to temperature in a reasonable amount of time. (This is something my new accommodations do not have and is a hurdle my new brewery will need to overcome.) Once the predetermined volume of water was heated to the proper temperature, it was transferred via gravity to a 10-gallon Igloo cooler fitted with a ball valve and stainless steel domed false bottom. In order to save time on my brewday, limit the mess in my kitchen, and limit the amount of equipment I needed, I always bought my grain pre-milled.
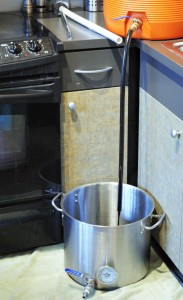
Draining the mash tun
The milled grain was added to the strike water along with adjustment salts creating my mash. While the mash conversion was happening, I would heat my sparge water in a separate 5-gallon stainless steel kettle to a predetermined temperature; usually high enough to get the grain bed up to mash out temperatures of 168° F or so. After the mash was complete, I recirculated the runnings until they were clear (vorlauf), using a pitcher and then drained the entire mash tun into my 8-gallon kettle. After completely draining the mashtun, I typically did two batch sparges until my preboil volume was hit. It is important to get to know your system and how different mash thicknesses and volumes of sparge water affect your system’s extraction efficiency. Once you have a good idea of what kind of efficiency you should expect with a given recipe, hitting your targeted gravity numbers becomes routine.
Boil
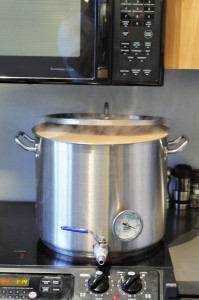
Wort coming to a boil
With all of the mash runnings collected in my 8-gallon kettle, I would take a pre-boil gravity reading using a refractometer to see if the amount of extract I achieved was in line with the predicted extract based on the efficiency I used for the recipe. The gravity of the wort can be multiplied by the volume of wort to calculate the total number of gravity units (GUs) in the kettle. This could then be compared to my recipe’s total gravity units (expected gravity x final expected volume) to see whether I had too much or too little sugar extract. From there, I would either add dry malt extract to the wort or revise my boil length (and hop additions) so that at the end of the boil I would be at the proper starting gravity. Ray Daniels, in his excellent book Designing Great Beer, has a chapter on using gravity units as a means to hit your target gravities. Again straddling two burners, my wort was boiled for a predetermined amount of time and hops were added at recipe-determined quantities and intervals. I typically kept the kettle lid on until the boil was achieved in order to save time as the wort came up to temperature. Additionally, I used a silicone based anti-foam agent to (mostly) prevent boil-overs.
Chill
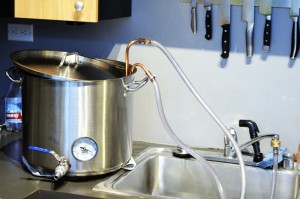
Copper chiller cooling the wort
After the boil was complete, I turned off the stove and placed a copper wort chiller into the boiling wort for 5 minutes to sanitize it. The copper chiller was plumbed to the faucet on my sink using a threaded adapter. During the summer months when the ground water temperatures were too warm to effectively chill the wort to pitching temperatures, I would use a submersible pump and bucket of ice water to circulate chilled water through the copper coil after the wort had been chilled to 130° F with tap water alone. After chilling, I typically let the trub in the kettle (hops and cold break) settle for 45 minutes or so before racking clear wort into a pre-sanitized Better Bottle. I would then hit the wort with 60 seconds of pure oxygen through a diffusion stone and pitch my yeast.
Ferment
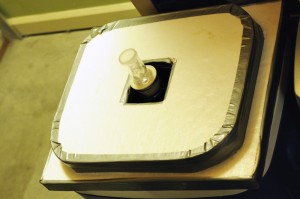
Styrofoam lid fabricated for fermentation chamber
Fermentation took place in an Igloo Ice Cube cooler with a custom-fit styrofoam lid that I fabricated. The lid allowed for an airlock or blow-off tube to come through the top while effectively sealing the cooler. The cooler was filled with water (with a touch of bleach) in which I put a floating thermometer and blue ice packs that I’d rotate in and out to achieve a fine degree of temperature control. Fermentation would typically go for about a week depending on the yeast strain, gravity, and fermentation temperature. At the end I would typically crash the fermenter as cold as my setup would allow to encourage any remaining yeast in suspension to flocculate out.
Package
After fermentation I would rack my beers into clean, sanitized, and CO2 purged corny kegs. From there they were placed into a chest freezer controlled by a Johnson A419 temperature controller and force carbonated using pressurized CO2 and a regulator. Beer was dispensed from a two tap kegerator sitting in my living room. Beers needed for competition were filled carbonated using a Blichmann Beer Gun.
Small Doesn’t Mean Sloppy

Hops are carefully weighed and labeled
In some ways, having a small, simple brewery allows you to focus on process rather than the equipment involved. Each step of the brewing process has control points which can be checked along the way to see if the brewday is progressing according to plan. With that in mind, things can always go differently, so it is important to know how to roll with these changes and adjust your brewday to sync with whatever might happen. Expense was not spared in acquiring accurate hydrometers, refractometers, and thermometer–giving me confidence in the numbers I was checking. Additionally, these instruments were frequently calibrated to ensure their accuracy. Pre-boil gravities were checked and adjusted in order to hit the gravities I was targeting. Temperatures on the fermentation side were tightly controlled to insure quality fermentations. Sanitation was of primary importance with all items on the cold side being thoroughly cleaned and sanitized. Recipes were thoroughly researched and designed to achieve the end product I wanted to obtain.
Where My System Worked
My old home in Seattle was small. The only place I was able to brew was in my kitchen as I didn’t have adequate outdoor space. In the end, this made many of my brewdays more pleasant, especially when it was freezing cold or burning hot outside. I literally lived in my brewery and brewing was always on my mind.
Where My System Sucked
Time. Waiting for items to come to a boil. Waiting for items to cool. Waiting for trub to settle. These were all things that dramatically increased my brewday lengths and something I hope to improve on in my new brewery.
Baby-sitting. My fermentation temperature control using a water bath required baby-sitting a couple times a day. I hope to automate this in my new brewery with a temperature controlled mini-fridge.
Labor. 10-gallon mash tuns filled to the brim are heavy. This becomes all the more precarious when you’re lifting it 3 feet from the ground to the kitchen counter. My next brewery design will take advantage of a pump to transfer liquid.
Mash Temperature Control. Correcting a missed mash temperature on my old system involved a frantic and imprecise scramble of either adding boiling water or ice to the mash in order to bring the temperature into line with what the recipe dictated. My next brewery will have some sort of built-in mash temperature control.
A Brewery I Respect
It seems that the homebrewer and DYI gadget crowds often overlap. There is a lot of conversation happening about ways to trick out your brewhouse, improve the quality of your beer, and expand your brewery’s output. A lot of people push these upgrades without really first understanding that technology and final quality are not implicitly connected. They spend more time chasing upgrades than understanding brewing fundamentals. For certain types of personalities, this is fine and represents a big chunk of the joy of the hobby.
At first glance, my friend at Black Alley Brewing might have fit this description. He has the most technologically advanced homebrew rig I’ve ever seen (in person). The degree of control he has is vastly superior to most commercial brewing systems I’ve seen of less than 30 barrels. That being said, every aspect of his design was well thought-out and had specific reasoning geared towards quality, time, or ease-of-use. Each part of the brewery was designed with purpose and not for the sake of gadget wizardry alone. It is an amazing thing to behold and something I greatly respect as a brewer. You can check out his build, which was thoroughly documented here: Black Alley Brewing.

