Fall 2012 Brooklyn Wort Recap

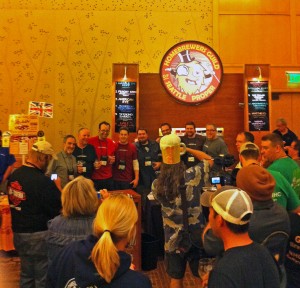
The Fall 2012 edition of the bi-annual The Brooklyn Wort was held this past Saturday, October 27th at Public Assembly, a venue in the Williamsburg neighborhood of Brooklyn. The Brooklyn Wort is an attempt to combine two of my favorite things: a homebrew competition and a beer festival. Local homebrewers sign up and pay an entry fee to serve 5-gallons of their beer to the public and have it judged by both professional brewers and industry insiders. There is a $1000 purse at stake, with a portion awarded by a professional judging panel and a portion awarded based on the popular vote of festival attendees.

Tacos From Cemita's

Ticket prices include pretty good tacos from Cemita’s.

From the general public’s perspective, this event looks like a lot of other beer festivals. You choose one of two sessions to attend and pay a $35 entry fee to sample twenty-five different homebrews and eat a light meal (two tacos from Cemita’s Mexican Sandwiches and Tacos). You are given a tear sheet of tickets to give to each brewer in exchange for a sample as well as an empty slip to register your personal vote for the best beer.

Crowded...

Crowded…

First impressions are important. Unfortunately, upon arriving at the venue there was a large slow moving line that took nearly 20 minutes to get through. Within the venue, homebrewers were set up in two different rooms, both of which were way too small to accommodate the crowds on hand. Getting to the actual tables in order to receive a sample required quite a bit of maneuvering through the oversold crowd. Do not attend this event if you are claustrophobic or short on patience. When I showed up for the second tasting of the day, there was still a considerable number of people lingering from the first session, which significantly exasperated the problem.

Overcrowding and comfort aside, the most important part of a beer festival is the quality of the beer. In many ways I think the quality of the homebrew being served very much echoes the quality of homebrew in general. Homebrewing is still very much in its nascent stages with the quality improving every year, which means events like this are often a mixed bag. Of course, in a lot of ways you could say the same thing about a commercial craft beer festival. I managed to taste 22 of the 25 beers being served. Of these 22 I rated:

  • 5 Great – Would drink well next to solid commercial beers.
  • 5 Good – Comparable to an average commercial beer.
  • 7 Below average. Some technical flaws or balance problems. Comparable to a handful of bad commercial beers.
  • 5 had serious infections or off-flavors. I ran into some seriously phenolic beers, beers tasting like DMS (rotten cabbage), unintentionally sour beers, and beers with big diacetyl problems.

I had a great time chatting with the actual brewers and hearing their reasoning behind recipe formulation. I loved that many brewers were looking for genuine, unabashed feedback on their beers, and that many brought in their recipe sheets. When people ask my opinion (we all have one), it is difficult to tell whether they really want to hear what you are perceiving or simply want a pat on the back. I try to read people, but tend to give my opinion when asked (good or bad). Carefully articulated, honest feedback is the only way to become a better brewer. If you ask for my opinion, you should be willing to take it–good or bad. I expect the same treatment for every beer I make.

My top five brewers and beers:

  1. Rye Rye My Darling (Rye IPA) – Steve Hanson
  2. Trois PA (Pale Ale, 100% Brett) – Jonathan Moxey
  3. Judie Tuzke (Best Bitter) – M. Messenie & T. Lee
  4. Prunus Maximus (Porter w/ Plum & Chili) – Marco Trauzzi
  5. The Blushing Goddess (Saison w/ Hibiscus) – Peter Durning

Revisiting Krampus AKA Miss Figgy

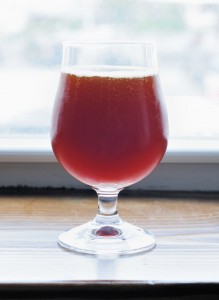
Krampus in the Glass

Krampus in the Glass

Krampus, AKA Miss Figgy, is a beer of strength and contemplation that begs to be sipped. Inspired by traditional English Barley Wines and complemented by flavors of fresh fig and dark rum, this beers packs a punch at over 10% alcohol. Traditional English malts and a long boil are used to give the beer a rich malt profile of unmistakable depth. Subtle spicing is present but fleeting on the palate leaving you questioning whether you’re tasting intentional spicing or simply the play of fruit, malt, and yeast. A light touch of oak becomes apparent on the finish bringing structure to the rich malt profile.

This beer was re-brewed on a commercial scale at Big Time Brewery in Seattle, WA as part of the 2012 GABF Pro-Am Competition. It will be poured during the Friday night session of the 2012 Great American Beer Festival at the Pro-Am Competition Booth. Below I’ve outlined the beer’s recipe as well as tasting notes from a sample of the homebrewed version.

The Recipe

Size: 5.25 gal
Efficiency: 74.0%
Attenuation: 73.0%

Original Gravity: 1.106
Terminal Gravity: 1.029
Color: 20.93 SRM
Alcohol: 10.32% ABV
Bitterness: 49.4 IBU
Mash Temp: 155° F

Fermentables:
13.5 lb Crisp Maris Otter (65.1%)
3.75 lb Weyermann Munich TYPE II (18.1%)
1 lb Crisp Crystal 77 (4.8%)
8 oz Belgian Special B (2.4%)
2 lb Star Thistle Honey (9.6%)

Hops:
28 g Magnum (12.5%) – added during boil, boiled 60 m

Spice:
1 tsp Cinnamon (ground) – added during mash
.25 ea Star Anise – added during boil, boiled 5 m

Other:
1 ea Whirlfloc Tablets (Irish moss) – added during boil, boiled 15 m
.5 tsp Wyeast Nutrient – added during boil, boiled 10 m

Yeast:
1 ea WYeast 1728 Scottish Ale™

Fruit:
4 lb Figs – added dry to secondary fermenter
.5 lb Dark Raisins Soaked in Aged Dark Rum – added dry to secondary fermenter
.5 lb Golden Raisins  Soaked in Aged Dark Rum – added dry to secondary fermenter

Oak:
1 oz Oak Cube Blend Soaked in Aged Dark Rum – added dry to secondary fermenter

Notes:
– Build 2800ml 1.040 starter on plate.
– Ferment primary 2 weeks.  Start at 58*F and hold 60-62*F.  Let ramp up to  72*F at end.

Secondary 1 (Rack to Purged Carboy) (Age 1 month):
4 lbs of figs
1/2 lb of dark raisins
1/2 lb of golden raisins

Secondary 2 (Age 2 Months):
1oz oak cubes

Tasting Notes:

Brewed: 12/4/11
Sampled: 10/7/12
Alcohol: 10.3% ABV

Aroma: This beer presents a great layered bouquet of fruit, malt, and various sugars. Initially apparent is a blend of tart cherries and prunes. As it warms, an earthy fig aroma becomes much more apparent and is reminiscent of biting into the skin of a fresh fig. Flavors of turbinado sugar and molasses sit in the background. There is a light touch of oak which is very vanilla-like. Ethanol is apparent, but not hot or distracting. The aroma is very complex and continually evolves as the beer is consumed. It seems like every sniff presents an opportunity to detect additional aromas. 12 / 12

Appearance: Deep brown with garnet-like highlights. Beer is fairly hazy. Head retention is poor, likely a consequence of the high alcohol levels. 1 / 3

Flavor: First up are flavors of heavily caramelized Belgian candi sugar that have characteristics of dark dried fruit. There is a solid amount of toasty melanoiden-rich malts (like Munich). The sugar flavors leave an impression of sweetness that is balanced with some tart-cherry like flavors. Ripe fig skin blends with some of the vanilla and oak flavors creating an interesting flavor combination. Very smooth balancing bitterness. Alcohol is barely perceptible. 19 / 20

Mouth Feel: Medium body and bitterness with soft carbonation. This beer feels like it could benefit from a heavier mouthfeel to increase its richness. 2 / 5

Overall Impression: This beer is quite nice. There are many layers of flavor which make it an enjoyable sipper that evolves in the glass. When fresh, this beer had a huge earthy fresh fig character that seems to have stepped into the background and become more integrated as the beer has aged. It is amazingly drinkable for the ABV. Really enjoyable beer. 9 / 10

Score: 43 / 50 (Outstanding)

Note: Evaluation done according to BJCP Scoring System. This beer was reviewed as a Category 20 Fruit Beer – English Barley Wine Base.

Brewing in Tight Spaces (and you can too!)

This topic has been on my mind for a long time. It is especially important now as I begin evaluating my old brewing process in the hopes of building a better brewery, customized to fit my new Brooklyn home. This post is meant to be an overview of my previous brewing process, which demonstrates that you can brew award-winning beer in the kitchen on your stovetop. This article is intended for brewers with a basic understanding of the brewing process and the terms associated with it. If you’re completely new to brewing, I highly recommend John Palmer’s book How to Brew to get you started.

The Kitchen Brewery

The Kitchen Brew House

The kitchen brewery

Kitchen brewers are often written off by long-time brewers (with more advanced systems) on the premise that those still working in the kitchen are neophytes producing inferior beer with extract and steeped grains. I agree to a certain extent. If you want to be producing the best beer possible, pre-formulated extracts whose sugar composition and quality is unknown adds an unneeded obstacle to producing great beer. Like cooking, starting with the best quality product in its least adulterated form typically leads to superior results. This is a brief overview of my kitchen brewery and how it worked for me. If you have questions, I’d be happy to elaborate on any part of this in the comments section below. This article is written in the past tense because I haven’t actually brewed this way since June 2012 and my new brewing process, while possessing many of the same procedures and equipment, will be adapted to my new location (as should anyone’s process).

Yeast
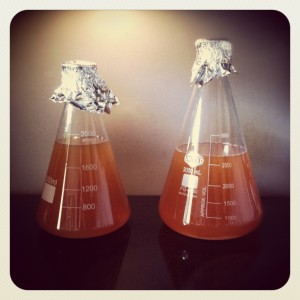
Erlenmeyer Flask Starters

Erlenmeyer flask starters

My brewdays were never a brew day (singular). Each batch always began several days in advance with yeast propagation. The first step was acquiring the freshest yeast I could get, either online or through my local homebrew shop. (Always check the dates on the packages.) In many cases, especially with less-popular strains, the yeast your shop is selling will be well past its prime. Yeast viability drops at alarming rates. Use the freshest yeast you can find, even if that means not supporting your local shop and going online. Once I had acquired fresh yeast, I would then build an appropriate starter–based on the gravity of the beer, its volume, and the freshness of the yeast sample. For ales, 1 million cells per milliliter wort per degree plato is the commercial standard. I could often get by with less than this, but the commercial standard is something to strive for. Erlenmeyer flasks are great for creating sanitary starters because the wort can be mixed and boiled in the heat-resistant flask, cooled, and then pitched with yeast all in the same vessel. I did all of my propagation on a stir plate, which increases the yeast growth curve and limits the volume of wort you need to create to hit your target pitching rate. I always timed my brewdays so I could chill the starter and decant the spent beer off the yeast culture before pitching. MrMalty.com has a great pitching rate calculator to help you size your starters.

Mash
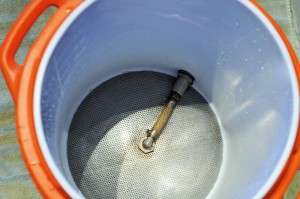
10-gallon Igloo Mash Tun

10-gallon mash tun with false bottom

Typically a brewday began by filling my 8-gallon stainless steel kettle outfitted with a ball valve and dial thermometer with the mash strike water. Water was dispensed from my kitchen faucet, which had an inline carbon filter installed. The filter removed the chlorine and chloramines found in most municipal water sources and prevented the need for campden tablets or bottled water. The strike water was then heated on a flat ceramic stove top. The flat top stove was nice because I could straddle two burners with my kettle and come up to temperature in a reasonable amount of time. (This is something my new accommodations do not have and is a hurdle my new brewery will need to overcome.) Once the predetermined volume of water was heated to the proper temperature, it was transferred via gravity to a 10-gallon Igloo cooler fitted with a ball valve and stainless steel domed false bottom. In order to save time on my brewday, limit the mess in my kitchen, and limit the amount of equipment I needed, I always bought my grain pre-milled.
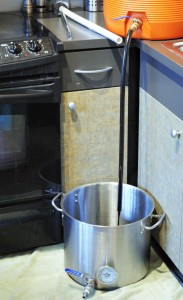
Draining the Mash Tun

Draining the mash tun

The milled grain was added to the strike water along with adjustment salts creating my mash. While the mash conversion was happening, I would heat my sparge water in a separate 5-gallon stainless steel kettle to a predetermined temperature; usually high enough to get the grain bed up to mash out temperatures of 168° F or so. After the mash was complete, I recirculated the runnings until they were clear (vorlauf), using a pitcher and then drained the entire mash tun into my 8-gallon kettle. After completely draining the mashtun, I typically did two batch sparges until my preboil volume was hit. It is important to get to know your system and how different mash thicknesses and volumes of sparge water affect your system’s extraction efficiency. Once you have a good idea of what kind of efficiency you should expect with a given recipe, hitting your targeted gravity numbers becomes routine.

Boil
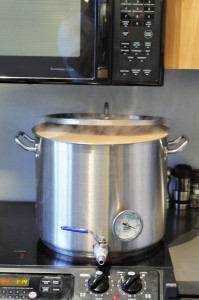
Wort Coming to a Boil

Wort coming to a boil

With all of the mash runnings collected in my 8-gallon kettle, I would take a pre-boil gravity reading using a refractometer to see if the amount of extract I achieved was in line with the predicted extract based on the efficiency I used for the recipe. The gravity of the wort can be multiplied by the volume of wort to calculate the total number of gravity units (GUs) in the kettle. This could then be compared to my recipe’s total gravity units (expected gravity x final expected volume) to see whether I had too much or too little sugar extract. From there, I would either add dry malt extract to the wort or revise my boil length (and hop additions) so that at the end of the boil I would be at the proper starting gravity. Ray Daniels, in his excellent book Designing Great Beer, has a chapter on using gravity units as a means to hit your target gravities. Again straddling two burners, my wort was boiled for a predetermined amount of time and hops were added at recipe-determined quantities and intervals. I typically kept the kettle lid on until the boil was achieved in order to save time as the wort came up to temperature.  Additionally, I used a silicone based anti-foam agent to (mostly) prevent boil-overs.

Chill
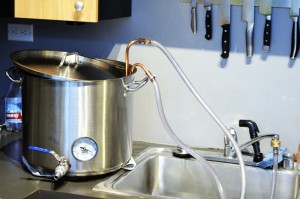
Chilling the Wort with a Copper Chiller

Copper chiller cooling the wort

After the boil was complete, I turned off the stove and placed a copper wort chiller into the boiling wort for 5 minutes to sanitize it. The copper chiller was plumbed to the faucet on my sink using a threaded adapter. During the summer months when the ground water temperatures were too warm to effectively chill the wort to pitching temperatures, I would use a submersible pump and bucket of ice water to circulate chilled water through the copper coil after the wort had been chilled to 130° F with tap water alone. After chilling, I typically let the trub in the kettle (hops and cold break) settle for 45 minutes or so before racking clear wort into a pre-sanitized Better Bottle. I would then hit the wort with 60 seconds of pure oxygen through a diffusion stone and pitch my yeast.

Ferment
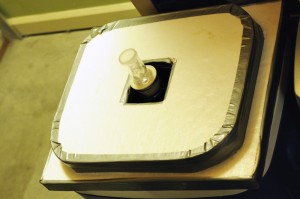
Lid on Fermentation Chamber

Styrofoam lid fabricated for fermentation chamber

Fermentation took place in an Igloo Ice Cube cooler with a custom-fit styrofoam lid that I fabricated. The lid allowed for an airlock or blow-off tube to come through the top while effectively sealing the cooler. The cooler was filled with water (with a touch of bleach) in which I put a floating thermometer and blue ice packs that I’d rotate in and out to achieve a fine degree of temperature control. Fermentation would typically go for about a week depending on the yeast strain, gravity, and fermentation temperature. At the end I would typically crash the fermenter as cold as my setup would allow to encourage any remaining yeast in suspension to flocculate out.

Package

After fermentation I would rack my beers into clean, sanitized, and CO2 purged corny kegs. From there they were placed into a chest freezer controlled by a Johnson A419 temperature controller and force carbonated using pressurized CO2 and a regulator. Beer was dispensed from a two tap kegerator sitting in my living room. Beers needed for competition were filled carbonated using a Blichmann Beer Gun.

Small Doesn’t Mean Sloppy
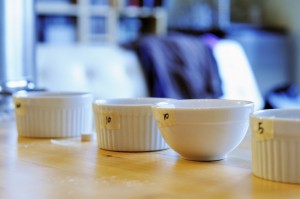
Hop Additions Ready for Kettle

Hops are carefully weighed and labeled

In some ways, having a small, simple brewery allows you to focus on process rather than the equipment involved. Each step of the brewing process has control points which can be checked along the way to see if the brewday is progressing according to plan. With that in mind, things can always go differently, so it is important to know how to roll with these changes and adjust your brewday to sync with whatever might happen. Expense was not spared in acquiring accurate hydrometers, refractometers, and thermometer–giving me confidence in the numbers I was checking. Additionally, these instruments were frequently calibrated to ensure their accuracy. Pre-boil gravities were checked and adjusted in order to hit the gravities I was targeting. Temperatures on the fermentation side were tightly controlled to insure quality fermentations. Sanitation was of primary importance with all items on the cold side being thoroughly cleaned and sanitized. Recipes were thoroughly researched and designed to achieve the end product I wanted to obtain.

Where My System Worked

My old home in Seattle was small. The only place I was able to brew was in my kitchen as I didn’t have adequate outdoor space. In the end, this made many of my brewdays more pleasant, especially when it was freezing cold or burning hot outside. I literally lived in my brewery and brewing was always on my mind.

Where My System Sucked

Time. Waiting for items to come to a boil. Waiting for items to cool. Waiting for trub to settle. These were all things that dramatically increased my brewday lengths and something I hope to improve on in my new brewery.

Baby-sitting. My fermentation temperature control using a water bath required baby-sitting a couple times a day. I hope to automate this in my new brewery with a temperature controlled mini-fridge.

Labor. 10-gallon mash tuns filled to the brim are heavy. This becomes all the more precarious when you’re lifting it 3 feet from the ground to the kitchen counter. My next brewery design will take advantage of a pump to transfer liquid.

Mash Temperature Control. Correcting a missed mash temperature on my old system involved a frantic and imprecise scramble of either adding boiling water or ice to the mash in order to bring the temperature into line with what the recipe dictated. My next brewery will have some sort of built-in mash temperature control.

A Brewery I Respect

It seems that the homebrewer and DYI gadget crowds often overlap. There is a lot of conversation happening about ways to trick out your brewhouse, improve the quality of your beer, and expand your brewery’s output. A lot of people push these upgrades without really first understanding that technology and final quality are not implicitly connected. They spend more time chasing upgrades than understanding brewing fundamentals. For certain types of personalities, this is fine and represents a big chunk of the joy of the hobby.

At first glance, my friend at Black Alley Brewing might have fit this description.  He has the most technologically advanced homebrew rig I’ve ever seen (in person). The degree of control he has is vastly superior to most commercial brewing systems I’ve seen of less than 30 barrels. That being said, every aspect of his design was well thought-out and had specific reasoning geared towards quality, time, or ease-of-use. Each part of the brewery was designed with purpose and not for the sake of gadget wizardry alone. It is an amazing thing to behold and something I greatly respect as a brewer. You can check out his build, which was thoroughly documented here: Black Alley Brewing.


2012 National Homebrew Competition Results

Homebrewers Guild of Seattle Proper and Charlie Papazian

The HGSP Pouring at Club Night with Charlie Papazian

2012 was a banner year for homebrew growth. This became evident last year as the National Homebrewers Conference and related National Homebrew Competition sold out in a matter of days. It is astonishing to see the popularity of the hobby grow by leaps and bounds. The sheer number of brewers is amazing, but more importantly the quality across the board is getting better and better each year.

The absolute highlight of my competitive brewing in 2012 was having 10 beers make it to the second round of the National Homebrew Competition, and having one of them score a gold medal in the final round. I’m even more proud of the fact that the points these entries earned along with those accumulated by the other talented brewers in the Homebrewers Guild of Seattle Proper were enough to earn us 6th place in the Homebrew Club of the Year rankings; an amazing feat considering there are only 8 in our club.

Bow Down the Charlie P and Get Your Gold

Bow Down to Charlie P and Get Your Gold – Photo Courtesy of Dan Stillwell

The National Homebrew Competition is the biggest in the world. This past year’s competition had 7,823 entries with each judging center accepting 750 entries. The only way to do well in this competition is to not only craft high quality entries, but do it across a broad spectrum of categories. I entered 38 beers into the first round, and of these 10 moved on to the final round (26.3%). I think this is a great average and very telling metric. Hopefully, at some point the AHA will begin taking this average into account with the award calculations as a means to moderate the explosive growth the competition has seen.

 2012 NHC Winning Recipes

  • Vienna Lager – 1st Place (round 1) Category 3 – European Amber Lagers (3a. Vienna Lager)
  • N. English Brown – 1st Place (round 1 & 2) Category 11 – English Brown Ale (11c. – N. English Brown)
  • Single Tap – 1st Place (round 1) Category 14 – IPA (14b. American IPA)
  • American Barley Wine – 1st Place (round 1) Category 19 – Strong Ale (19c. American Barley Wine)
  • Vanilla Milk Stout – 1st Place (round 1) Category 21 – Spice / Herb / Vegetable Beer
  • Five (Blended Strong Ale) – 1st Place (round 1) Category 23  – Specialty Beer
  • Kolsch – 2nd Place (round 1) Category 6 – Light Hybrid Beers (6c. Kolsch)
  • Saison – 2nd Place (round 1) Category 16 – Belgian & French Ale (16c. Saison)
  • Düsseldorf Altbier – 3rd Place (round 1) Category 7 – Amber Hybrid Beers (7c. Düsseldorf Altbier)
  • Spazzy Man Wheat – 3rd Place (round 1) Category 15 – German Wheat & Rye Beer (15a. Weizen/Weissbier)

More Interesting NHC Related Links

Spazzy Man Wheat Recipe

A good friend of mine originally exposed me to an amazing beer from New Glarus Brewing called Dancing Man Wheat. This beer, while outside of the OG specification for a traditional hefeweizen is an amazing example of the style. New Glarus’ weizen yeast strain and their processes restrain the over-the-top banana and bubblegum character that dominate most homebrew versions of the style. Instead, it has a great spice character of cinnamon and clove which complement its smooth and creamy mouth feel. In addition, I pick up an almost tropical fruit note, likely a yeast derived flavor.

For this recipe I started with a few things I knew about the beer (like the percentage of oats I took from Brewing with Wheat by Stan Hieronymus) as well as other theories about the way New Glarus brews. I then critically tasted the beer, researched hefeweizen brewing techniques, and brewed my initial batch. After the initial batch, I made a few recipe tweaks, lowered the OG to better fit the style guideline, and then rebrewed using a yeast culture I grew from the bottle dregs of Dancing Man. While not a spot on clone, this beer is very much in the same family as New Glarus’ beer, and is absolutely delicious.

Specifications

Volume: 5.74 Gallons
Original Gravity: 1.054
Terminal Gravity: 1.007
Color: 8.97 SRM
Alcohol: 6.11%
Bitterness: 14.1
Efficiency: 68% (tweak recipe to match efficiency of your brew house)
Boil Length: 90 Minutes

Ingredients

6.5 lb (56.5%) Pale Wheat Malt; Weyermann
14 oz (7.6%) Unmalted Wheat
3 lb (26.1%) Bavarian Pilsner; Weyermann
12 oz (6.5%) Oats (Pregelatinized Flakes); Briess
2 oz (1.1%) Caramel Malt 40L; Briess
4 oz (2.2%) Honey Malt
Rice Hulls as Required
30 g (100.0%) East Kent Goldings (4.7%) – added during boil, boiled 60 m
1 ea Whirlfloc Tablets (Irish moss) – added during boil, boiled 15 m
.75 tsp Wyeast Nutrient – added during boil, boiled 10 m
1800ml starter of New Glarus Weizen Yeast – User Wyeast 3068 as a replacement

Water

Carbon-filtered Seattle water which is very soft.  All salts added to grist before mashing in.
2.0 g Gypsum (Calcium Sulfate)
6.0 g Calcium Chloride (Calcium Chloride)
2.0 g Epsom Salts (Magnesium Sulfate)

Mash

15 Minute Ferulic Acid Rest at 110° F
Pull Decoction to Raise to Saccharification Rest
40 Minute Saccharification Rest at 156° F
Pull Decoction to Raise to Mashout Rest
10 Minute Mashout Rest at 170° F
Sparge at 170° F and collect sufficient runnings to hit pre-boil volumes.

Fermentation

  1. Chill wort to 58° F and pitch yeast slurry.
  2. Set temp controller to 60° F and allow to rise to this temp.
  3. Ferment at 60-62° F until beer is 2-6 points from terminal gravity then raise temp to 68° F.  Hold at 68° F for 2 days.
  4. Chill fermenter to 34° F and package.  Bottle conditioning adds an authentic feel to this beer.

Awards

The beer brewed from this recipe has won as a BJCP Category 15a. Weizen/Weissbier:

  • 2012 NHC First Round – 1st Place