Sierra Nevada Pale Ale Clone – 2.0

Another blog post, another Sierra Nevada Pale Ale clone. The Verdict: Not Cloned.

fsfsdf

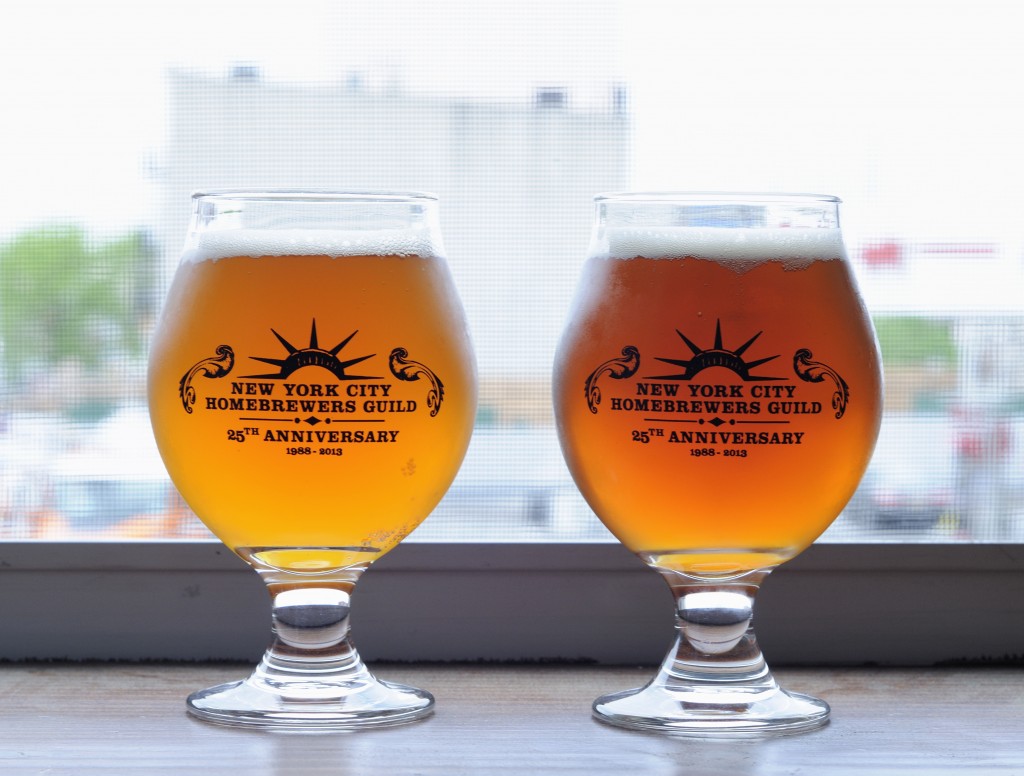
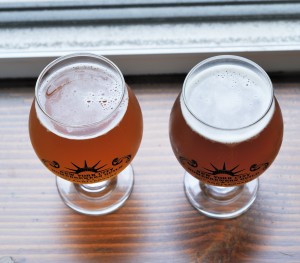
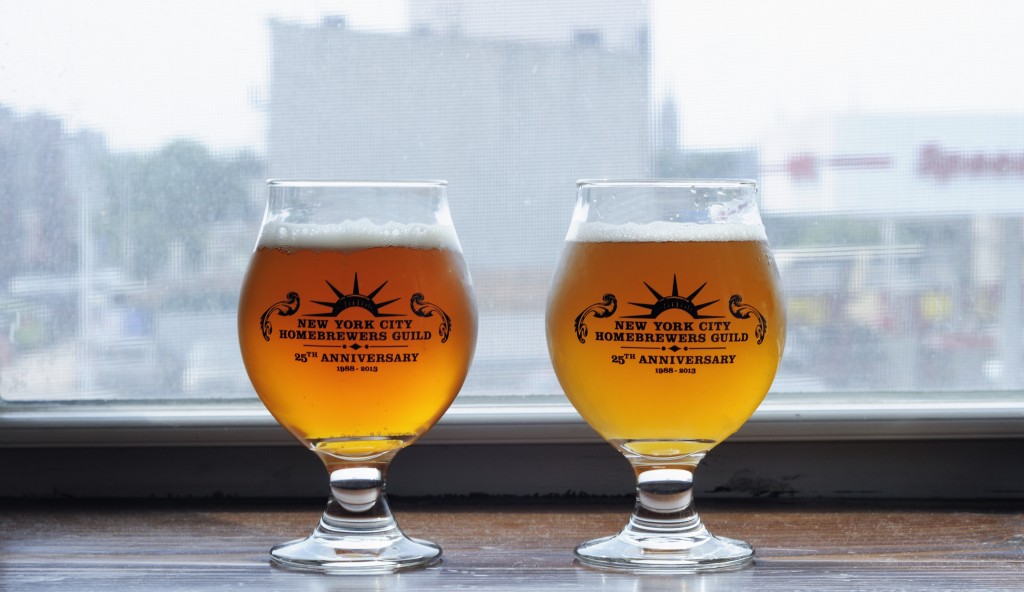
Commercial beer on the left, homebrew on the right.

That said, we’re getting close.To start, here is the recipe that I brewed.

Sierra Nevada Pale Ale Cone 2.0 (Not Cloned)

Specifications:

Size: 3.25 gal
Efficiency: 68%
Attenuation: 80% (measured)

Original Gravity: 1.051
Terminal Gravity: 1.010 (measured)
Color: 10.86 SRM
Alcohol: 5.4% ABV (calculated)
Bitterness: 37.7 IBU (calculated)

Grist:

6.75 lb (94.7%) Briess 2-Row Brewers Malt
6 oz (5.3%) Briess Caramel 60L

Mash Regiment:

152 °F – Sacc Rest – 60min

Water Treatment:

Extremely Soft NYC Water
4g Gypsum (to mash)
2g Calcium Chloride (to mash)

Hopping:

9 g Magnum (12.6% AA) – 60 m
8 g Perle (8.7% AA) – 30 m
8 g Cascade (6.9% AA) – 10 m
72 g Cascade (6.9% AA) – Whirlpool 15m

Kettle Additions:

0.5 ea Whirlfloc Tablets (Irish moss) – 15 m
0.5 tsp Wyeast Nutrient – 10 mYeast:

Yeast:

WYeast 1056 American Ale™ Starter on stirplate to achieve 1 million cells per milliliter of wort per degree Plato. Use Mr. Malty to determine proper starter sized based on age of yeast package. Pitch into 60°F wort and allow to free rise to 64°F. As fermentation begins to slow, raise temperature to 70°F.

The Results

While there are some recipe changes in store for the next iteration, this beer primarily misses the mark on technical merits. Most noticeably my beer has a touch of honeyed oxidized malt character with perhaps a faint hint of diacetyl that is not present in the commercial beer.

I am typically very careful to limit O2 exposure, especially in fermented beer. In some ways, the oxidation of this beer is welcome as it is making me look critically at my process and think of ways I can limit O2 pickup. The biggest risk for oxidation in my process comes at two locations: the cold crash and packaging.

When I cold crash my beer, there is usually some suck-back of air into the fermenter due to a vacuum being pulled as the liquid’s volume decreases as it cools. I typically put a little CO2 head pressure on my beers as I cold crash in order to prevent this. With this beer, I got lazy and skipped this step. Nevermore!

The second biggest opportunity for O2 pickup is when I rack finished beer to my keg. I always purge the keg, but perhaps I am not always as careful as I should be in gently racking the beer and purging the racking cane or fermenter head space once it is opened up. In a perfect world, I would be doing a completely closed transfer — this is something I’m looking into and hope to implement in the future.

In terms of recipe, I believe the malt bill I am using is nearly perfect. There is a slight color difference between my beer and the commercial example, but I believe this has more to do with some yeast being suspended in the homebrew, and not a dramatic miss with the malt bill. I may bump up the crystal malt ever so slightly in the next round — perhaps only by a couple ounces.

The biggest recipe difference that I need to implement for the next round is in regard to flavor and aroma hops. The commercial beer has a substantial grapefruit pith and slightly spicy / herbal hop character. While this character is present in the homebrew, it is not nearly as intense. The homebrew’s bitterness level is spot on, but the aroma and flavor needs to be dramatically increased. For the next iteration of my recipe, I intend to boost the amount of late hopping at least by an order of 2 or 3 in order to get closer to the commercial beer.

Circa ’96 Redux IPA – Homebrew Recipe & Review

ipaThe new proprietary hops currently being developed by the likes of HBC and others in the Yakima valley are wonderful, interesting varieties. Citra, Amarillo, Mosaic, Nelson, and Galaxy with their intense flavors of tropical fruits and citrus are both novel and delicious. They’re also, very much in demand by today’s craft brewers. Over the past couple of years I’ve been playing around with the idea of someday, in the not-too-distant future starting a craft brewery. With the competition  for these hops coming from established brewers with deep pockets, it can be be very difficult for a new brewery to establish contracts for these new varieties. With this reality in mind, it would be an interesting proposition to see if there is a combination of readily available hops (like those popular in 1996) coupled with contemporary techniques (dryness, massive whirlpool, massive dry hop) that can be utilized to create the bright juicy hop character seen in today’s most popular IPAs. This is my first attempt at a recipe that strives to do just that.

American IPA Recipe

Specifications:
Size: 3.25 gal
Efficiency: 62% (measured)
Attenuation: 83.3% (measured)

Original Gravity: 1.066
Terminal Gravity: 1.011 (measured)
Color: 10.78 SRM
Alcohol: 7.2% ABV (calculated)
Bitterness: 42.9 IBU (does not account for IBUs created by whirlpool hop addition)

Malt Bill:
7 lb (75.7%) Briess Pale Ale Malt
0.25 lb (2.7%) Briess Victory® Malt
1 lb (10.8%) Great Western White Wheat Malt
1 lb (10.8%) Corn Sugar – added to boil

Mash Profile:
149°F – 60m

Water Treatment:
Extremely Soft NYC Water
4g Gypsum (to mash)

Hopping:
0.5 oz Centennial (10.5% AA) – 60 m
1 oz Cascade (5.5% AA) – 10 m

1 oz Columbus (15.0% AA) – Whirlpool 25m
1 oz Chinook (13.0% AA) – Whirlpool 25m
2.5 oz Centennial (10.5% AA) – Whirlpool 25m

1 oz Centennial (10.5% AA) – Dry Hop 3 Days
1 oz Columbus (15.0% AA) – Dry Hop 3 Days

Kettle Additions:
0.5 ea Whirlfloc Tablets (Irish moss) – added during boil, boiled 15 m
0.5 tsp Wyeast Nutrient – added during boil, boiled 10 m

Yeast:
Safale US-05 – American Ale Yeast

Tasting Notes:

Judged as a BJCP 14B. American IPA

Aroma (5/12):
There is a substantial hop fruitiness that is almost lemony on the nose. The upfront fruitiness is supported by some pine and an earthy, almost musty hop character with spicy undertones. Some grassy dry hops notes are present. The malt is very neutral. In general the hop character on the nose is very muddled.

Appearance (3/3):
The beer is deep gold, almost copper, and surprisingly clear. This is astonishing considering that the beer is bottle conditioned and dry hopped. A nice tight white head persists.

Flavor (8/20):
The hops are upfront and dominated by a lemony citrus quality muddled by some resinous notes of pine and spice. The bitterness is quite sharp and coarse. The malt present is slightly toasty and dry. There is some boozy alcohol on the finish as well as a touch of honey-like oxidation.

Mouthfeel (3/5):
Medium-low bodied with a prickly effervescence. A bit over-carbonated. The hop bitterness borders on astringent.

Overall Impression (4/10):
This beer is a long way from being a great. In particular, I think the hops choices are somewhat poor, creating a muddled and at times conflicting hop character. In the next iteration, I plan to use fewer varieties that are more synergistic than the combination of citrus and pine that I employed in this recipe. The malt character is great — lean and dry — right where I like my IPAs to be. I made the mistake of bottle conditioning this beer which seems to have imparted some oxidization, making it tough to truly judge the merits of this recipe.

Good (23/50)

Developing House Sour Cultures – A Bioreactor Approach

Previously I've been keeping my house sour culture refreshed with frequent feedings of starter wort.

I have typically been keeping my house sour culture refreshed with frequent feedings of starter wort.

Over the past couple of years, I’ve cultured and grown up bottle dregs from a variety of commercial sour beers to complete several different projects. These dregs are a great way to add biodiversity to the commercial blends (like Roeselare) that I typically start a sour beer with and tend to produce a more interesting final product. As I acquired these cultures, I began combining them with the intent of developing a variety of house-mixed cultures of bacteria and yeast that I can maintain and use to completely ferment out sour beers. The intent is to continue shaping these mixed cultures until they get to the point where they can consistently produce quality sour beer in a predictable time frame. I fully expect the blend of microbes within the culture to drift, but hope an eventual homeostasis will take hold within the culture. Currently, I have built three different mixed cultures around a spectrum of cultured microbes harvested from commercial beers.

One of the biggest tasks in maintaining a culture like this is the frequent feedings required to keep a culture viable. The idea of maintaining my cultures through periodic feedings of fresh wort that would eventually provide the steady byproduct of sour beer seemed like a great idea. And so, the idea of a sour culture bio-reactor was born. The idea is pretty basic. I’ve put together a schedule of brew days that in theory will consistently provide nutrition for the culture as well as produce a steady stream of sour beer for evaluation. Every four months I brew a different 3-gallon batch of moderate gravity wort that gets split three ways to feed one gallon of fresh wort to each of my three mixed cultures. On brew day I transfer the previous batches of now fermented beer off the culture to a clean glass aging vessel where it will continue to develop for another 8 months (1-year total fermentation time) before packaging. The cultures are then transferred to the freshly brewed wort for a new round of fermentation. After the initial one-year cycle, the bioreactor will consistently output three, 1-gallon batches of sour beer every four months. The beauty of running three cultures in parallel with the same wort is that I’ll be able to compare side-by-side the impact each different culture has on the finished product. My hope is to experiment with different grain bills to better understand the interrelationship between grain bills, mash temperatures, and mixed culture fermentation.

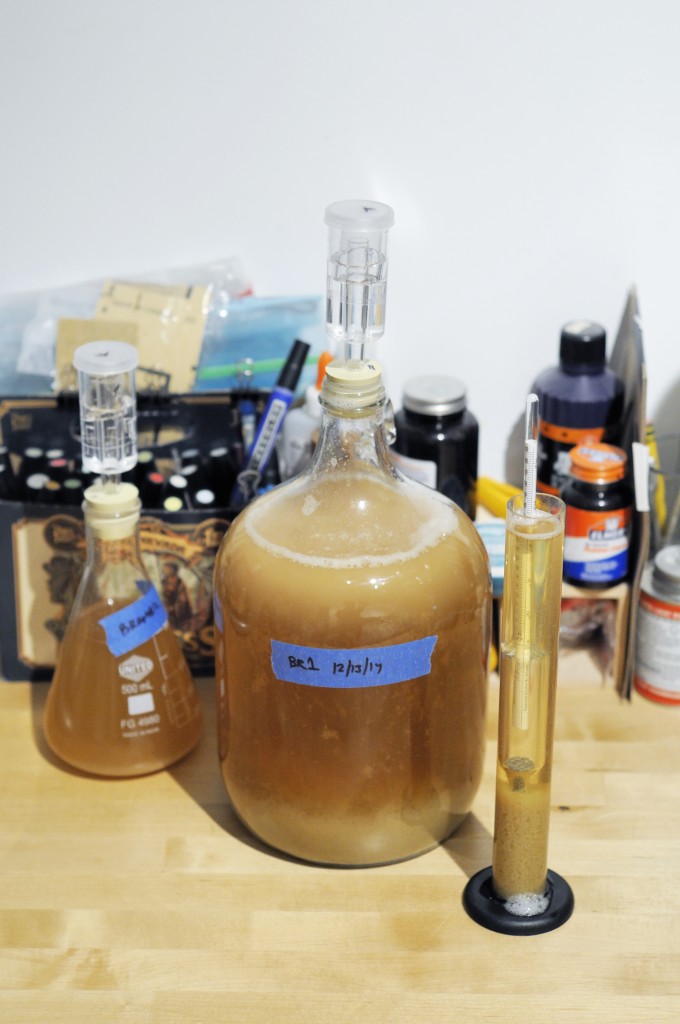
I initially started this project using a single mixed culture. To date, this culture has been through 3 generations of wort. I’ve tasted the first two generations (currently 4-months and 8-months old) and the results have been pretty outstanding; and consistent within the limited sample thus far. I’m optimistic that with some luck and diligence I’ll be able to shape these cultures to the point that they produce sour beer that is both delicious and unique to my brewery.The first round in the bioreactor is complete. The initial recipe was 90% pilsner, 10% carapils with a starting gravity of 1.054.

The first round in the bioreactor ready for fermentation. The initial recipe was 90% Pilsner, 10% Carapils, and had a starting gravity of 1.054.

Cloning Sierra Nevada Pale Ale

Somehow, I’ve managed to never make a true attempt at cloning a commercial beer. This is somewhat regrettable as attempting to reproduce a reliably consistent commercial product is an opportunity to not only test your process controls, but also gain a true understanding of how certain ingredients and techniques can impact a final beer. Personally, no beer would be better for a clone attempt than Sierra Nevada Pale Ale. Not only is this a beer that was very formative in my journey towards craft beer, it is also reliably available, fresh, and consistent.

Sierra Nevada Pale Ale on the left, homebrewed beer on the right.

Sierra Nevada Pale Ale on the left, homebrewed beer on the right.

The first step is researching the beer you’re trying to clone and establishing a set of specifications for that beer. In the case of Sierra Nevada Pale, their website provides a good starting point in terms of gravities, bitterness, and base ingredients. From there, a number of other websites and forums provide additional anecdotal stories and recipes that can inform your own formulation. With the research complete, I formulated the following recipe.

Sierra Nevada Pale Ale Clone Attempt (not Cloned)

SN Pale AleSpecifications:

Size: 3.25 gal
Efficiency: 68%
Attenuation: 75% (measured)

Original Gravity: 1.053
Terminal Gravity: 1.013 (measured)
Color: 11.79 SRM
Alcohol: 5.1% ABV (calculated)
Bitterness: 38.2 IBU (calculated)

Grist:

6.75 lb (93.1%) Briess 2-Row Brewers Malt
8 oz (6.9%) Muntons Crystal 60L

Mash Regiment:

153 °F – Sacc Rest – 30min

Water Treatment:

Extremely Soft NYC Water
4g Gypsum (to mash)
2g Calcium Chloride (to mash)

Hopping:

9 g Magnum (12.6% AA) – 60 m
8 g Perle (8.7% AA) – 30 m
8 g Cascade (6.9% AA) – 10 m
26 g Cascade (6.9% AA) – Whirlpool 15m

Kettle Additions:

0.5 ea Whirlfloc Tablets (Irish moss) – 15 m
0.5 tsp Wyeast Nutrient – 10 mYeast:

Yeast:

WYeast 1056 American Ale™ Starter on stirplate to achieve 1 million cells per milliliter of wort per degree Plato. Use Mr. Malty to determine proper starter sized based on age of yeast package. Pitch into 60°F wort and allow to free rise to 64°F. As fermentation begins to slow, raise temperature to 70°F.

The Results

An important part of the cloning process is a critical review that involves consuming the beer side-by-side with the original, preferably blindly. This allows you to note critical differences which can be projected out to future recipe iterations. Unfortunately, my first attempt clearly did not result in a clone. This however is not a failure, as it allows me to make process and recipe changes to hopefully create a clone in future iterations. Below I’ve outlined the critical differences between my beer, and commercially available Sierra Nevada Pale Ale and the changes I plan to incorporate into the next version of the beer.

Aroma:

  • The homebrew version of the beer has far more yeast character than the commercial beer. Specifically, my beer has a distinct floral and fruity ester (pear and berry) not present in the commercial beer. In future iterations, I plan to pitch a larger starter and provide additional oxidation of the wort to discourage the production of yeast esters.
  • The commercial beer has a brighter grapefruit pith and slightly herbal hop aroma. I plan to dramatically increase the whirlpool addition of cascade hops in my beer.
  • The homebrewed beer has a distinct dark fruit, dark caramel malt aroma. My original intention was to stick with American crystal malts, but was forced to substitute out British crystal malts due to availability. This had a huge impact on the final beer. I will stick to American maltsters in the next iteration.

SN Pale Ale CloneAppearance

  • My beer appears a shade darker than the commercial beer. My beer has better head retention than the commercial beer. In the next recipe iteration, I will dial back the amount of crystal malt to lighten up the beer color.

Flavor

  • Again, my beer has a much richer, darker crystal malt character. This is the by-product of using British crystal malt. The choice of crystal malt made an enormous difference in the final beer. For the next version, I will stick to American maltsters.
  • My homebrewed version is lacking in the fresh cascade hop grapefruit pith flavor. I will dramatically increase the Cascade whirlpool addition in the next iteration of this recipe.
  • My homebrew is sweeter than the commercial version. The commercial beer attenuates to approximately 79% apparent attenuation. My version only attenuated to 75%. I will mash lower for the next version of the recipe to attempt to further dry out the beer.
  • Sierra Nevada Pale Ale has a slightly grainy / tannic finish. This is likely a byproduct of high levels of sugar extraction. I will attempt to boost my extract efficiency for the next version of the beer.
  • My homebrew is less bitter than the commercial version. Increasing my whirlpool additions should bring the beer closer in line with the commercial version.

Eisbock Homebrew Recipe & Review

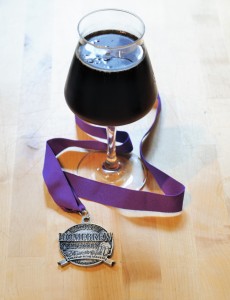
Eisbock: Silver Medal in Category 5 Bock at the final round of the 2015 National Homebrew Competition

Eisbock: Silver Medal in Category 5 Bock at the final round of the 2015 National Homebrew Competition

In many ways, contemporary American craft beer is constantly chasing extremes. Extreme hops, malt, and alcohol are the norm. Eisbock can be seen as one of the original ‘extreme’ beers. It predates the American craft beer movement, but is equally as intense and flavorful as some of the most coveted craft beers. Eisbock manages to maintain a smooth lager character while being a showcase for the intense malt flavors inherent to many of the great German malts.This recipe has done well in competition, winning a silver medal in the Bock category at the final round of the National Homebrewer Competition in 2015.

The myth of eisbock is that it owes its origin to a brewer who inadvertently left a barrel of dopplebock outside in the winter which led to the freeze concentration of the nectar inside. True or not, the science is sound and methodology similar to what I used for this beer. Alcohol inherently freezes at a much lower temperature than water. This trait can be exploited by brewers, allowing them to effectively concentrate the alcohol in their beers while discarding some of the water content.

When designing an Eisbock, my intent was to specifically formulate a base doppelbock that would be lean on caramel character in order to avoid a cloying sweetness once the flavors are intensified during freeze-concentration. Additionally, I wanted to keep the IBUs low as it is has been my experience that freezing a beer will concentrate the bittering compounds. The same logic can be applied to alcohol heat. Providing for a healthy fermentation is key to avoiding excessive fusel alcohols which will be concentrated in the final beer. My focus was on creating rich toasty notes with a solid Munich malt base while including a touch of high lovibond caramel to throw in a bit of dark fruit flavor that is delicious in these types of beers.

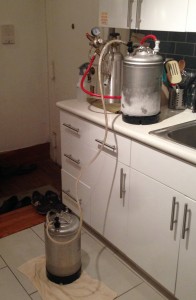
Utilizing C02 and a jumper line to transfer beer keg to keg during the freeze-concentration.

Utilizing C02 and a jumper line to transfer beer keg to keg during the freeze-concentration.

The trick to doing this beer correctly is in the freeze-concentration. I went through approximately 8 freeze cycles utilizing two 3-gallon corny kegs and my kitchen freezer. The basic methodology is to freeze a keg of the beer and then push out the remaining unfrozen liquid to a second keg. It is extremely important to use closed vessels purged with CO2 in order to minimize any risk of oxidizing the beer. Patience is key; multiple incremental freezes that only push a small volume of liquid at a time will help insure you’re pulling out the most concentrated liquid. In the end, I pulled out approximately 32% of the original volume. The liquid that was discarded typically had a specific gravity of near 1.000 meaning that it was primarily water. Sensory analysis of the discarded liquid confirms that it was primarily water. This freeze concentration effectively took my ABV from approximately 7.5% to over 11%.


Eisbock Recipe

Specifications:
Size: 3.25 gal
Efficiency: 74%
Attenuation: 68%

Original Gravity: 1.084
Terminal Gravity: 1.026 (measured)
Color: 18.88 SRM (Before Freeze)
Alcohol: 7.5% ABV (Before Freeze. Approximately 11% after freeze.)
Bitterness: 22 IBU (Before Freeze)

Malt Bill:
7.5 lb (68.2%) Weyermann Munich TYPE II
3 lb (27.3%) Weyermann Pilsner Malt
2 oz (1.1%) Weyermann Caramunich® TYPE III
6 oz (3.4%) Hugh Baird Crystal 130

Mash Profile:
148°F – 60m
155°F – 15m
168°F – 5m

Decoctions used between each step.

Water Treatment:
Extremely Soft NYC Water
2g Gypsum (to mash)
4g Calcium Chloride (to mash)

Hopping:
0.75 oz Hallertauer Mittelfrüher (4.0% AA) – 60 m
0.5 oz Hallertauer Mittelfrüher (4.0% AA) – 10 m

Kettle Additions:
0.5 ea Whirlfloc Tablets (Irish moss) – added during boil, boiled 15 m
0.5 tsp Wyeast Nutrient – added during boil, boiled 10 m

Yeast:
White Labs WLP833 German Bock Lager

Tasting Notes:

Judged as a BJCP 5D. Eisbock

Aroma (10/12):
Rich and decadent malt fills your olfactory nerves. The malt is toasty and reminiscent of heavily browned bread crust. There is a background of rich dark caramel providing additional complexity. Enticing aromas of dark fruit, plum, fig, and perhaps cherry waft from the glass. As it warms, a bit of ethanol is apparent and true to the style.

Appearance (2/3):
Deep brown with only the slightest of tan heads that quickly dissipates. Beer is nice and clear due to the prolonged lagering period.

Flavor (17/20):
Huge display of rich malt. There is some residual sweetness that manages to be kept in balance by some intense toasty, almost drying, malt notes. The malt is wonderfully complex with a round nuttiness, followed by fig, molasses, burnt sugar, and sourdough toast. There is just a hint of hop bitterness and no flavor. Fermentation character is clean with a low level of hot alcohol. No ester or other fermentation character.

Mouthfeel (4/5):
Silky full-body with a smooth medium-low level of carbonation. Mouthfeel is just a touch sticky, but otherwise quite luscious.

Overall Impression (9/10)
Beautiful showcase of the melanoiden-rich Munich malt that comprises the bulk of the grain bill. Rich and decadent, it would be tough to consume more than a bottle of this at a time. This Eisbock is a great sipper to spend some time with slowly consuming and contemplating the broad spectrum of flavors it contains. The beer would be absolutely delicious paired with a sharply acidic aged cheddar.

Excellent (42/50)