A Tale of Three Saisons (with Brett)

Intent. In food, beer, architecture, art, everything — a clear vision is key to truly honing your craft.

Along those same lines, I’ve gotten to the point where the intent of most batches transcends beyond simply creating something delicious to consume. I feel like each batch needs to serve a broader purpose, specifically, learning about the impact of various ingredient choices and processes.

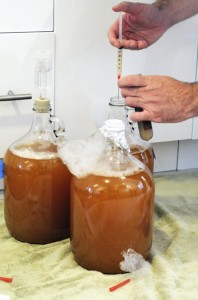
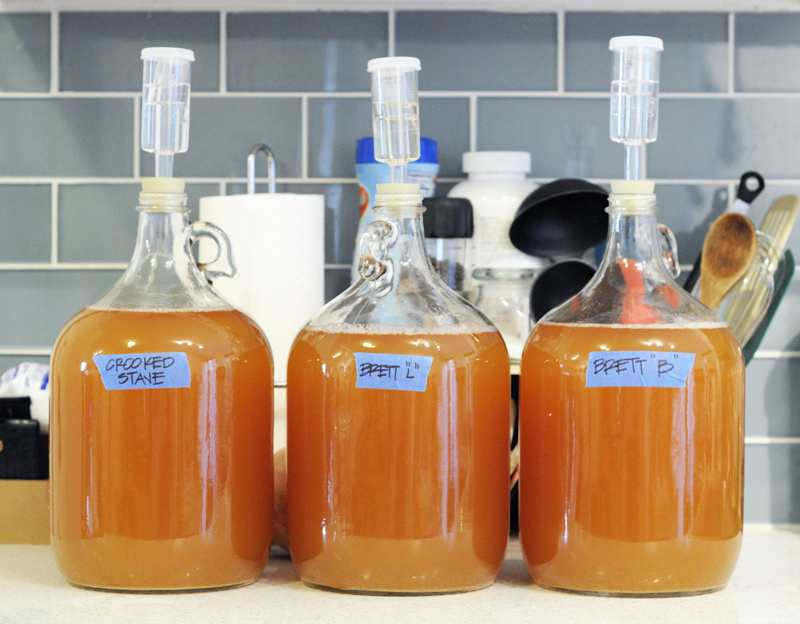
1-gallon each of Brettanomyces Bruxellensis, Brettanomyces Lambicus, and cultured Crooked Stave Surette.

1-gallon each of Brettanomyces Bruxellensis, Brettanomyces Lambicus, and cultured Crooked Stave Surette inoculated saison.

The intent of this beer is to see how citrusy American hops meld with various strains of Brettanomyces. Specifically, I’ve taken a pretty typical saison recipe, tweaked the fermentability of the wort by creating a higher proportion of long-chain sugars to be consumed during a secondary Brett fermentation, and hopped it to higher levels using American varietals. I am using the notoriously fickle Dupont strain which is nice and fruity, but painfully slow — something that will work well with a super-attenuative Brett strain.

Inoculating with cultured Crooked Stave Surette microbes.

Inoculating with secondary microbes.

The base beer was allowed to ferment with Wyeast 3724 until approximately 54% apparent attenuation was achieved (about 3 weeks) before being transferred into secondary 1-gallon fermenters, where each beer was dosed with different bugs:

  • White Labs Brettanomyces Bruxellensis
  • White Labs Brettanomyces Lambicus
  • Cultured Crooked Stave Surette (cocktail of Brett, Lacto, etc.)

With some luck, in about 6-10 months I’ll have bottles of each variety ready for consumption.

The Recipe

Size: 4.54 gal
Efficiency: 72%
Attenuation: 94.0%

Original Gravity: 1.055
Terminal Gravity: 1.003 (Projected)
Color: 5.32 SRM
Alcohol: 6.24% ABV
Bitterness: 16.4 IBU (Calculated but doesn’t account for whirlpool isomerization)

Ingredients:
7 lb (76.7%) Pilsner Malt (Dingemans)
1 lb (11.0%) Munich 10L Malt (Briess)
1 lb (11.0%) White Wheat Malt (Briess)
2 oz (1.4%) Acidulated Malt (Best Malz)

8 g (5.7%) Citra™ (14.1%) – added during boil, boiled 60 m
20 g (14.1%) Citra™ – WHIRLPOOL (14.1%)
1 oz (20.0%) Simcoe® – WHIRLPOOL (13.0%)
2 oz (40.1%) Citra™ Leaf – HOP BACK (13.8%)
1 oz (20.0%) Centennial Leaf – HOP BACK (10.0%)

0.5 ea Whirlfloc Tablets (Irish moss) – added during boil, boiled 15 m
0.5 tsp Wyeast Nutrient – added during boil, boiled 10 m

1 ea WYeast 3724 Belgian Saison™

Mash:
60m – 152 °F
10m – 168 °F

Notes:
Final Volume into Fermenter = 3.5 Gallons
Yeast Required =  125 billion (per Mr. Malty)
Yeast Production Date: 6/26/13
Yeast Starter = 1L @ 1.040 on stir plate (per Mr. Malty) =  4 1/8oz. DME

Fermentation:
1. Chill to 66* F and allow to free rise to room temp (high 70’s)
2. Keep at room temp until fermentation stops
3. Rack to (3) 1-gallon purged FVs and Pitch Secondary Cultures

Secondary Fermentation:
Rack to 3 separate 1 Gallon FVs.
Pitch with (3) different cultures:
1. Brett Bruxellensis (Whitelabs)
2. Brett Lambicus (Whitelabs)
3. Crooked Stave Surette Culture

Brettanomyces Pitching Rate:
White Labs Brett Vial: 50 million / ml
(Per White Labs FAQ: http://www.whitelabs.com/yeast/wlp650-brettanomyces-bruxellensis)

Target Secondary Pitch = 20,000 / ml / degree plato (0.02 million / ml / degrees plato)

12.62 plato X 3785 ml (1 gallon) x 20,000 = 955,334,000 (0.95 billion)

Pitch 19.1 ml of slurry from each vial into one gallon

Reactive Brewing – Czech Pils Brewday and Recipe

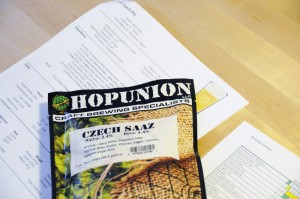
Hop Union Czech Saaz leaf hops packaged in one ounce nitrogen purged opaque bags.

Hop Union Czech Saaz leaf hops packaged in one ounce nitrogen purged opaque bags.

Most of the time, brewdays go smoothly; there can be a zen-like dance between brewer, equipment, and ingredients  where all marks are hit, stress is minimized, and all is right in the brew-world. This was not one of those days. Learning how to react to the variables thrown at you during the course of a brewday and making intelligent reactions is critical to becoming a better brewer. No matter how much preparation goes into your brewing, things happen; your reactions determine what impact unexpected variables will have on the final beer.

Before I get into the brewday shenanigans, let’s talk about why I’m brewing a Czech Pils.
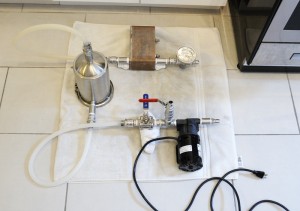
Blichmann Hop Rocket inline between the pump and plate chiller.

Blichmann Hop Rocket inline between the pump and plate chiller.

First and foremost, Czech Pils is delicious – enough said. Czech Pils also happens to be a clean, hop-forward lager that showcases the Saaz hop. This style would serve as the perfect platform for testing out my new toy – a Blichmann Hop Rocket. This contraption acts as a hop back, sitting in-line on the hot side between pump and chiller. This allows you to run hot wort through a bed of leaf hops and then chill almost immediately. It prevents too much trub from getting into the chiller, but more importantly gives another opportunity to push hop aroma and flavor into your beer. For this recipe, I am specifically interested in seeing how much and what kind of hop character the hop back provides. In formulating the hop bill for this recipe, there is a singular bittering charge with everything else going into the hop back post-boil. I can be reasonably confident that any hop aroma or flavor can be primarily attributed to the hop back addition.

The Brewday
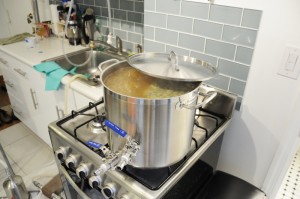
Living on the edge, boiling 4.5-gallons in a 5-gallon kettle.

Living on the edge, boiling 4.5-gallons in a 5-gallon kettle.

Problem 1: Yeast Selection
My problems started three days before the scheduled brewday when I went to pick up ingredients at my local homebrew shop. The recipe I developed originally called for Wyeast 2001- Urquell Lager. Unfortunately, my local shop didn’t have this strain in stock. A quick look at Wyeast’s web site led me to select Wyeast 2278 – Czech Pils as a back up. Luck would have it that they had this in stock, but the packs were 5 months old. The brew shop offered to give me a second pack at no cost, but adding yeast that old to a delicate lager was not an idea I wanted to entertain. I finally ended up selecting Wyeast 2124 – Bohemian Lager. This strain is the work horse used in most commercial lager around the world, and should work well for my beer. Best of all, the pack was only a week old. The lesson to take away is that when it comes to yeast, I’d rather compromise on strain selection and get the freshest yeast I can, rather than risk using yeast that likely has low viability – especially when brewing a lager.
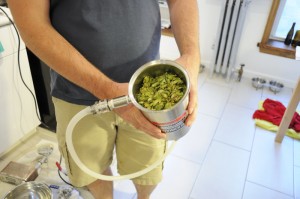
Hop back fully loaded with 2 oz. Czech Saaz hops.

Hop back fully loaded with 2 oz. Czech Saaz hops.

Problem 2: Where’d my Volume Go?
My mash went perfect; all temperatures and steps were hit. The problem occurred when I transferred everything to my kettle. When I measured my pre-boil volume I was about 0.7 gallons short of my target. My initial reaction was to start heating water to add back to my mash tun and collect more runnings. Stepping back and pausing for a moment, I decided to measure the gravity of the runnings I had collected in order to calculate how much sugar I had already extracted. It turned out that while my volume was low, I had the right amount of sugar in solution to hit my projected target gravity. To correct the problem, all I needed to do was simply top up my kettle to the projected pre-boil volume. To avoid this problem in the future, I plan to recalculate my mash tun dead space to better hit my projected volumes.
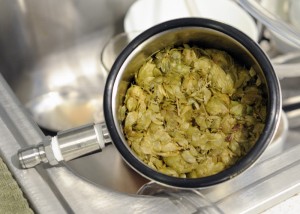
Spent hops in hop back.

Spent hops in hop back.

Problem 3: Cheesy Saaz Hops
For this recipe, I was working with two lots of Saaz hops that I had acquired from two different shops. The first leaf hops were sealed in clear vacuum bags that had been broken down by the brew shop into smaller lots, and were noticeably brown. The second set of hops were sealed in nitrogen purged Hop Union opaque bags. Since the hops in the clear bags didn’t look great, I had planned to use them to bitter the beer and use the Hop Union sealed hops in the hop back. Once I opened the clear bag hops of dubious provenance, it became clear that they had tell-tale oxidized hop smell of cheese / stinky feet. There was no way I could use these hops in a beer, even for bittering. With the aid of brewing software, I was able to replace the 2 ounces of cheesy Saaz bittering hops with 12 grams of Citra hops; the only other hop I had on hand. This is an extremely unconventional hop to use in a Czech Pils, but in a pinch it should work. There may be some residual American hop character in the background, but I find that preferable to an oxidized hop character.

Problem 4: The Hop Back Drank All My Work
My boil went well. I knew based on the Hop Rocket’s design that it would be difficult to determine how much wort the leaf hops would absorb, and how much wort would be trapped in the Hop Rocket canister. As it turns out, I lost about a half-gallon of wort within the hop back. This lost volume will be taken into account for future beer formulations that use the hop back.

Problem 5: Warm Ground Water
We’ve been riding a heat wave here in Brooklyn with high humidity and temperatures in the mid-90’s. Consequently our ground water has warmed considerably. Even with completely throttling down the wort flow rate through my plate chiller, I was only able to get the wort down to 68° F. With lagers, I like to pitch around 46° F and ferment 48-50° F. After running the wort through my chiller I placed it in my fermentation fridge to bring it down to 46° F before oxygenating and pitching yeast. This took about 4 hours, but should help ensure a clean lager fermentation.

The Recipe

Size: 3.25 gal
Efficiency: 72% (Measured)
Attenuation: 77% (Projected)

Original Gravity: 1.052 (Measured)
Terminal Gravity: 1.012 (Projected)
Color: 5.09 SRM
Alcohol: 5.24% (Projected)
Bitterness: 48.4 IBUs

Ingredients:
6.5 lb (91.2%) Bohemian Pilsner Malt (Weyermann)
6 oz (5.3%) Cara-Pils® Malt (Briess)
2 oz (1.8%) Melanoidin Malt (Weyermann)
2 oz (1.8%) Acidulated Malt (Weyermann) – Added for pH Correction

90m       1 oz (29.2%) Czech Saaz Leaf (Hop Union Flushed Bag) (2.4% AA)
90m       12 g (12.4%) Citra™ Pellets (14.1% AA)
15m       0.5 ea Whirlfloc Tablets
10m       0.5 tsp Wyeast Nutrient
0m          2 oz (58.4%) Czech Saaz (Hop Union Flushed Bags) (2.4% AA) – Hop Back

WYeast 2124 Bohemian Lager™
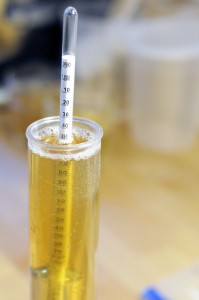
Original Gravity 1.052

Original Gravity 1.052

Mash Regiment:
10m       147 °F
50m       153 °F
10m       168 °F

Notes:
Final Volume into Fermenter = 2.75 Gallons
Yeast Required =  200 billion (per Mr. Malty)
Yeast Production Date: 7/1/13
Yeast Starter = 1L @ 1.040 on stir plate (per Mr. Malty). Use 1300ml Starter (5.5 oz DME)

Fermentation:
1. Chill to 46* F and keep at 48°F until activity slows (1 week+).
2. Raise temp to 58°F 3 days
3. Crash to 32°F and lager 21 days
100% Sour Mash Berliner Weisse Tasting

Less than a week after pitching yeast, my Berliner Weisse was carbonated and ready for consumption. The beer finished just in time for the NYC Homebrewers Guild annual picnic and the intense NYC heat (and humidity) wave that followed shortly afterwards. I couldn’t have made a beer in a more timely manner. At only 3.4% ABV, I was able to push it from grain to glass faster than any other beer I’ve brewed.

100% Sour Mash Berline Weisse

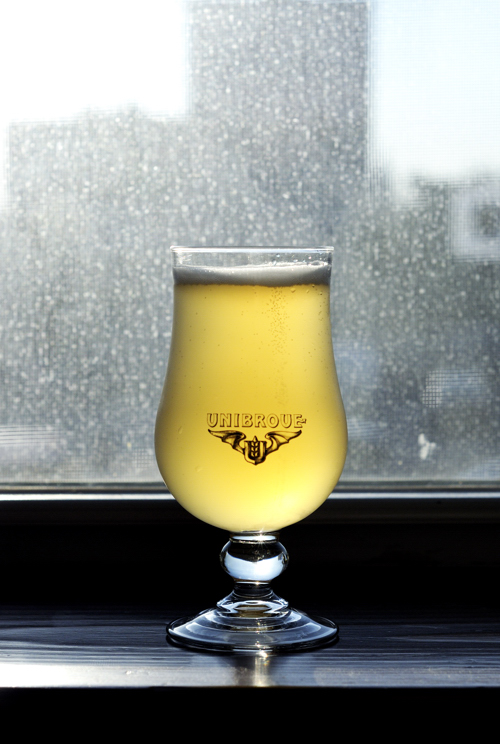
Perhaps the best beer to consume during the doldrums of a NYC heat wave?

Beer Tasting

Judged as a BJCP Category 17A Berliner Weisse.

Aroma (10/12)
Initially the beer presents with a nice and clean, tangy lactic aroma that is in some ways reminiscent of the acidity found in yogurt. In the background is a round and almost honey-like pilsner malt aroma with a hint of toasted cracker. Also apparent is a very light herbal hop aroma that is a bit out of place in the style, but welcome in such a young beer. There is a light touch of a pear ester. No diacetyl, DMS, or other off-flavors.

Appearance (3/3)
Quite hazy and very pale. There is a bright white foam that easily builds and persists throughout consumption.

Flavor (16/20)
Simple and delicious. The beer somehow manages to have an acidity that is both round and soft, while also quite intense and refreshing. The acid is clean and pleasant. There is a nice simple and easy-drinking malty character that showcases the pilsner malt sweetness while having a crisply dry crackery finish (probably from the wheat). None of the hops I got on the nose can be tasted. The malt is maybe a hair too sweet for the style. There is just a hint of perceptible bitterness.

Mouthfeel (4/5)
The dryness of this beer combines with the acidity and medium-high carbonation to be quite crisp. The body is maybe a touch full. There is no hint of thinness or the watery character that is often found in low-alcohol beers.

Overall Impression (8/10)
This is an excellent example of the style. It captures the acidity and refreshing qualities that are the hallmark of the style and hits all the right marks in terms of malt character. There are none of the off-flavors sometimes associated with sour mashes. The only detractor is that perhaps it is a touch sweet; likely caused by me undershooting my attenuation goals. To make this beer better, I would allow it to ferment for an extra day or two and hopefully squeeze a couple more points of  attenuation out of it.

Total: 41/50 (Excellent)

Critical Path Brewing

When not brewing, I work as an architect. While there is seemingly little cross-over between the two, both are analogous in their diverse blend of science and art. One thing my day job has brought to my brewday is the concept used in construction of critical path scheduling. While not the sexiest topic to talk about, it has given structure and efficiency to my brewdays.

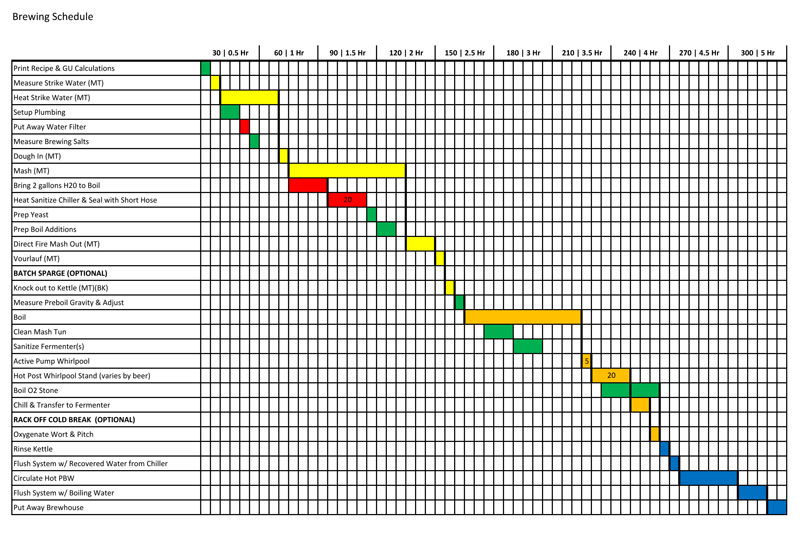
My Brewday Schedule - Critical Path Items are connected in the schedule using bold vertical lines. Non-critical tasks are taken care of while critical items are taking place.

My Brewday Schedule – Critical paths are connected in the schedule using bold vertical lines. Non-critical tasks are taken care of while critical paths are taking place.

In a nut shell, critical path scheduling dictates that your overall project (brewday) can never take less time than the sum of all critical paths (tasks) within the overall schedule. If your goal is to shorten your overall project, you must look at ways to shorten your critical paths. A critical path is essentially any task which must be completed before other critical paths can begin. In brewing, a common critical path would be mashing. You can’t start boiling (another critical path) until the critical path of mashing is complete. By looking at your brewday in this manner, it illustrates all of the other non-critical path items (cleaning, prepping items, putting away items, etc.) that can occur while critical path items are being completed. This methodology exposes areas of unused time during the brewday and allows you to be efficient with your time and decrease the time required to complete a brewday.

Geeky, yes, but it works. If you really want to geek out, you can download my Excel spreadsheet, here.

Back in the Brew House Again

When I first got into brewing, I started small and simple. Very little process control was in place, the equipment was basic and easy to use, and the beer turned out… okay. As time went on, my brewery grew organically to include more and more pieces of specialized equipment whose purposes varied, but generally involved making brewdays easier or giving me a greater degree of control over the process. This is a pretty typical evolution that homebrewers go through, and something that offers the opportunity for your brewhouse to grow in sync with your brewing skills.

After relocating to Brooklyn, I took the opposite approach. Instead of organic growth, I preplanned my system on paper, acquired my parts, and then built-out the brewery over the course of several evenings. This was an exciting and daunting task; not something I’d recommend for someone just learning how to brew.

Acquisition of Parts and Build-Out

For what seemed like weeks, strange and wonderful pieces of stainless steel began arriving at my apartment. Thanks to the folks from places like Bargain Fittings, More Beer, and Williams Brewing, finding the parts I needed was fairly easy. The most difficult item to track down was a thick walled stainless steel kettle with a multi layered bottom in a 5-gallon format. Unfortunately, most 5-gallon kettles are designed for entry level or partial boil extract brewers. I wanted something sturdy that would provide better heat dispersion and retention. I ended up with a great little kettle from Midwest Brewing that fit the bill perfectly.

The actual build-out went simply enough. It was important to diagrammatically layout how all the components were fitted out in order to procure the right fittings, but also have a pseudo installation manual for building. From there, piecing together the components was rather easy and happened quickly. The most difficult task was using a step-bit to place holes into my thick walled kettle. My cordless drill was barely up to the task. It took multiple trials and battery charges, but in the end I successfully placed two holes into my kettle’s walls. Lubricant is your friend when drilling (yes, I said that) and keeps the bit cool while cutting through the kettle walls.

The Build-Out:

Ready to be assembled.

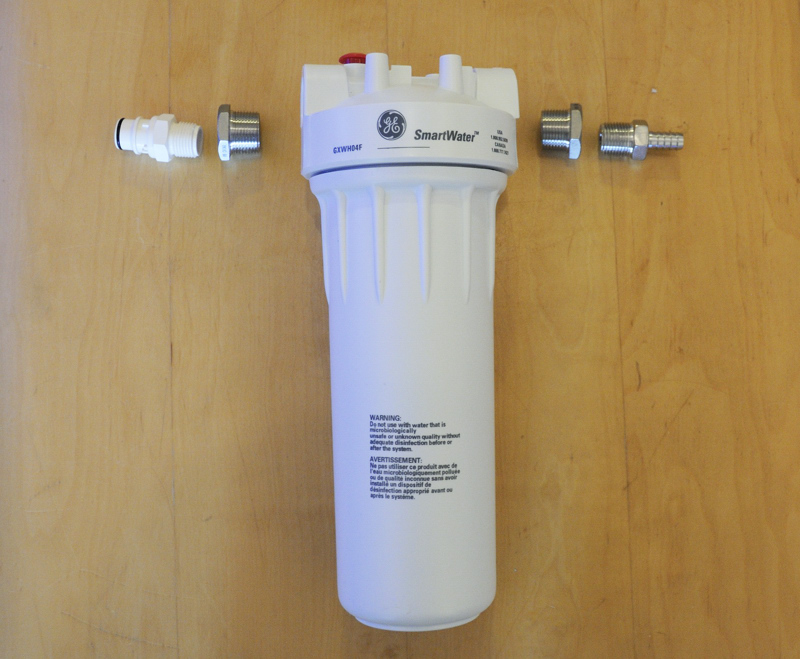
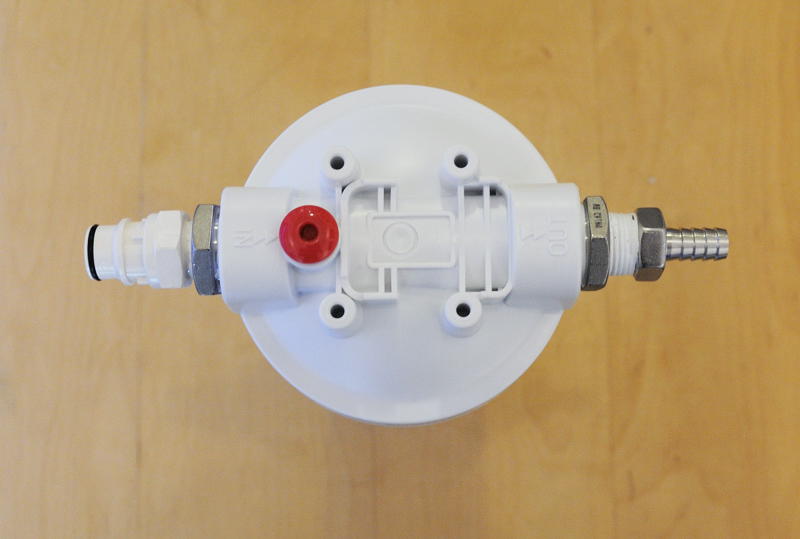
GE water filter ready to be assembled. There isn’t much chlorine in NYC water, but the filter is a relatively easy way to provide some piece of mind.

GE water filter with quick disconnects allows me to quickly fill my kettle with filtered water. Thread onto kitchen faucet.

Quick disconnects allow me to quickly fill my kettle with filtered water. The plastic quick disconnect inlet snaps onto a hose with a threaded adapter for my kitchen faucet. The same hose is used later in the process to connect to the inlet on my my plate chiller. The barbed outlet connects to a hose used to fill my mashtun with strike water.

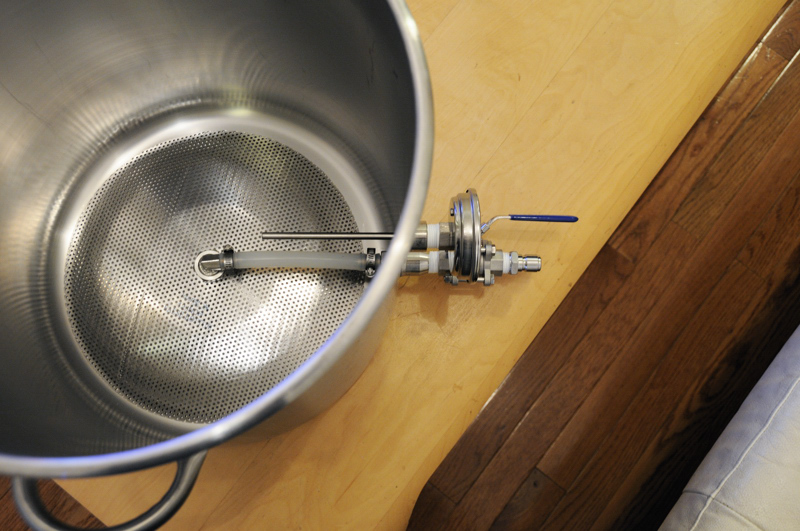
42 quart Polarware mashtun with stainless steel false bottom, 3-peice ball valve with quick disconnect, and thermometer.

42 quart Polarware mashtun with stainless steel false bottom, 3-piece ball valve with quick disconnect, and thermometer. Strike water is directly fired in the mashtun.

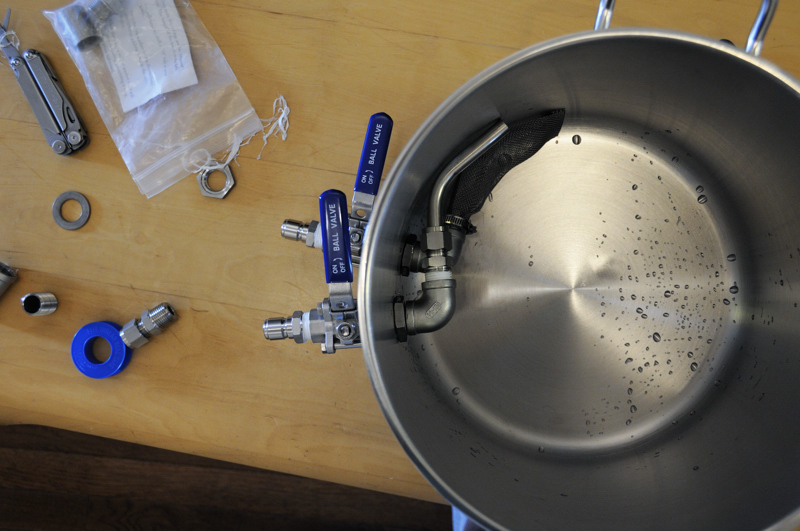
My 5-gallon kettle was installed with an outlet and tangential inlet for whirlpool purposes. All equipment is fitted out with male stainless steel quick disconnects. All hoses are fitted with female stainless quick disconnects. This allows for maximum flexibility when chaining together equipment.

My 5-gallon kettle was installed with an outlet and tangential inlet for whirlpool purposes. Both bulkheads are fitted with 3-piece ball valves allowing for complete disassembly and cleaning. All equipment is fitted out with male stainless steel quick disconnects. All hoses are fitted with female stainless quick disconnects. This allows for maximum flexibility when chaining together equipment. The kettle screen on the outlet valve was a flawed design on my part and has since been removed due to excessive clogging. I know use a simple 90 degree elbow for the pickup and use hop bags to contain most hop material.

Individual fittings ready to go together.

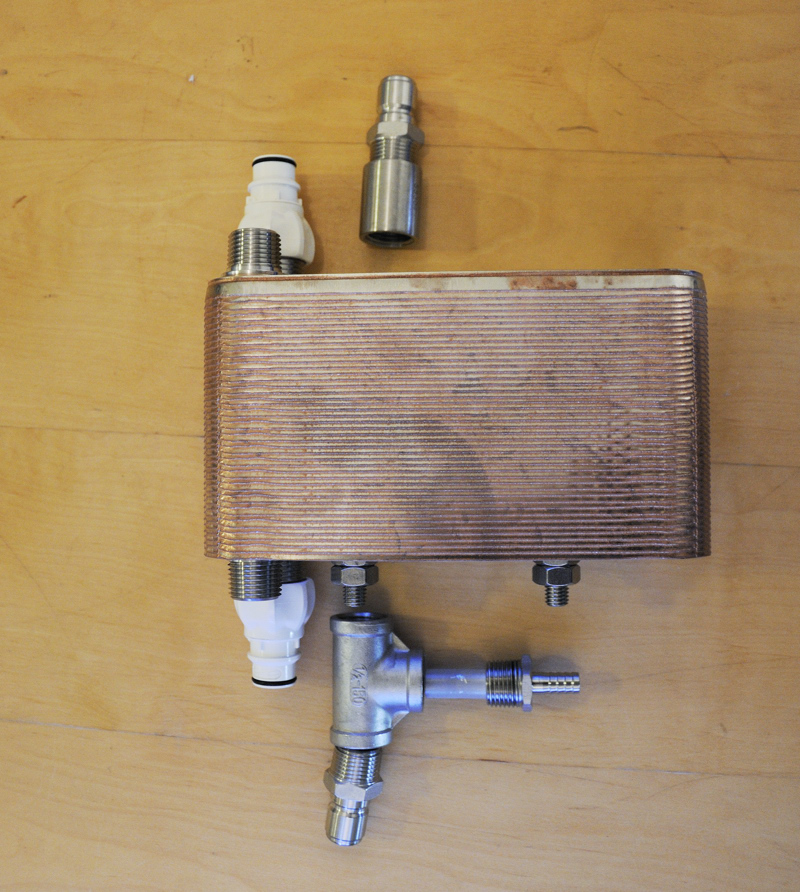
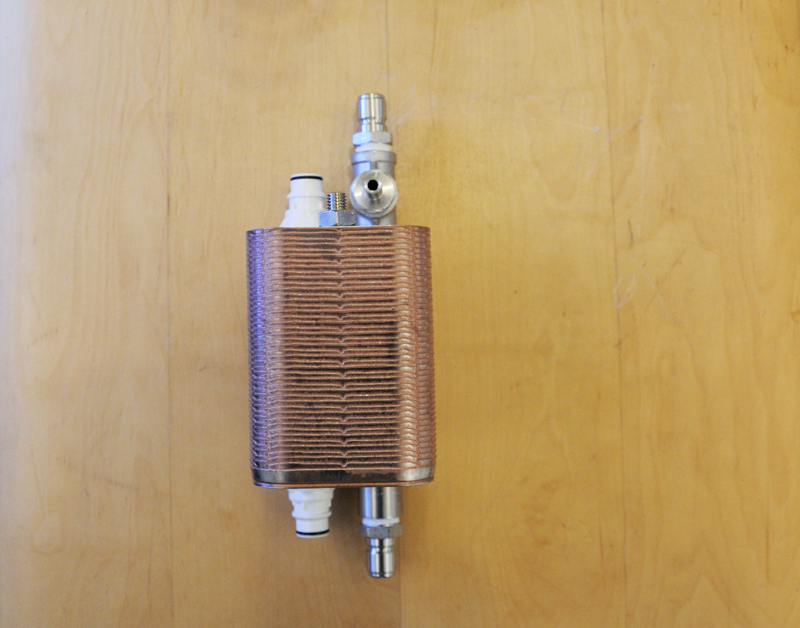
Blichmann Therminator with individual fittings laid out and ready to go together.

Fitted out with plastic quick disconnects on the water side and stainless quick disconnects on the wort side. I iniatially installed an inline O2 stone which has since been removed due to excessive foaming and concerns about sanitation.

Fitted out with plastic quick disconnects on the water side and stainless quick disconnects on the wort side. I initially installed an inline O2 stone which has since been removed due to excessive foaming and concerns about sanitation.

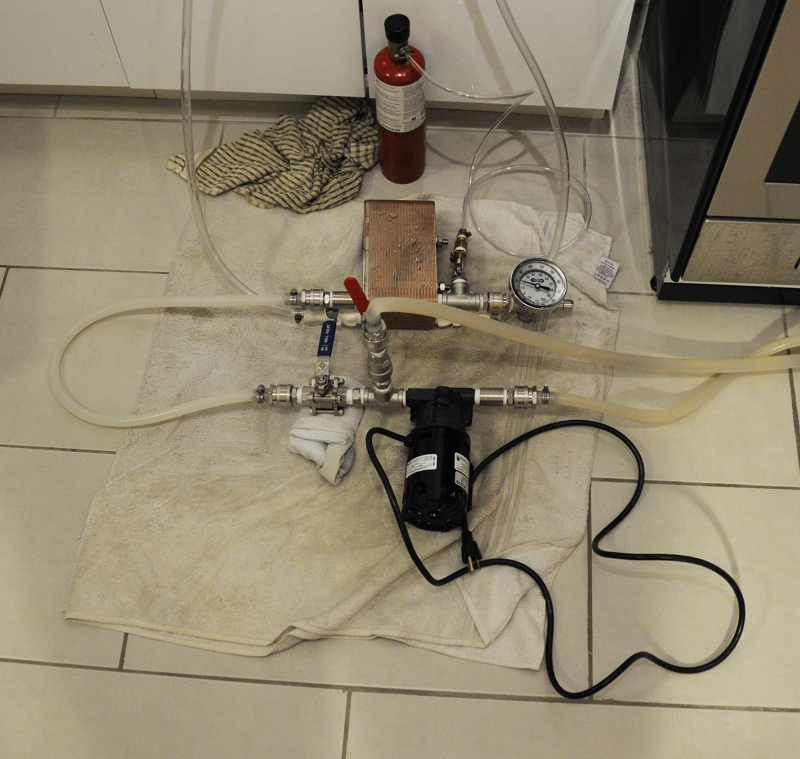
March Pump and fittings. I've installed the output side of the pump with two circuits. One can go straight back to the kettle for whirlpooling. The other circuit goes to the plate chiller and back to the kettle.

March Pump and fittings. I’ve installed the output side of the pump with two circuits for hot liquid. One can go straight back to the kettle for whirlpooling. The other circuit goes to the plate chiller and on to the fermenter. An inline thermometer on the plate chiller outlet tells me the temperature of wort heading to my fermenter.