Single Tap IPA 3.0 Recipe & Review

Over the years I’ve brewed lots of different IPAs. Lately however, I’ve been focused on developing Single Tap, my house IPA. This third generation recipe has its roots in a beer I brewed back in 2012 which won a first place ribbon in the first round of the National Homebrew Competition. Over the years, the recipe has been simplified, with the notion that every ingredient should have a justifiable reason for its inclusion. While the recipe is always changing, the heart of this beer is focused on providing a toasty, yet lean, highly-attenuated malt background and contrasting it against a ton a big American hop flavor and aroma. I am able to keep the bitterness low compared to other IPAs by pushing attenuation to the point that little bitterness is needed for balance.

Single Tap IPA 3.0 Recipe

Size: 4.32 gal – With system and trub losses, I typically end up with 2.75 gallons in the fermenter.
Efficiency: 72% (Measured)
Attenuation: 82.8% (Calculated)

Original Gravity: 1.070 SG (Measured)
Terminal Gravity: 1.012 SG (Measured)
Color: 9.71 SRM
Alcohol: 7.6% ABV (Calculated)
Bitterness: 24.0 IBUs – Calculations don’t take into account bitterness gained through whirlpool additions, which is considerable.

Fermentables:
5 lb (45.5%) – Briess 2-Row Brewers Malt
3 lb (27.3%) – Crisp Maris Otter
1 lb (9.1%) – Weyermann Vienna Malt
8 oz (4.5%) – Briess White Wheat Malt
6 oz (3.4%) – Crisp Crystal 45
2 oz (1.1%) – Weyermann Acidulated Malt – added for pH correction
1 lb (9.1%) Table Sugar – added during boil

Hop Additions:
4 g  Citra™ (13.7% AA) – First Wort Hop
0.5 oz Sterling (7.5% AA) – 10 m
0.5 oz Centennial (10.5% AA) – 10 m
2 oz Citra™ (13.7% AA) – Post Boil Whirlpool – 25 m
3 oz Amarillo® (8.7% AA) – Post Boil Whirlpool – 25 m
1 oz Centennial (10.5% AA) – Post Boil Whirlpool – 25 m
0.5 oz Sterling (7.5% AA) – Post Boil Whirlpool – 25 m

0.5 oz Centennial (10.5% AA) – Dry Hop 3 Days
1.5 oz Citra™ (13.7% AA) – Dry Hop 3 Days
1.5 oz Amarillo® (8.7% AA) – Dry Hop 3 Days

Kettle Additions:
0.5 ea Whirlfloc Tablets – 15 m
0.5 tsp Wyeast Nutrient – 10 m

Yeast:
WYeast 1056 American Ale™ – 1600ml 1.040 starter on stir plate.

Water Additions:
Soft NYC Water
6g Gypsum (Calcium Sulfate)
2g Calcium Chloride

Mash Regiment:
Saccarification Rest – 149° F, 60m
Mashout Rest – 168° F, 5m
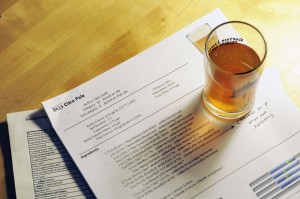
Single Tap IPATasting Notes:

Judged as a BJCP Category 14b American IPA

Aroma (11/12)
Putting your nose in this glass unveils a cornucopia of hop-derived fruit aromas. Most obvious is the mango, but there are also big notes of orange, tangerine, and a hint of peach. There is just a touch of grassiness and pine resin. Underneath the hops, there is a light hint of toasty and bready malt. Very clean. Not alcohol or other off-aromas.

Appearance (3/3)
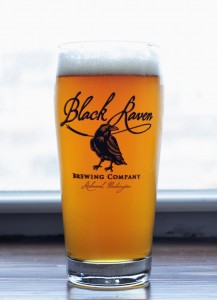
Beer is a slightly hazy and light copper in color. The glass is capped by a frothy white head of exceptional persistence and lacing.

Flavor (15/20)
This beer is bursting with bright hop flavor. There is tons of citrus, some tropical fruit, and just a touch of grass. The beer is extremely dry, but the ripe fruity hops give a slight perception of sweetness. Bitterness is considerably less than most commercial examples and could be bumped up just a touch. Underneath all of the hops is a moderately toasty and bready malt component which is quite nice. The hop flavor carries through and lingers a touch in the finish.

Mouthfeel (5/5)
Medium bodied with a very nice creaminess that finishes clean. Moderate carbonation.

Overall Impression (8/10)
This is the best iteration yet of my constantly evolving IPA recipe. The dryness of the beer melds well with intense juicy hops achieving a balance that makes the beer extremely quaffable. While it could use just a hair more bitterness and perhaps even a touch more dryness, the beer in the glass is a wonderful example of the style. This homebrew easily stands up to the best commercial examples.

Total: 42/50 Excellent

Citrillo Pale Ale Recipe and Brewday

citraUpdate 3/25/14: Tasting and Review

I have a bit of nostalgic love for the humble American Pale ale. I can only assume this sentiment is shared by a large number of craft beer drinkers that came of age during the beginning of the craft beer explosion we’re currently in the midst of. Experiencing the relative extremity of a beer like Sierra Nevada pale ale for the first time was somewhat shocking and admittedly, not instantly pleasurable. To my inexperienced palate, the beer was extremely bitter and intense, something radically different from the adjunct-laden lagers I cut my consumption teeth on. It took some time to acclimate, but since those early experiences with SNPA, I’ve rarely looked back.

Revisiting SNPA today makes me realize just how much my palate has changed. The  transition my drinking habits have made towards bigger and bolder closely aligns with the shifts that we’ve seen within the APA category. SNPA would now barely register as a pale ale compared to the highly alcoholic hop bombs that are the most popular examples of the style today. My goal with this recipe is to capture the intense tropical and citrusy hop flavor and aromatics that today’s most popular APAs possess (Zombiedust comes to mind) while pairing down the alcohol to be more in-line with something like SNPA.

Citrillo Pale Ale Recipe

Size: 4.0 gal – My goal is to net 2.75 gallons into the fermenter after hop-related and equipment losses.
Efficiency: 68%
Attenuation: 78.0% (estimated)

Original Gravity: 1.056 SG
Terminal Gravity: 1.012 SG (estimated)
Color: 8.82 SRM
Alcohol: 5.76% ABV (estimated)
Bitterness: 4.5 IBU – Note, my software doesn’t take into account isomerization during the whirlpool where I am getting the majority of my bitterness.

Grist:
7.75 lb (81.6%) 2-Row Brewers Malt (Briess)
1 lb (10.5%) Vienna Malt (Weyermann)
6 oz (3.9%) 2-Row Caramel Malt 40L (Briess)
4 oz (2.6%) 2-Row Caramel Malt 10L (Briess)
2 oz (1.3%) Acidulated Malt (Weyermann) – Used for pH Adjustment

Hopping:
2 g Citra™ (13.7% AA) – 60 m
2.75 oz Citra™ (13.7% AA) – Whirlpool 20m
1.25 oz Amarillo® (8.7% AA) – Whirlpool 20m

3 oz Amarillo® (8.5% AA) – Hop back. Unfortunately, my hop back broke during the brew day. In lieu of the hop back addition, I ended up adding the hop back hops to my kettle with 5 minutes left in the whirlpool.

1.5 oz Citra™ (13.7% AA) – Dry Hop 3 Days
0.75 oz Amarillo® (8.5% AA) – Dry Hop 3 Days

Kettle Additions:
0.5 ea Whirlfloc Tablet – 15 m
0.5 tsp Wyeast Nutrient – 10 m

Yeast:
WYeast 1056 American Ale™ (1 very fresh packet)

Mash Regiment:
Saccharification Rest – 154 °F – 60m
Mashout – 168 °F – 5m

Fermentation:
1. Chill to 60°F and let rise to 64°F. Hold until activity begins to slow.
2. Raise temp to 70°F until all activity is complete.
3. Dry hop at room temp (74°F or so)
4. Crash to 32°F 2 days then package.

A New Take on Single Tap IPA

Hops!Update: Single Tap IPA Reviewed

In the past, I’ve had good luck brewing my IPA. My standard recipe has won a number of awards and tastes great. That being said, my attention span is short and it is time to change things up. Between the fresh 2013 hops I had ordered in bulk (from Hops Direct) and capabilities built into my current brewery, the time was nigh to make some tweaks to Single Tap.

On the brew house side, I am now able to do a pump-driven whirlpool. This allows me to better simulate the extended whirlpool often done with the best commercial IPAs. Additionally, I now have a hop back that allows for one last infusion of hops directly before going into my plate chiller to cool. Finding Amarillo hops during the 2013 brewing year was nearly impossible. I’ve overcompensated this year by purchasing massive amounts of the 2013 Amarillo crop, which this recipe has been built around. I’ve also included a small charge of Sterling hops — a tip I picked up from Mitch Steele of Stone Brewing during last year’s National Homebrewers Conference. (The idea is that the Sterling will add a bit of complexity and nuance to what is otherwise a citrus heavy hop bill.)

Single Tap IPA Recipe

Size: 4.32 gal – My goal is to net just under 3 gallons into the fermenter.
Efficiency: 70% – Calculated
Attenuation: 75.7% – Calculated based off of OG and FG readings.

Original Gravity: 1.066 SG – Measured
Terminal Gravity: 1.016 SG – Measured
Color: 10.78 SRM
Alcohol: 6.58% ABV – Calculated
Bitterness: 63.2 IBU – Actual measured IBUs will likely be a bit higher. My software doesn’t account for the whirlpool hop contribution of bitterness.

Grist:
4.5 lb (38.3%) 2-Row Brewers Malt (Briess)
4 lb (34.0%) Golden Promise Malt (Crisp)
2.25 lb (19.1%) Vienna Malt (Weyermann)
8 oz (4.3%) White Wheat Malt (Briess)
6 oz (3.2%) Caramunich® TYPE II (Weyermann)
2 oz (1.1%) Acidulated Malt (Weyermann) – for pH adjustment

Hopping:
6 g Columbus (15.0% AA) – First Wort
20 g Sterling (7.5% AA) – 15 m
14 g Centennial (10.5% AA) – 15 m
1 oz Amarillo® Leaf (9.6% AA) – 10 m
12 g Columbus (15.0% AA) – 10 m
1 oz Amarillo® Leaf (9.6% AA) – Whirlpool 20m
14 g Centennial (10.5% AA) – Whirlpool 20m
8 g Sterling (7.5% AA) – Whirlpool 20m
3 oz Amarillo® Leaf – Hop Back

1 oz Centennial (10.5% AA) – Dry hop 3 days
2 oz Amarillo® (8.7% AA) – Dry hop 3 days

Kettle Additions:
0.5 ea Whirlfloc Tablet – 15 m
0.5 tsp Wyeast Nutrient – 10 m

Yeast:
1 ea Wyeast 1056 American Ale™ – 1400ml starter on stir plate

Mash Regiment:
Saccharification Rest – 150 °F – 60m
Mashout – 168 °F – 5m

Fermentation:
1. Chill to 62 °F and keep at 64 °F until activity slows (4-6 days).
2. Raise temp to 68 °F until fermentation stops.
3. Crash to 32 °F (2 days)

Pork Belly Confit Sandwich

I’m bringing gluttony back. And pork shall be my accomplice. Heady and emboldened by my previous duck confit success, I decided it was time to confit something even more decadent than duck — pork belly. It seems slightly absurd taking a cut of meat that is primarily fat and slowly cooking it in a bath of more fat, but this recipe creates one of the most succulent bites of meat you’ll ever eat. Absurd or not, it is delicious.

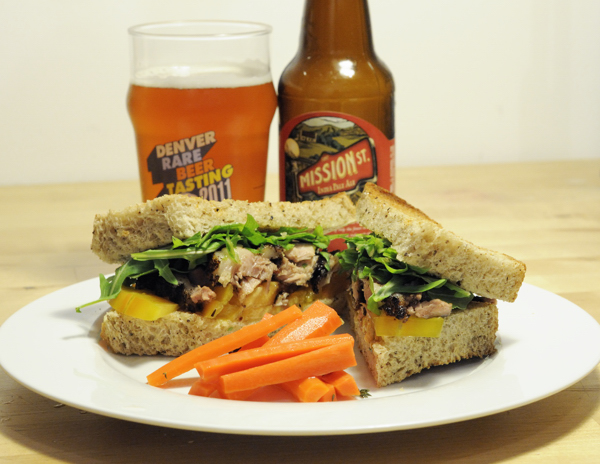
Pork belly confit, baby arugula, and heirloom tomato on homemade spent grain sourdough bread. Paired with a side of pickled carrots and Mission Street IPA.

My take on the humble BLT sandwich. Pork belly confit, baby arugula, and heirloom tomato on homemade spent grain sourdough bread. Paired with a side of pickled carrots and Mission Street IPA. The hop notes in the IPA complement the peppery arugula while the bitterness cuts through the fatty pork belly. At $6.99 and six-pack, Mission Street IPA, brewed by Firestone Walker and re-branded by Trader Joe’s, is a great value.

Note: The recipe for pork belly confit was adopted from Michael Ruhlman and Brian Polcyn’s book Charcuterie. This book goes into great detail about confit, rendering fat, and the greater world of charcuterie.

Step 1 – Prepare Your Fat

One of the more difficult requirements of confit is collecting the large amount of fat needed to cook your protein in. While lard is readily available at many markets (look for ‘Manteca’) it tends to be highly processed and hydrogenated. Some butcher shops will sell their own house rendered lard, but it is just as easy to buy some pork fat back and render it yourself. The process is pretty basic. The fat back is diced and then slowly cooked with a bit of water until all of the moisture is cooked out and you’re left with pure melted fat. The liquid is then strained of solids and allowed to solidify. For this recipe I rendered out about 6 pounds of fat back for use in the confit.

Step 2 – Cure Your Pork Belly

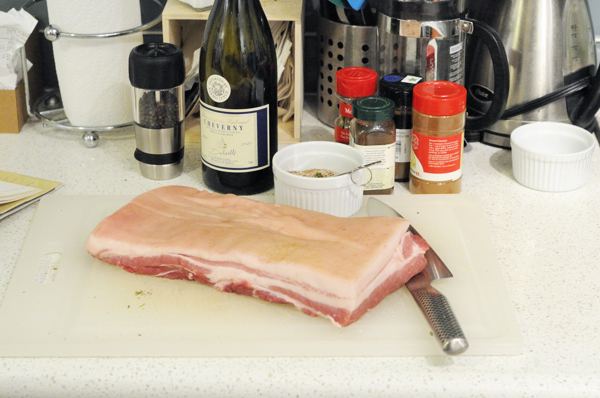
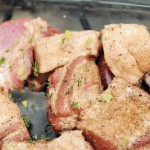
Pork belly, salt, herbs, and a dry white wine.

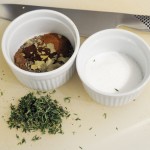
Twenty-four hours before you’re ready to confit your pork belly, the meat is cured. To do this, a mixture of salt and herbs is rubbed over the meat, which is then submerged in a dry white wine and placed in the refrigerator for 24 hours. This infuses the meat with flavor and gives it a preservative quality should you decide to store the meat for future use. I used Jim Drohman’s Pork Belly Confit recipe found in Michael Ruhlman and Brian Polcyn’s book Charcuterie. You can find an online version of the recipe here.

Step 3 – Confit the Pork Belly

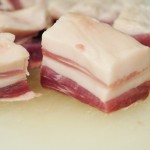
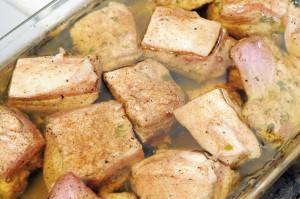
The cubes of pork belly are submerged in a bath of pork fat and slowly cooked.

The cubes of pork belly are submerged in a bath of pork fat and slowly cooked.

After 24 hours of curing in the refrigerator, the pork is removed from the cure and patted dry. The meat is submerged in the melted lard and cooked at 250°F for 2-3 hours until the meat is completely tender. Once cooked, refrigerate the confit so that the fat solidifies and encases the meat. If fully sealed in fat, the meat should stay good for a couple months. When you’re ready to eat the confit, simply melt the fat off and then reheat in a frying pan until warm and crisp. Retain the lard which can be used again for other confits, biscuits, tortillas, eggs, or pretty much any other recipe calling for fat, oil, or shortening.

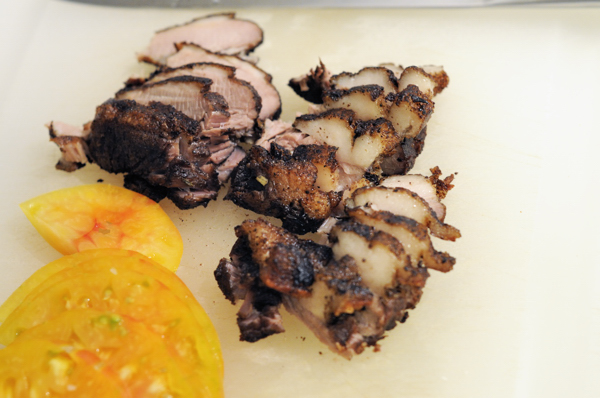
The pork belly is lightly sauteed in a skillet to crisp up the exterior. It is then sliced and placed on toasted spent grain sourdough bread with butter, tomato, and baby arugula.

The pork belly is lightly sauteed in a skillet to crisp up the exterior. It is then sliced and placed on toasted spent grain sourdough bread with butter, tomato, and baby arugula.

My Funked-Up Cider

This is the Caption

Making hard cider is stupid-easy. My 1-gallon experiment included pre-pressed cider, a 200ml slurry of my house “bug” culture, and a small addition of nutrients. The up-front investment of time was approximately 30 minutes.

Update 8/2/14: Full Review

Fall in New York. A chill in the air, leaves on the ground, and a butt-ton of apples at the green market. During a recent trip to the Grand Army Plaza market, nearly every purveyor of produce was selling a variety of apples. Along with these apples came the real prize — jugs of apple cider. The trick is finding minimally processed juice unadulterated with Potassium Sorbate. Sorbates create a stable product by inhibiting the yeast’s ability to reproduce. This works great at preventing cider from inadvertently fermenting and becoming alcoholic, but also makes the juice tough, if not impossible, to use for the production of hard cider. After talking to five different stands selling sorbated juice, I found Tree-Licious Orchards out of Warren County, NJ. Their juice was not only sorbate-free, but had already begun to show the tell-tale signs of early fermentation.

Tafasgsg

This past NHC, Chris Baker gave a talk about cider and suggested that juice should be supplemented with Fermaid-K and DAP to help ensure a healthy and complete fermentation. His suggested rate was 1/2 tsp. Fermaid-K and 1/4 tsp. DAP per five gallons. After measuring and weighing out the nutrients, this works out to 0.54 grams Fermaid-K and 0.31 grams DAP per gallon of juice.

There is a good amount of precedence for making funky ciders. The Spanish have a knack for making tart, dry, complex, Brett-bombs; a naturally occurring event if the native yeast and bacteria residing on apple skins are left to their own devices.

My goal with this experiment is to produce a cider with a healthy dose of bacteria-derived acidity to make up for the fact that the juice I used was likely comprised of primarily culinary apples containing little balancing acid and tannin. With some luck, the acidity will help balance out the cider while preventing the cider from becoming too watery or austere.

Recipe:

dsdada

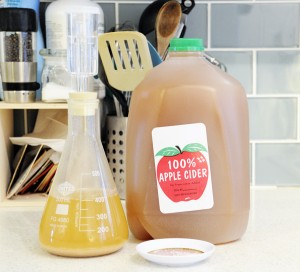
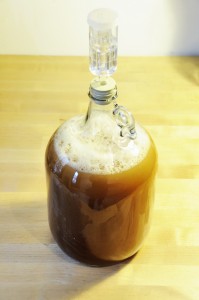
One gallon of funked-up cider ready to start fermenting.

Juice:
1-Gallon Non-Sorbated Cider
My juice had a starting gravity of 1.050. If this ferments out completely, it should leave me with a 6.5% ABV cider.

Nutrients:
0.54 grams Fermaid-K, dissolved in water
0.31 grams DAP, dissolved in water

Yeast:
200ml House Bug Culture
My culture started with microbes obtained from commercial beers including Cantillon Rose de Gambrinus, Russian River Beatification, and Tilquin Gueuze.

Process:

  1. Sanitize 1-gallon jug, stopper, and airlock.
  2. Pour in juice, nutrients, and yeast.
  3. Let cider ferment.