Making Duck Confit Rillettes

Like most Americans growing up in the 80’s and 90’s, duck was not something my family or I ever ate. Huey, Dewey and Louie were entertaining TV characters that never found their way to my dinner table. As my food experiences expanded and I began seeking out new foods, I was quickly indoctrinated into the Church of Duck. In many ways, duck is the perfect poultry—far superior to the mass-produced manufactured chickens most people eat. Modern chickens have been bred to be lean with massive breasts (insert joke here). The duck’s beauty is much more Rubenesque; a thick layer of fat underneath their skin keeps them warm in the water and succulent on our plates — something simply not found in most poultry. This high ratio of fat is easily rendered to cook all sorts of things in. One of my favorite things to do is confit duck legs in the fat and then make rillettes out of the cooked meat.

Note: This recipe was adopted from Michael Ruhlman and Brian Polcyn’s book Charcuterie. This book goes into great detail about confit, rillettes, and the broader world of charcuterie.
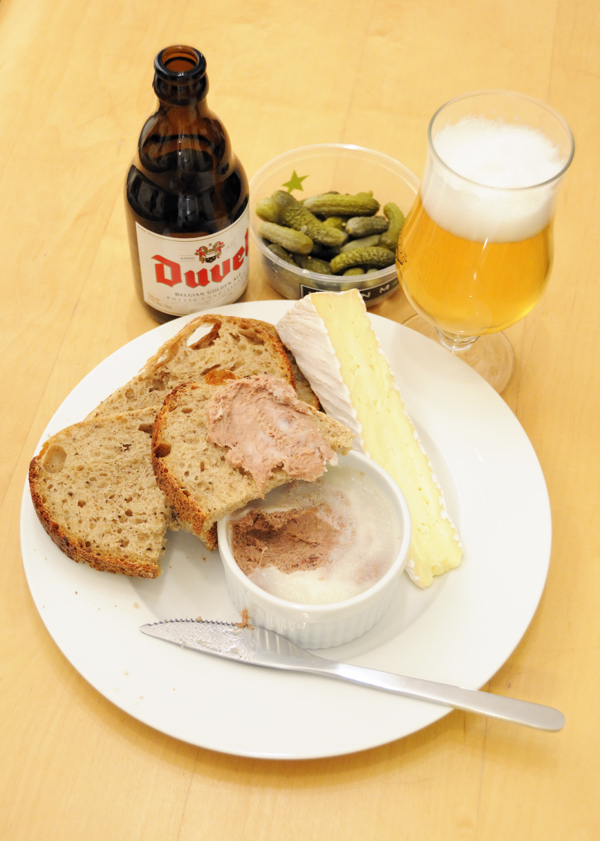
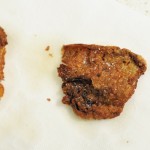
Duck rillette smeared on freshly baked spent grain sourdough bread. Pairs well with Duvel, Saison Dupont, or other dry and effervescent Belgian ale that can cut through the fatty richness of the duck while complementing the light gamey qualities of the rillette.

Duck rillette smeared on freshly baked spent grain sourdough bread. Pairs well with Duvel or other dry and effervescent Belgian ales that can cut through the fatty richness of the duck while complementing the light gamey qualities of the rillette.

Step 1: Make Duck Confit

Confit sounds much more complicated and haute cuisine than it really is. Like a lot of ‘gourmet’ food, it has modest roots as a food preservation technique used to help even out seasonal surplus and shortages of food. Confit is simply the process of poaching meat in a bath of fat at a low temperature over a long period of time. The fat is cooled and solidified, encasing the meat in a fatty tomb free of oxygen, allowing it to be preserved for long periods of time.

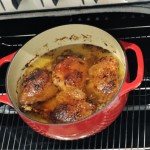
Confit techniques can be used with all sorts of proteins and fats. In this case, I used duck legs with duck fat as the cooking medium. The first step is to take duck legs (I used four) and dry cure them with a mixture of salt and herbs (garlic, clove, bay, and pepper all work well). This is then refrigerated overnight, drawing moisture from the meat, deeply seasoning it, and imparting a preservative quality.

The next day, the meat is thoroughly rinsed and then gently cooked at the lowest setting your oven can manage — generally around 200°F — submerged in the duck fat (I used about 1.5 pounds). It is important to do this uncovered so that any moisture can evaporate. Once the duck legs sink to the bottom of the pan and the meat begins to fall off the bone (about 6-8 hours), it is done. From there the dish is allowed to cool. The fat solidifies, encasing the meat. At this point I like to refrigerate the entire thing allowing the meat to ‘ripen’ anywhere from a week to a month during which the flavor will improve.

Step 2: Create the Rillette

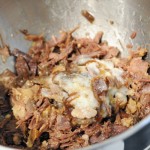
Duck confit is a wonderfully versatile ingredient to have on hand for use in a variety of dishes. Reheating the legs in a frying pan and crisping up the skin makes an absolutely succulent and delicious main course. Another option is using the confit as an ingredient for another dish such as cassoulet. With this iteration, I opted instead to pick the meat off the bones (setting the skin aside) to make rillettes.

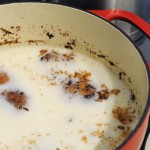
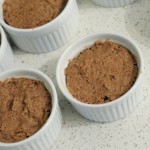
A rillette is essentially a creamed paste consisting of confit meat, a touch of duck fat, and a portion of the gelatinous ‘confit jelly’ that settles to the bottom of the confit pan. These ingredients are blended to taste with an appropriate level of seasoning (a word of warning, confit jelly can be extremely salty) and then capped with a layer of melted duck fat which solidifies and gives the rillettes a great shelf life.

Once complete, the rillettes are stored in the fridge and can last months. They are delicious with some crusty bread!

Vienna Lager 3.0 – Recipe and Brewday

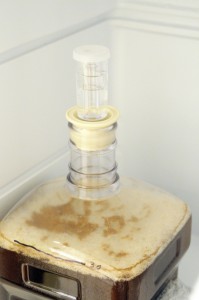
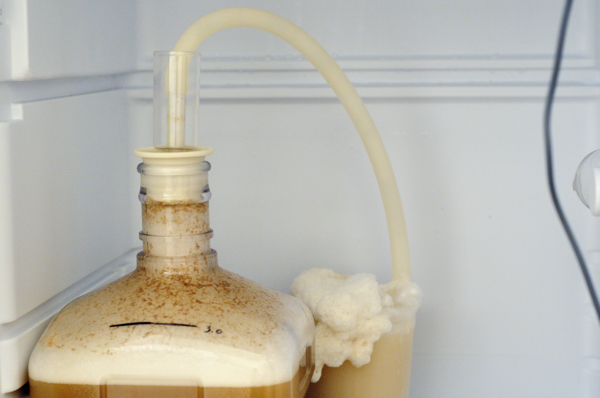
Nice cool lager fermentation chugging away.

Nice cool lager yeast fermenting away.

Update: Vienna Lager Reviewed

Update 2/20/2014 – Beer placed 3rd as a Vienna Lager in Category 3 European Amber Lagers at the 2014 Homebrew Alley 8 competition.

UPDATE 4/5/2014 – Beer placed 1st as a Vienna Lager in Category 3 European Amber Lagers at the 2014 First Round of the National Homebrew Competition (NYC Regional).

When it comes to brewing a particular style of beer, I am a serial philander. Rarely do I brew the same beer twice, and when I do it is typically with radical departures to the recipe. Of course, there are exceptions to this rule, and Vienna lager is one of them.

I’ve probably brewed four or five Vienna lagers since I began brewing in 2009. While most have been outstanding, and several have won pretty nice awards (Gold in the 2012 NHC first round, and 2nd Best of Show at the 2011 Best of the Bay), I seem to always be making tweaks to the recipe to correct minor details that I believe would lead to a better beer.

With this iteration, I’ve gone back to my favorite lager strain, White Labs WLP833 German Bock, which always seems to produce very malt-forward, diacetyl free lagers for me. Additionally, I’ve introduced a single step decoction into the recipe as a replacement for the touch of melanoiden malt that I generally throw into my non-decocted lagers. A small Hallertaurer addition with 10 minutes left in the boil gives the beer an almost imperceptible late hop character.

With winter coming, and the ground water cooling, it is the perfect time to brew lagers. My Blichmann Therminator plate chiller struggles with warm summer water, but drops the wort to pitching temperatures with ease during the cooler months. With a little extra time in my fermenation fridge, I am able to chill my wort to 44°F before pitching my yeast. Over the course of the lag phase, I let the temperature free rise to 48°F and then keep it there until the very end of fermentation when I complete a diacetyl rest. This requires a very large starter, but tends to create what I feel is a cleaner lager character.

Recipe

Size: 3.25 Gal
Efficiency: 68%
Attenuation: 74% (projected)

Original Gravity: 1.052 SG
Terminal Gravity: 1.014 SG (projected)
Color: 14.09 SRM
Alcohol: 5.07% ABV (projected)
Bitterness: 28.4 IBU

Grist:
3.5 lb (47.9%) Vienna Malt (Weyermann)
1.25 lb (17.1%) Pilsner Malt (Weyermann)
2.25 lb (30.8%) Munich TYPE II (Weyermann)
4 oz (3.4%) Carafoam® (Weyermann)
1 oz (0.9%) Carafa® TYPE II (Weyermann)

Boil Additions:
1 oz  Hallertauer Hersbrucker (4.1% AA) – 60 m
1/2 Tablet Whirlfloc (Irish moss) – 15 m
0.5 oz Hallertauer Hersbrucker (4.1% AA) – 10 m
0.5 tsp Wyeast Nutrient – 10 m

Yeast:
1800ml 1.040 starter on stir plate – White Labs WLP833 German Bock Lager

Mash Regiment:
20m – 144 °F
Decoct to 156 °F
20m – 156 °F
Direct Fire to Mashout at 168 °F
10m – 168 °F

Water Adjustment:
Carbon filtered NYC water with 1g gypsum and 4g calcium chloride added to the mash.

Yeast Notes:
Final Volume into Fermenter = 2.75 Gallons
Yeast Required = 100 billion (per Mr. Malty)
Yeast Production Date: 10/14/13
Yeast Starter = 1.8L @ 1.040 on stir plate (Mr. Malty suggests 1L) = 7.5 oz. DME

Fermentation:
1. Chill to 44°F and keep at 48°F until activity slows (1.5 weeks or so).
2. Raise to 58°F for diacetyl rest 24-48 hours .
3. Cool 2°F / day until down to 34 °F.
4. Rack to corny keg.
5. Lager near freezing 4-6 weeks.

Sour Mashed Berliner Weisse with Brett Trois

Reheating and recirculating the sour mash after 60 hours of sour-mashing.

Recirculating and reheating the mash after 60 hours of sour-mashing.

My first batch of Berliner Weisse left me confident that sour mashing is a viable option for creating brightly acidic sour beers in short order. I’ve had a number of wonderful sour mashed beers along with quite a few terrible ones. A lot of people proclaim that sour mashing is a bit of a crap shoot, but I believe with careful process control, you can utilize sour mashing with a high success rate. It seems that the key to success with sour mashing is creating an environment that favors the lactic acid production you’re looking for while discouraging the growth of other bacteria and yeast that can easily fowl your mash with pretty horrific off-flavors.

My primary concerns are creating an anaerobic (no oxygen) environment, maintaining temperatures above 105°F, and pre-acidifying the mash. An anaerobic environment is achieved by thoroughly flushing the fermenter with C02 gas and then sealing the lid. Temperatures are maintained by insulating the mash tun and periodic hot water additions. Pre-acidification is achieved through a healthy dose of acidulated malt at the end of the mash regiment. After a 60 hour sour mash, the liquid was very tart and clean. There was no pellicle, mold, or otherwise odd looking growths on the surface of the mash. At this point in the process, you’re looking for a bright clean acidity — more similar to yogurt  (lactic) than vinegar (acetic). If your mash smells or tastes like rotten vegetables, baby diapers, vinegar, or other funky flavors, your mash likely went off. Boiling and subsequent fermentation may drive off some of these offensive aromas, but chances are pretty slim that they will be eliminated completely.

_DSC0547After sour-mashing I retrieved the soured wort and boiled it for 30 minutes to achieve a minor reduction in volume, kill any bacteria, and achieve a slight amount of bitterness. I cooled the wort and pitched Wyeast’s German Ale strain. I have heard antidotal evidence that low pH can adversely effect yeast fermentation. I can offer my own contrary antidotal evidence — my low pH wort exhibited a very vigorous fermentation and attenuated well.

UPDATE 11/16/2013: After about 2 weeks in primary, I seem to be experiencing a pH related issue with this beer. Fermentation appeared extremely vigorous. It has however stopped at 1.010, which is most likely related to the beer’s low pH. At this point I am not comfortable bottling with a secondary Brett Trois strain. Instead, I have racked the beer to a secondary fermenter and pitched the Brett in an attempt to reach terminal gravity prior to packaging and bottle conditioning.

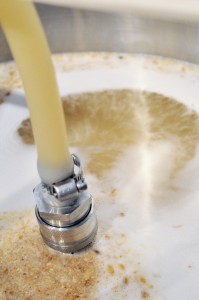
Wyeast describes the German Ale strain as a true top cropping yeast... I concur.

Wyeast describes the German Ale strain as a true top cropping yeast. Fermenting at 64°F created a large amount of yeast blowoff.

Recipe

Size: 3.25 gal
Efficiency: 68%
Attenuation: 80.0% (projected)
Boil Length: 30m

Original Gravity: 1.034 SG
Terminal Gravity: 1.007 SG (projected)
Color: 3.99 SRM
Alcohol: 3.59% ABV (projected)
Bitterness: 5.0 IBUs

Grist:
2 lb (43.2%) Bohemian Pilsner Malt (Weyermann)
2 lb (43.2%) White Wheat (Briess)
2 oz (2.7%) Victory® Malt (Briess)
8 oz (10.8%) Acidulated Malt (Weyermann) – 2oz during mash, 6oz to cap mash post sugar conversion

8 g Hallertauer Hersbrucker (4.3% AA) – 30m
0.5 ea Whirlfloc Tablets (Irish moss) – 15m
0.5 tsp Wyeast Nutrient – 10 m

WYeast 1007 German Ale™ – Primary Fermentation
White Labs WLP644 Brettanomyces Trois – Added to individual bottles during bottle conditioning. Ended up adding it in secondary before packaging.

Water Treatment:
Carbon filtered Brooklyn water (very soft) with 2g Gypsum and 4g Calcium Chloride added to mash.

Mash Regiment:
60m – 148 °F
10m – 154 °F
10m – 168 °F

Sour mash 60 hours:
1. Complete mash regiment above. Let mash cool to 128°F. Minimize stirring and aeration of wort.
2. Add 4 oz uncrushed grain & remainder of acidulated malt (6 oz).
3. Cover mash bed with aluminum foil, purge with CO2, and seal mashtun.
4. Insulate the mash tun and let rest for 60 hours.
5. Add boiling H2O to increase sour mash temp as required to keep above 105°F.
6. After 60 hours, increase mash tun temperature to 168°F and transfer wort to kettle.

Fermentation:
1. Chill to 64°F and keep at 64°F until activity slows (1 week+).
2. Raise temp to 68°F 2 days
3. Drop temperature to 32°F over the course of 4 days. Hold at 32°F for 2 days.

Packaging:
Prime with sugar as required to achieve 3 volumes of CO2. Inoculate half the bottles with Brett Trois (WLP644) for future side-by-side comparisons. Ended up adding the Brett to secondary in bulk prior to packaging.

Spawn of the Duvel – Homebrew Recipe

UPDATE 11/17/2013 – Read the review here.

UPDATE 2/20/2014 – Beer placed 2nd as a Belgian Blond in Category 18 Belgian Strong Ales at the 2014 Homebrew Alley 8 competition.

UPDATE 4/5/2014 – Beer placed 1st as a Belgian Blond in Category 18 Belgian Strong Ales at the 2014 First Round of the National Homebrew Competition (NYC Regional).

Duvel. You sneaky little bastard. Crisp, refreshing, complex, yet not overbearing. Your austere dryness and pear-like ester melds with an ever-so-sweet pilsner malt background striking a balance that is tough to resist. I know it’s not a problem for you, but your 8.5% ABV is for me. I need a beer that possesses everything I love about Duvel, but doesn’t leave me spinning after a few.

This recipe intends to do just that. I’ve started this beer at 1.054 original gravity versus Duvel’s reported 1.069; mashing a bit higher and not including any simple sugars to decrease the wort’s fermentablity and create a mouth feel comparable to Duvel while having significantly less alcohol. Duvel attenuates in the 90%+ range helping it hit 8.5% ABV with a somewhat modest starting gravity. With the lower gravity of my beer, I’m hoping to achieve a similar balance by lowering the attenuation rate and finishing the beer at a more sessionable 5.5% ABV.

Duvel is reputed to contain only pilsner malt and simple sugar; up to 17% by some accounts. I’ve dropped the alcohol boosting simple sugar in favor of an all-malt grain bill, including a touch of character malts to bring some complexity to the wort composition. For hops, I’ve decided to go ahead and bump up the continental hop character found in Duvel by increasing the amount of late hops in the beer. This beer is by no means meant to clone Duvel, but will hopefully capture the spirit and attributes that make it such a great beer. We’ll know how successful I was when I taste the finished product in a few weeks.

Recipe

Size: 3.25 gal
Efficiency: 68%
Attenuation: 78.0% (projected)

Original Gravity: 1.054 sg
Terminal Gravity: 1.012 sg (projected)
Color: 5.81 SRM
Alcohol: 5.53% ABV (projected)
Bitterness: 22.6 IBU (doesn’t account for whirlpool isomerization)

Ingredients:
6.5 lb (87.4%) Belgian Pils (Dingemans)
.5 lb (6.7%) Pale Wheat Malt (Weyermann)
4 oz (3.4%) Belgian Biscuit (Dingemans)
3 oz (2.5%) Acidulated Malt (Weyermann) – pH Adjustment

1 oz Styrian Goldings (3.2% AA) – 60 m
0.5 oz Czech Saaz (3% AA) – 20 m
0.5 oz Czech Saaz (3% AA) – whirlpool 20m
1 oz Styrian Goldings (3.2% AA) -whirlpool 20m

0.5 ea Whirlfloc Tablets (Irish moss) – 15 m
0.5 tsp Wyeast Nutrient – 10 m

WYeast 1388 Belgian Strong Ale™

Mash Regiment:
154 °F – 60m
168.0 °F – 10m

Water Treatment:
Carbon filtered tap water. Salts added to the mash.
4g Calcium Carbonate
2g Calcium Sulfate (gypsum)

Yeast Notes:
Final Volume into Fermenter = 2.75 Gallons
Yeast Required = 104 billion (per Mr. Malty)
Yeast Production Date: 9/3/2013
Yeast Starter = 1L @ 1.040 on stir plate (per Mr. Malty) =  4 1/8 oz. DME

Fermentation:
1. Chill to 62°F and keep at 66°F until activity slows (1 week+).
2. Raise temp to 74°F 3 days
3. Crash to 32°F 5 days
4. Verify gravity has stabilized. Bottle condition in 12oz bottles primed to 2.8 volumes CO2

Firestone Walker Parabola Clone Attempt

My Parabola clone fermenting side-by-side my King Henry clone.

My Parabola clone explosively fermenting away.

One of the greatest things about homebrewing is that it enables you to dissect commercial beers and make your own attempts at brewing beers of a similar nature. Precise replication is rare, even when you’re working from a proven recipe, but the exercise in itself is enjoyable, and the beers typically turn out quite tasty.

Back in 2011, I was inspired to take a shot at cloning Firestone Walker’s Parabola, and posted a quickly cobbled together recipe on HomebrewTalk. Now, a couple years later I’ve finally gotten around to taking a shot at it.

The recipe below was put together while carefully tasting the commercial beer and reading through the information published on both bottles of Parabola and on Firestone Walker’s website. The information that is out there indicates a very complex malt bill; something that makes determining the precise percentages of each malt somewhat of a shot in the dark. That being said, I’ve based the recipe on typical uses of those grains and what I’ve been able to taste in the commercial beer. The actual brewday was quite uneventful, and the beer is happily fermenting away. My plan is to transfer it onto oak in secondary and to let it rest until next April, which happens to coincide with the annual commercial release of Parabola. Stay tuned for future posts reviewing the beer and indicating how close this recipe replicates the commercial beer.

Recipe:

Size: 2.74 gal
Efficiency: 60%
Attenuation: 73.0%

Original Gravity: 1.127 SG
Terminal Gravity: 1.034 SG (projected)
Color: 53.12 SRM
Alcohol: 12.42% ABV
Bitterness: 79.6 IBUs

Ingredients:
10.5 lb (64.1%) Maris Otter (Crisp)
1.75 lb (10.7%) Munich TYPE II (Weyermann)
14 oz (5.3%) Chocolate (Crisp)
8 oz (3.1%) Roast Barley (Crisp)
8 oz (3.1%) Carafa Special® TYPE III (Weyermann)
12 oz (4.6%) Flaked Oats (Briess)
8 oz (3.1%) Carahell® (Weyermann)
8 oz (3.1%) Crystal 120 (Crisp)
8 oz (3.1%) Crystal 45 (Crisp)

22 g Columbus (15.0% AA) – boiled 60 m
1/2 tablet Whirlfloc – boiled 15 m
0.5 tsp Wyeast Nutrient – boiled 10 m
1 oz Hallertauer Hersbrucker (4.5% AA) – Whirlpool Rest 15m

Fermentis Safale US-05

Mash:
148 °F – 60m
170.0 °F – 10m

Fermentation:
1. Chill to 62°F and keep at 64°F until activity slows
2. Raise temp to 72°F 3 days
3. Crash to 32°F 3 days

Secondary:
Split into 1-gallon vessels with oak soaked in bourbon.

Vessel 1: 0.25 oz. American Heavy Toast + 2oz. Larceny Wheated Bourbon
Vessel 2: 0.25 oz. American Heavy Toast + 2oz. Rittenhouse Rye 101

Update:

The beer has unfortunately stopped fermenting at 1.044. The taste is quite nice and is by no means cloying. The high gravity however makes me slightly nervous as my eventual plan is to bottle condition the beer. I pulled a sample and preformed a force ferment test on it. The force ferment test confirms that there is no residual fermentable sugars left in the beer. Next round, I will likely lower the mash temperature and decrease the crystal malts to achieve a more fermentable wort. In the mean time, this beer tastes quite good and is aging on bourbon soaked oak cubes.